Dashboard Customization
The admin dashboard displays a set of widgets — summary panels that give you a quick overview of key information like support tickets, loaner devices, unpaid invoices, and licensing status. You can customize which widgets are visible and how they're arranged.
Quick Stats
The Quick Stats bar at the top of the dashboard shows four key counts at a glance:
- Active Users — total active users in the system
- Inventoried Devices — total devices tracked
- Active Incidents — open incidents
- Unpaid Invoices — outstanding invoices
Quick Stats is always visible at the top of the dashboard and cannot be repositioned.
Available Widgets
Below Quick Stats, additional widgets provide more detailed information. The widgets available depend on your permissions and which features are enabled:
- Unpaid Invoices — a table of outstanding invoices with amounts and due dates
- Support — tickets awaiting reply, tickets assigned to you, and recent ticket activity
- Loaner Devices — active loaner counts, overdue devices, and quick links to loaner reports (only visible when Loaner Return Dates is enabled)
- Licensing Info — your Manage1to1 license usage
- Campus Summary — a per-campus table showing active assets, spare inventory, devices in repair, open incidents, and carts for the campuses your account has access to
Campus Summary widget
The Campus Summary widget shows the same stats principals receive in a Scheduled Campus Summary email, right on your dashboard. It lists one row per campus with Active, Spare, In Repair, Open Incidents, and Carts, plus a Total row when more than one campus is shown.
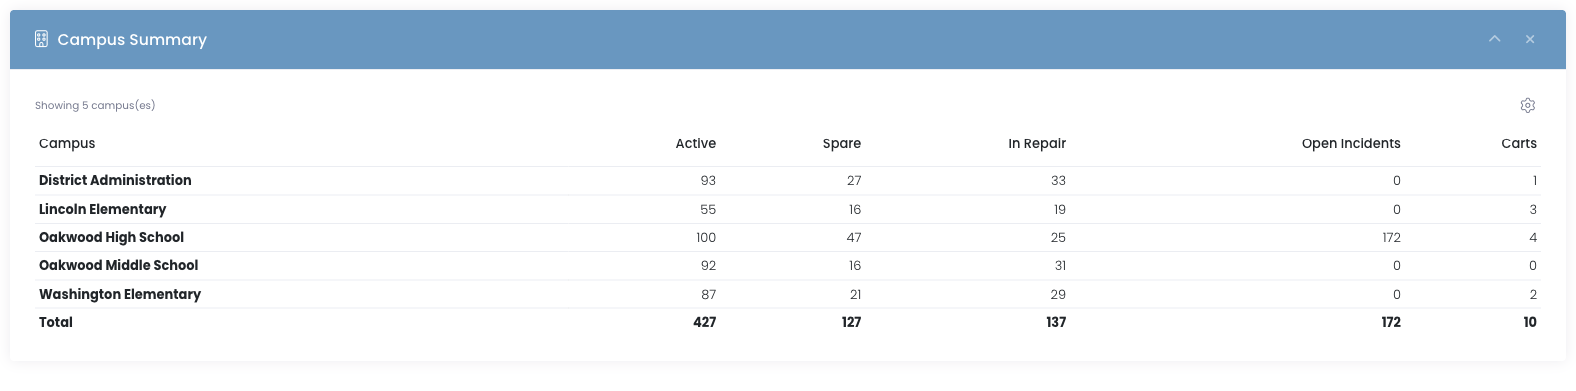
By default the widget shows every campus your account has access to. To narrow it down:
- Click the gear icon in the top-right of the widget
- A campus picker appears — remove any campus chips you don't want included
- The table updates as soon as you change the selection
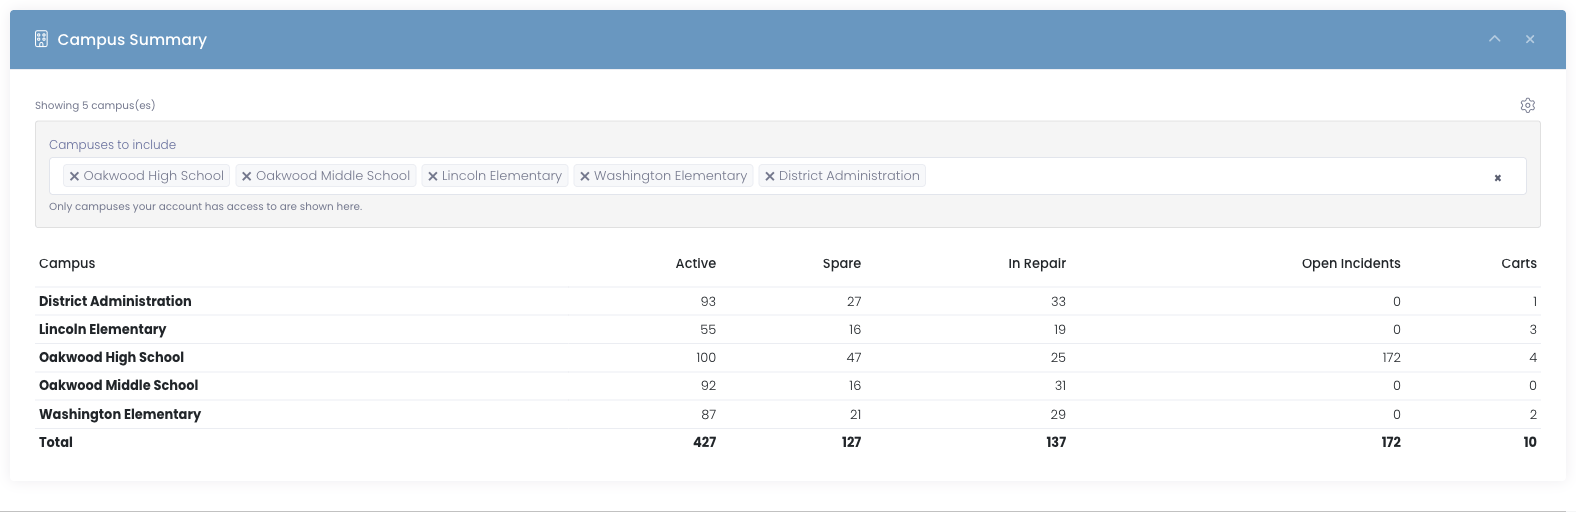
The picker only lists campuses your account has access to. If you don't see a campus you expect, check with your district admin that your role has access to that building.
The filter is per-view and resets when you reload the page. If you want a recurring delivery of these same numbers by email, set up a Scheduled Report under Settings instead.
Showing and Hiding Widgets
- Click the Customize dropdown in the top-right corner of the dashboard
- Toggle widgets on or off using the switches
- Changes are saved automatically
Hidden widgets are removed from the dashboard but can be restored at any time by toggling them back on.
Rearranging Widgets
Widgets can be dragged to change their position on the dashboard:
- Hover over a widget's header bar — your cursor will change to a grab icon
- Click and drag the widget to a new position
- Release to drop it in place
Widgets will flow into available columns automatically. Your layout is saved and will persist across sessions.
Collapsing Widgets
If you want to keep a widget on your dashboard but save screen space:
- Click the chevron icon (^) in the widget's header
- The widget body collapses, leaving just the header bar
- Click the chevron again to expand it
Closing Widgets
Click the X icon in a widget's header to hide it. This is the same as toggling it off in the Customize dropdown — you can bring it back at any time.
Tips
- Each administrator has their own dashboard layout — your customizations don't affect other users
- If a widget isn't showing, check the Customize dropdown to make sure it's toggled on
- Widgets that depend on a feature (like Loaner Devices) will show a helpful message if the feature isn't enabled yet, with a link to enable it in settings