MDM Device Review
Your MDM integrations normally enrich devices you already have — they match on serial number and fill in details like model, OS, and storage. Any device the MDM knows about but that isn't in your Manage1to1 inventory is simply left alone, and a device that later disappears from your MDM is never touched.
MDM Device Review lets you act on both of those cases, safely:
- Import devices your MDM has but your inventory is missing, so you can bootstrap or top up your records.
- Flag removed devices — when a device drops out of your MDM's feed, set it to a status of your choosing (for example Disposed or Retired).
Both are off by default, enabled per MDM, and — most importantly — nothing changes in your inventory until you review and approve it. Imported devices and removed-device changes land in a review queue first, so a stray or mistyped record in your MDM never silently creates or alters real inventory.
MDM data isn't always clean — it can contain test devices, mistyped serial numbers, or hardware that's already been retired. That's why importing and removal handling are optional and always routed through a review step. Only turn them on for an MDM whose data you trust, and review the queue rather than approving everything blindly.
Turning On Device Import
- Go to Settings → MDM Settings
- Click Manage on the MDM you want to import from
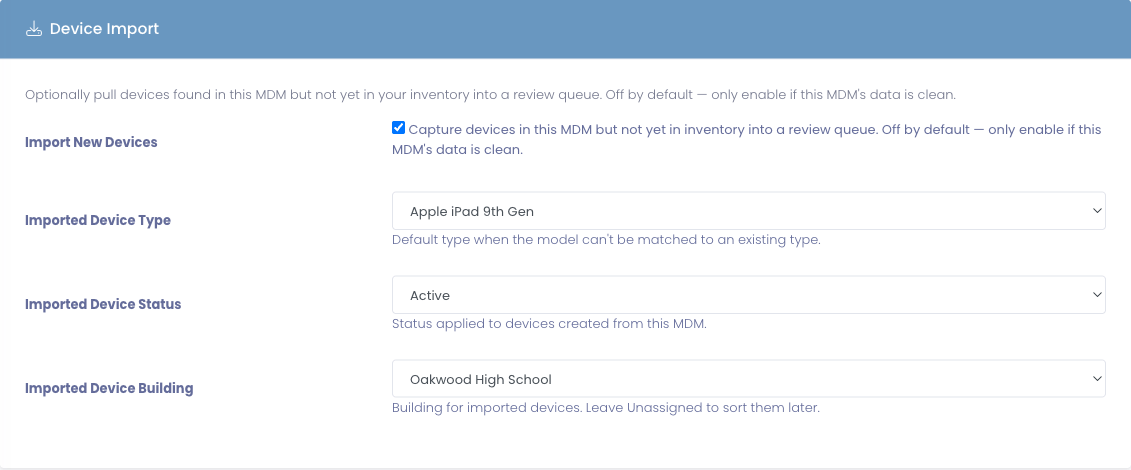
- Open the Device Import section
- Turn on Import New Devices
- Choose the defaults imported devices should start with:
- Imported Device Type — used when a device's model can't be matched to one of your existing types automatically
- Imported Device Status — the status new devices are created with (for example Active)
- Imported Device Building — the building imported devices are assigned to, or leave it Unassigned to sort them later
- Click Save Settings
From then on, whenever that MDM syncs, any device it reports that isn't already in your inventory is added to the Pending Imports queue for your review. Nothing is created yet.
When a device is imported, Manage1to1 tries to match the model your MDM reports to one of your existing device types. If it finds a match, the device is created as that type; if it can't, it falls back to the Imported Device Type default you chose. You can always override the type when you approve — and if the model isn't in your catalog yet, you can create it right from the approval window. Any other devices waiting in the queue with that same model are matched to it straight away.
Turning On Removed-Device Handling
- Go to Settings → MDM Settings
- Click Manage on the MDM
- Open the Removed-Device Handling section
- Turn on Handle Removed Devices
- Choose the Removed Device Status to apply once you approve a removed device (for example Disposed or Retired)
- Click Save Settings
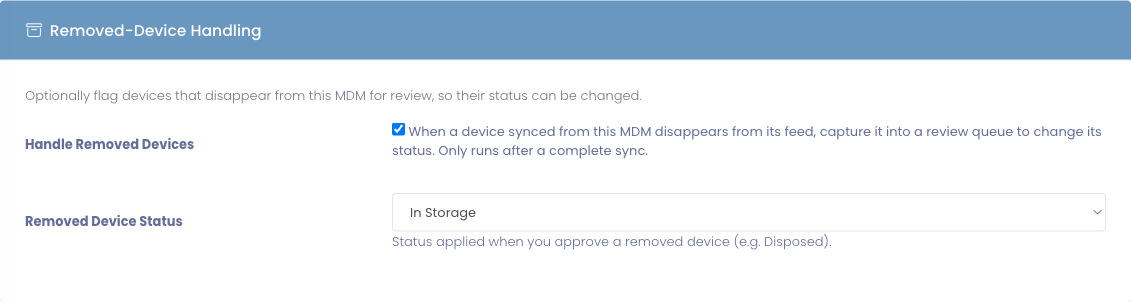
When a device that was previously synced from this MDM stops appearing in its feed, it's added to the Pending Removals queue. Approving it applies the status you chose.
Removed-device handling only appears for MDMs that report their full device list on every sync. Integrations that sync incrementally can't reliably tell a removed device from one that simply hasn't changed, so they offer importing only.
Reviewing the Queue
- Go to Settings → MDM Settings
- Click Open Review Queue on the MDM Device Review card
The page has two tabs, each with a count of how many items are waiting:
- Pending Imports — devices to add to your inventory
- Pending Removals — synced devices that have gone missing from a feed
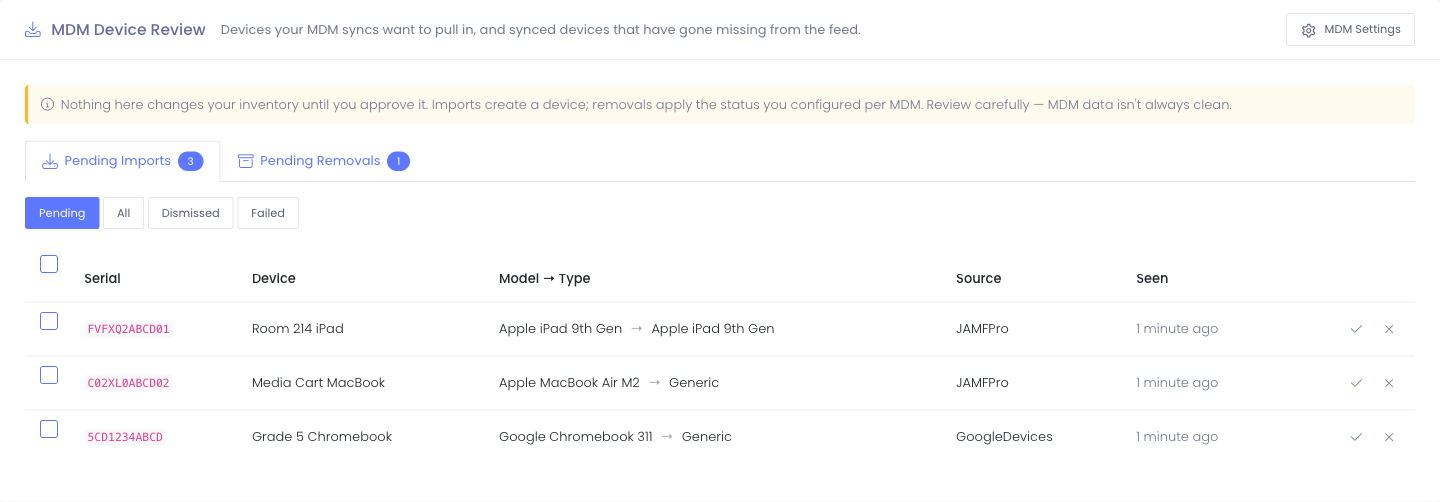
Each row shows the device's serial number, name, and source MDM. Import rows also show the model and the type it will be created as; removal rows show the current status and the status that will be applied.
Approving and Dismissing
For any row you can:
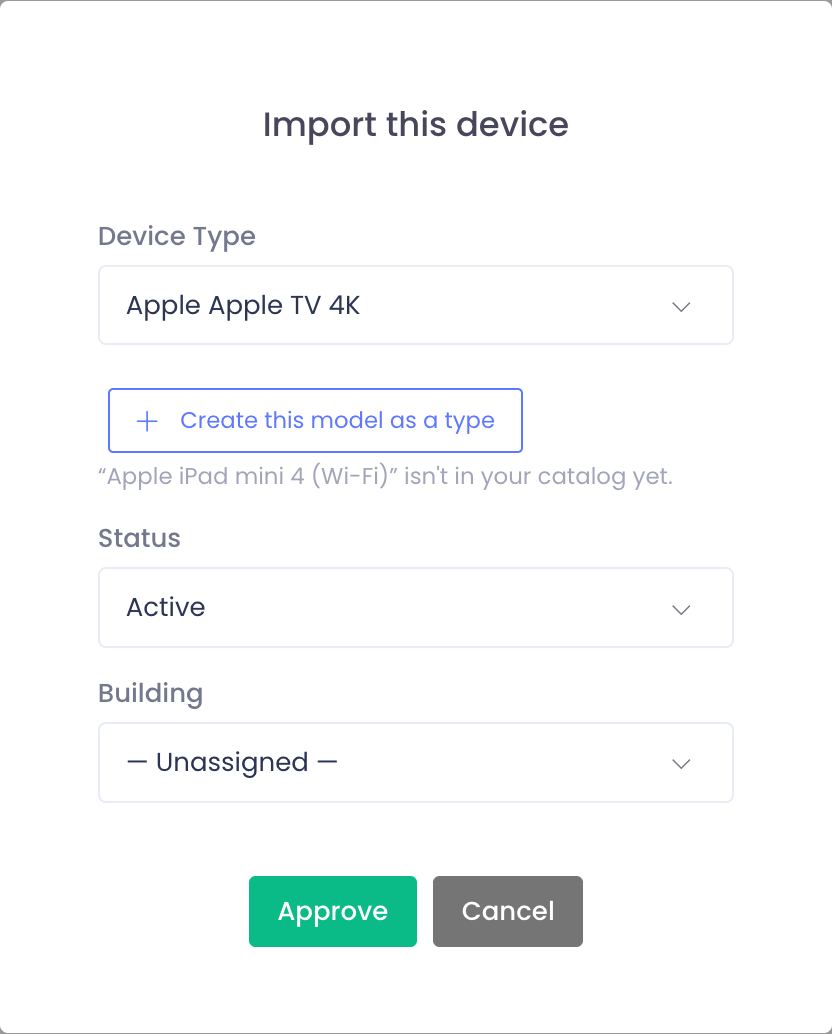
- Approve (the check) — for an import, this creates the device; for a removal, this applies the status. Approving opens a short confirmation where you can adjust the details first:
- Imports — change the type, status, or building before the device is created. If the reported model isn't one of your device types yet, click Create this model as a type to add it and select it in one step.
- Removals — change the status that will be applied
- Dismiss (the ×) — remove the item from the queue without making any change. Dismissed items won't come back on the next sync.
Working in Bulk
To handle many at once, tick the checkbox on each row — or the checkbox in the header to select the whole page — then use Create models, Approve selected, or Dismiss selected in the bar that appears.
If you're importing a batch of a model that isn't in your catalog yet, select those rows and click Create models. Manage1to1 adds each new make and model to your device types in one step (models already in your catalog are left alone, never duplicated), and the rows update to show the model they now match. You can then Approve selected and each device is created as its correct model — no need to open every row one at a time. This is the fast way to bring in a new cart of devices at the start of the year.

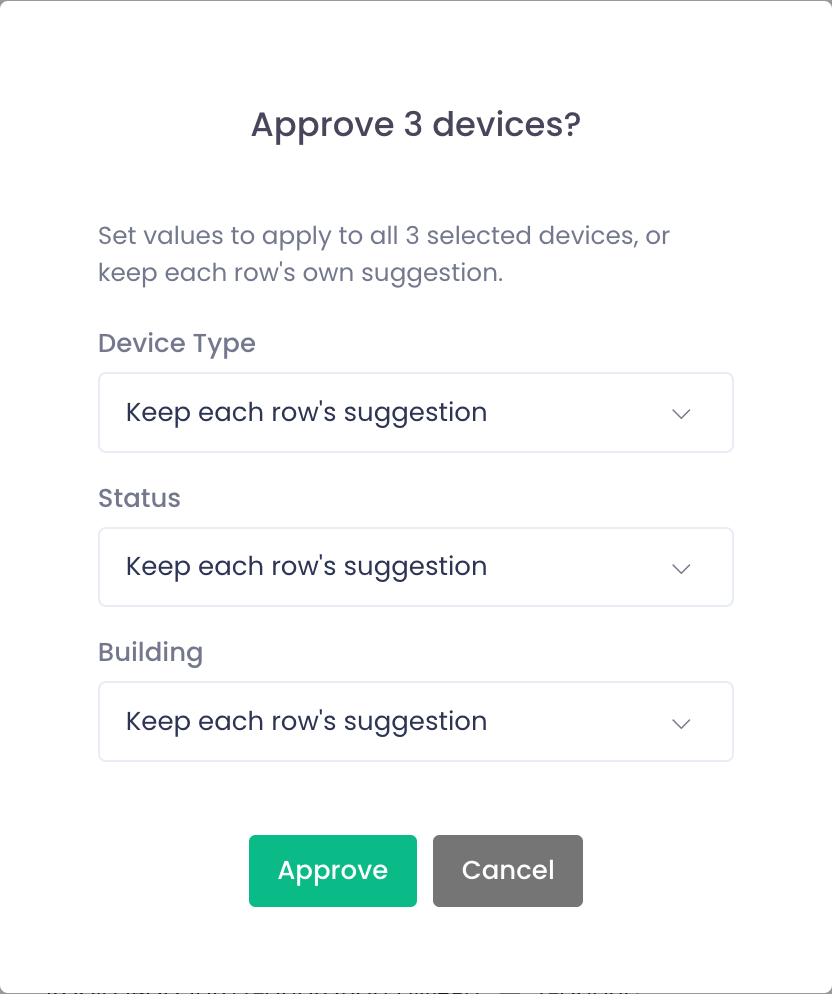
When you approve in bulk, a window lets you set the type, status, and building to apply to every selected device at once — handy when a whole batch should be created the same way. Leave any field on Keep each row's suggestion to use each device's own default instead.
Use the Pending / All / Dismissed / Failed filters at the top of each tab to switch between what's waiting, everything, items you've dismissed, and any that couldn't be applied.
Every device created through import is tagged with the MDM it came from, so you can always identify — and, if needed, clean up — everything a particular integration brought in.