New District Onboarding Best Practices
Standing up a new Manage1to1 environment goes smoothly when you configure things in the right order: secure your accounts first, get your foundational data in cleanly, layer integrations on top, and validate before you go live. This guide lays out a recommended sequence and the best practices that prevent the most common onboarding headaches.
It complements the Getting Started with Manage1to1 overview, which introduces the interface and each platform area. Use that page to learn what everything is; use this guide to decide when to set each piece up.
This guide is written for the district's primary administrator or implementation lead — the person responsible for the initial rollout. You do not need every step done in one sitting. Treat it as a checklist you work through over your onboarding window.
The Recommended Onboarding Sequence
Configure Manage1to1 in five phases. Each phase builds on the one before it, so resist the urge to jump ahead — importing devices before your buildings and roles exist, for example, creates cleanup work later.
- Secure your administrator team — passwords, MFA, and roles
- Configure your foundation — district settings, buildings, and custom fields
- Bring in your data — users first, then devices and accessories
- Connect your integrations — SIS, MDM, and SSO
- Validate and go live — test workflows, then roll out to staff
Phase 1: Secure Your Administrator Team
Before you put any real student or device data into the system, lock down who can access it.
Secure the Primary Account First
Your primary administrator account is the most powerful account in the system. Harden it immediately:
- Change the initial password on first login to a strong, unique password (at least 12 characters)
- Set up Multi-Factor Authentication right away — see the Admin MFA Setup guide
- Store your MFA backup codes somewhere secure (a password manager is best)
Plan Your Administrator Structure Before Adding People
It is tempting to give every colleague full access so nothing blocks them. Resist this. Decide up front what each person actually needs to do, then create roles that match.
Best practices for roles:
- Grant the least access each person needs for their job, not the most
- Create custom roles for common job functions (help desk, secretary, business office) rather than making everyone a super administrator
- Reserve super administrator for a small number of trusted IT staff
- Scope building access so building-level staff only see their own building
See Managing Roles to define roles and Adding an Administrator to create accounts.
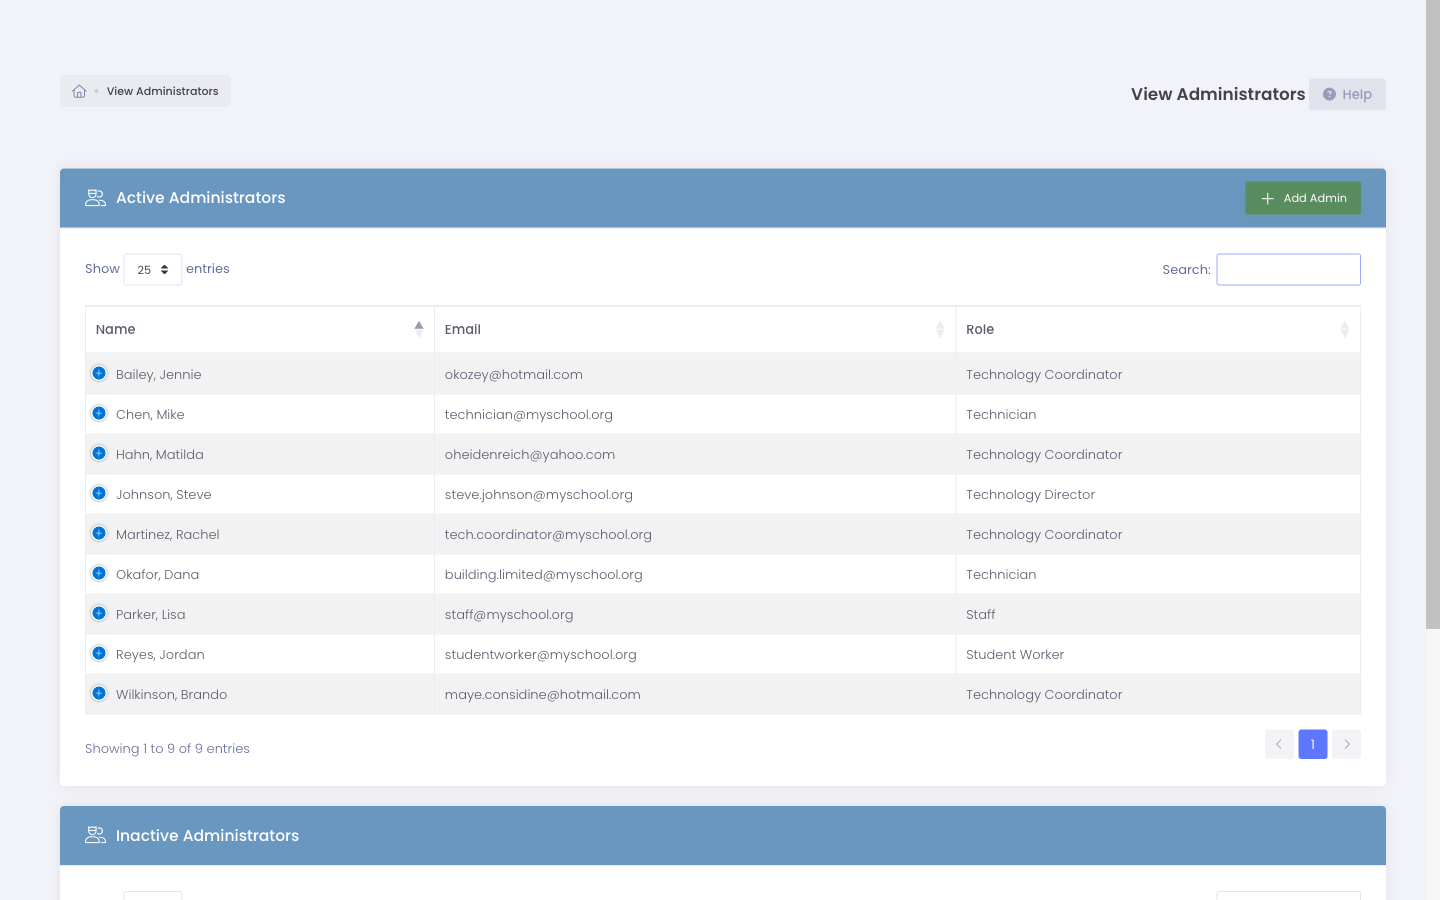
Every super administrator can change system-wide settings, reset security, and see all data across all buildings. Keep this group as small as possible — a compromised super admin account is a district-wide risk.
Set an MFA Policy
Decide early whether MFA will be required for all administrators. Enabling it during onboarding — before staff form login habits — is far easier than enforcing it later. The MFA Best Practices guide covers a phased rollout if you need to bring an existing team along.
Phase 2: Configure Your Foundation
With your team secured, set up the structures that everything else attaches to. Getting these right before importing data saves significant rework.
Set Up Buildings and Locations First
Users and devices are assigned to buildings, so your buildings need to exist before your data arrives. Enter every building, campus, or site your district operates.
Name your buildings to match how they appear in your Student Information System. Consistent naming makes automated imports map cleanly and avoids duplicate or mismatched locations down the road.
Define Custom Fields Before Importing
If you plan to track district-specific information (grade level, homeroom, department, funding source, etc.), define those custom fields before your first import. That way the data lands in the right place from day one instead of requiring a second pass. See Mapping SIS Data into User Custom Fields when you are ready to connect these to an automated feed.
Review System and Automation Settings
Walk through Settings and align the defaults with your district's policies before real activity starts:
- Signature and acceptable-use policy requirements
- Invoice and billing defaults
- Email templates and notifications
- Inventory and device status options
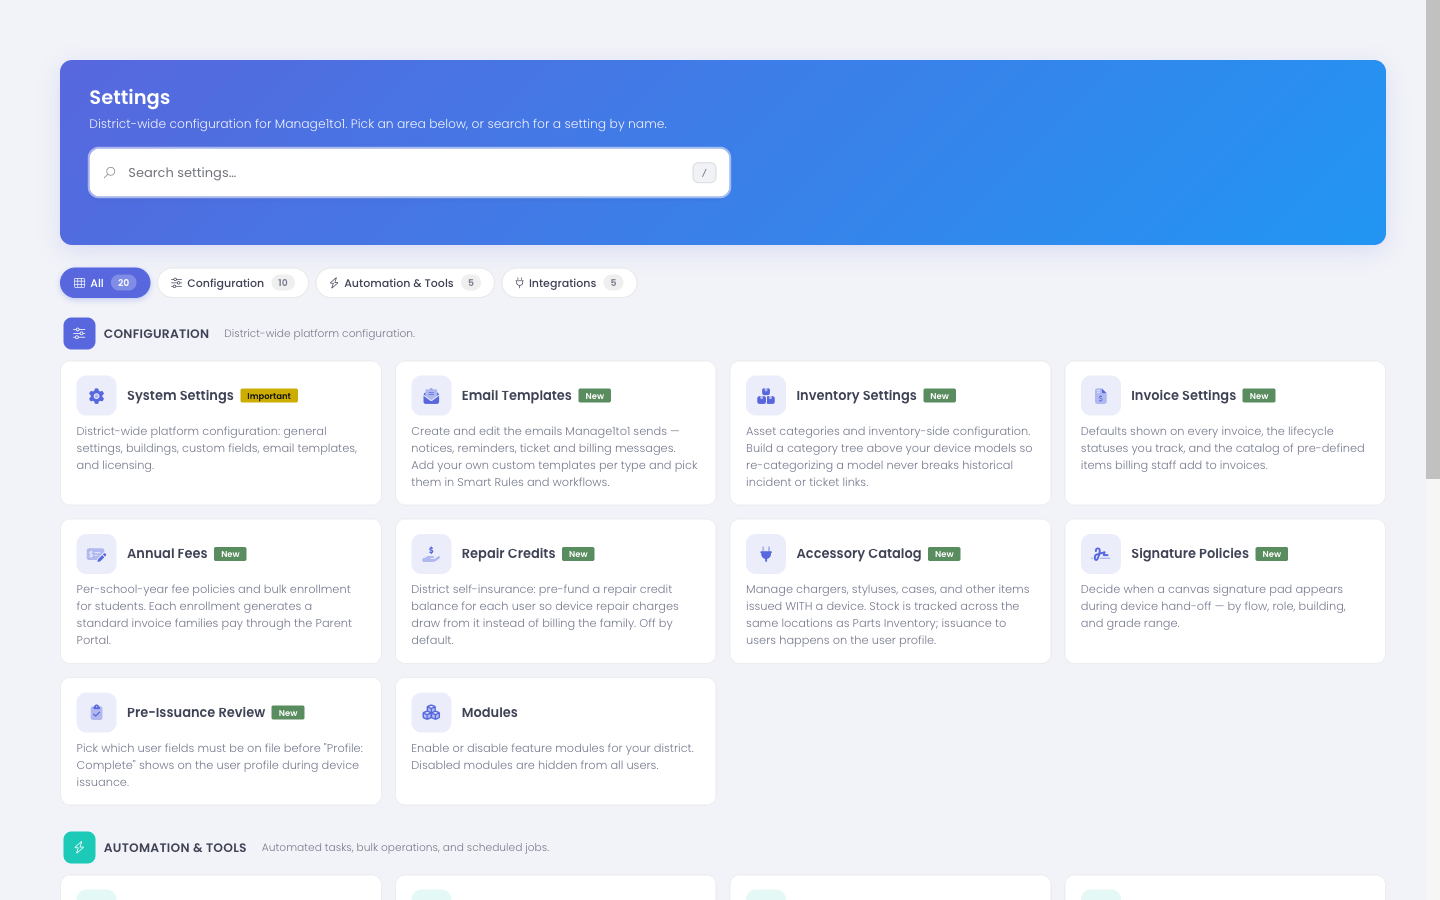
You do not need every setting perfect on day one, but reviewing them now prevents surprises once staff begin checking out devices.
Phase 3: Bring In Your Data
Import in the right order: users before devices. Devices get checked out to users, so your people need to exist first.
Import Users First
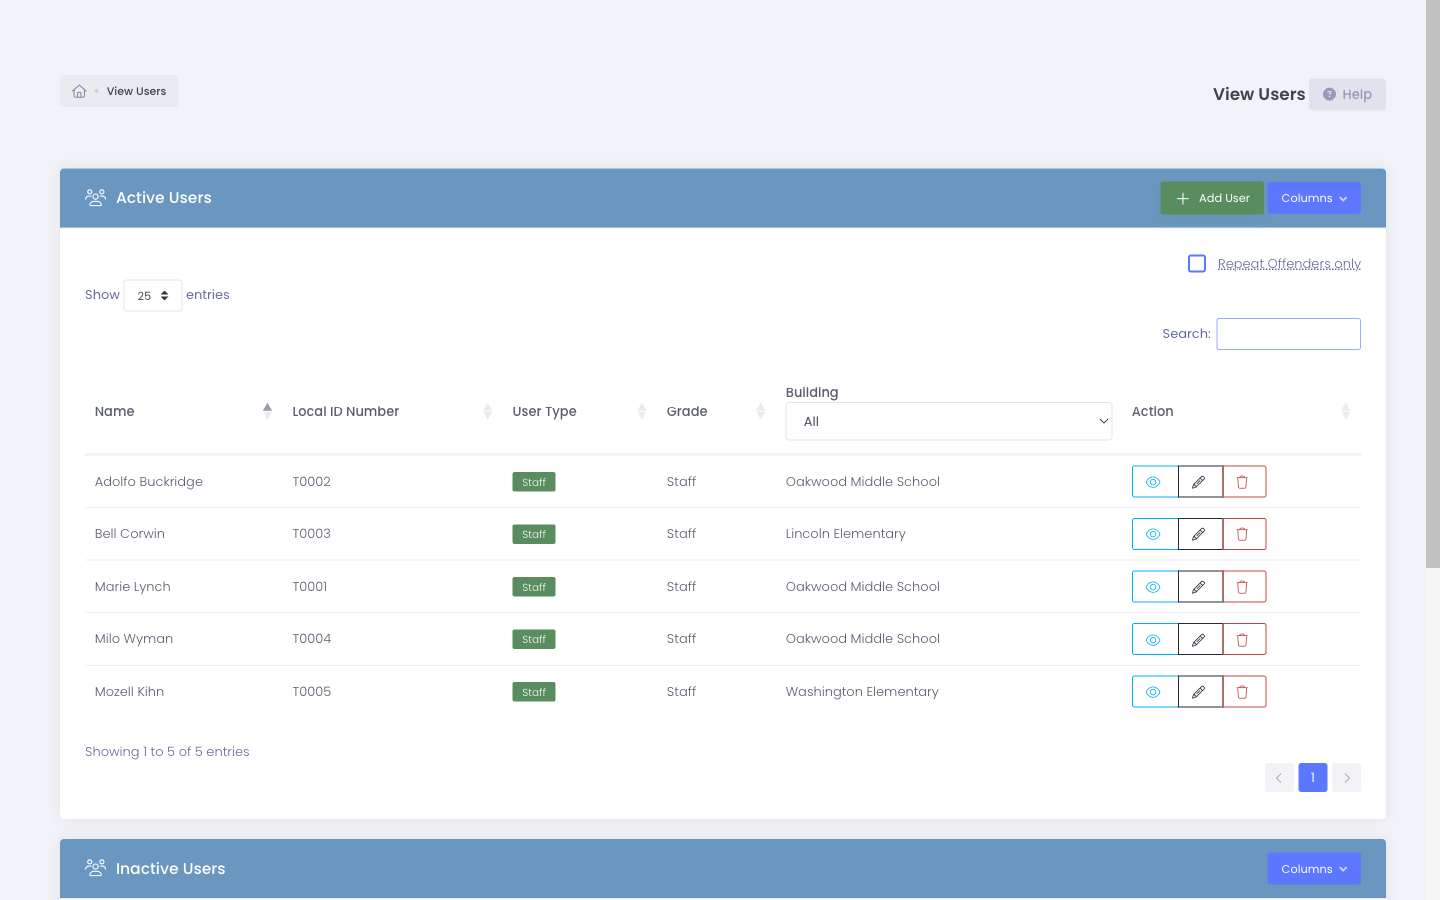
Start with your student, staff, and guardian records. For anything beyond a handful of records, use a bulk import rather than manual entry.
Best practices for a clean user import:
- Start with a small test batch (10–20 records) and verify the results before importing thousands
- De-duplicate before you import — clean up your source spreadsheet so the same person does not arrive twice
- Include a unique identifier (student ID or email) so future imports update existing records instead of creating duplicates
- Validate custom field mapping on the test batch before the full run
For file-based imports, see Uploading Student, Staff & Guardian CSVs via SFTP and Accessing Your SFTP Credentials. For manual additions, see Adding Users.
Import Devices and Accessories
Once users are in and verified, load your device inventory:
- Confirm each device's building assignment matches your Phase 2 setup
- Use consistent asset tag and serial number formats
- Import accessories (chargers, cases) so they can be bundled with checkouts later
Add ID Photos (Optional)
If you use student and staff photos, you can bulk upload them — see Uploading Student & Staff ID Photos.
Always confirm a small test import looks correct before running the full dataset. A mapping mistake caught on 15 records is a quick fix; the same mistake across 15,000 records is a cleanup project.
Phase 4: Connect Your Integrations
With clean data in place, connect Manage1to1 to your other systems. Doing this after your foundation and initial data are set means integrations map onto structures that already exist.
SIS / Automated Imports
Move from one-time file imports to a recurring automated feed from your Student Information System so user data stays current without manual work. Confirm your building names and custom fields (Phase 2) line up with the incoming data first.
MDM Integration
Connect your device management platform so device details and status sync automatically. Match your imported inventory against what the MDM reports to catch any gaps.
Single Sign-On
If your district uses SSO, configure it so administrators sign in with their existing district credentials. See Enabling Single Sign-On. Roll SSO out after your admin accounts and roles exist so identities map correctly.
Phase 5: Validate and Go Live
Before you announce Manage1to1 to your staff, prove the core workflows work end to end.
Run Through the Key Workflows
Using a test user and a test device, walk through the tasks your staff will perform daily:
- Check a device out to a user and check it back in
- Create and resolve a support ticket
- Log an incident and generate any related invoice
- Run a report and export the data
If each of these works cleanly, your foundation is sound.
Prepare Your Staff
- Identify which staff need which roles and confirm their access
- Point staff to the documentation relevant to their job
- Designate an internal point of contact for questions during the first weeks
Roll Out in Stages
Where possible, start with one building or one team rather than the whole district at once. A staged rollout surfaces issues while they are small and gives you a group of confident early users to help their peers.
Common Onboarding Pitfalls
Avoid the mistakes that most often create rework:
- Making everyone a super administrator. Convenient on day one, a security and accountability problem forever. Use scoped roles.
- Importing devices before users. Devices check out to users; import people first.
- Skipping the test batch. Full-dataset imports with an unnoticed mapping error are painful to unwind.
- Inconsistent building names. Mismatches between Manage1to1 and your SIS break automated mapping.
- Defining custom fields after importing. You will end up re-importing to backfill them.
- Turning on integrations before the foundation exists. Automated feeds need buildings, roles, and fields to map into.
Onboarding Checklist
Use this as a quick progress tracker:
Phase 1 — Secure
- Primary account password changed
- MFA enabled on primary account, backup codes stored securely
- Administrator roles defined
- Administrator accounts created with appropriate access
- MFA policy decided
Phase 2 — Foundation
- All buildings and locations entered
- Custom fields defined
- System and automation settings reviewed
Phase 3 — Data
- Users test batch imported and verified
- Full user import completed
- Devices and accessories imported
- ID photos uploaded (if used)
Phase 4 — Integrations
- SIS / automated import connected
- MDM integration connected
- SSO configured (if used)
Phase 5 — Go Live
- Core workflows tested end to end
- Staff roles confirmed
- Staged rollout underway
Getting Help
If you get stuck during onboarding, use the Help button (?) in the top right corner of the admin area, or reach Manage1to1 support through manage1to1.com/support. Your implementation contact can also help sequence the rollout to fit your district's timeline.