Enabling Single Sign-On for Your District
This guide walks you through turning on Single Sign-On (SSO) for Manage1to1, verifying it works end-to-end, and — if your district is ready — switching to SSO-only sign-in so users no longer use a Manage1to1 password.
Turning on SSO takes about 5 minutes. The optional Force SSO migration adds another 10–15 minutes for verification and user communication.
Before You Begin
What You'll Need
- A Tech Director (or equivalent) administrator account — turning SSO on or off requires the
settingspermission. - At least one identity provider account in your district matching a real Manage1to1 admin or user — to verify the round-trip before turning SSO on for everyone.
- The list of identity providers your district uses — Manage1to1 supports Google, Microsoft 365 (Entra ID), and ClassLink LaunchPad out of the box. No API keys, app registrations, or per-district setup are required for any of them.
How SSO Sign-In Works
When SSO is enabled, every Manage1to1 sign-in page (admin and User Portal) shows brand-coloured buttons for each enabled provider:

A user clicks the button for their identity provider, authenticates on that provider's secure page, and lands back at Manage1to1 already signed in.
SSO only signs in users whose email already matches an existing admin or user record in Manage1to1. A Google or Microsoft account whose email doesn't match any Manage1to1 record is bounced back to the login screen with an invalid-credentials message. Create the user record in Manage1to1 first; then their SSO sign-in works.
Step 1: Open the SSO Settings Page
- Sign in to Manage1to1 as an administrator
- Open Settings → SSO Settings
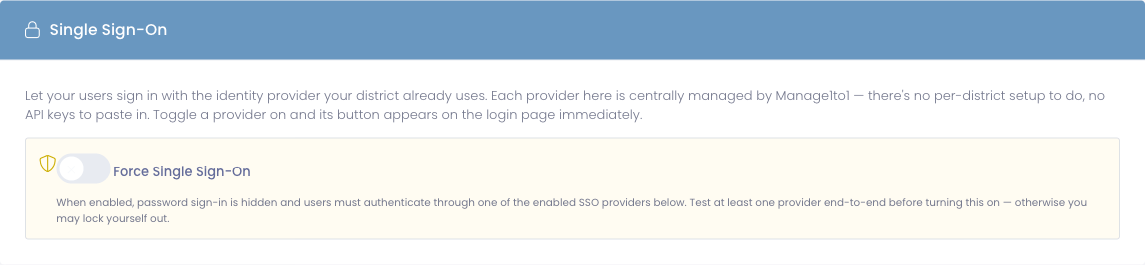
You'll see two cards. The top card holds the Force Single Sign-On master toggle (leave it off for now — we'll come back to it). The bottom card lists every identity provider Manage1to1 supports:
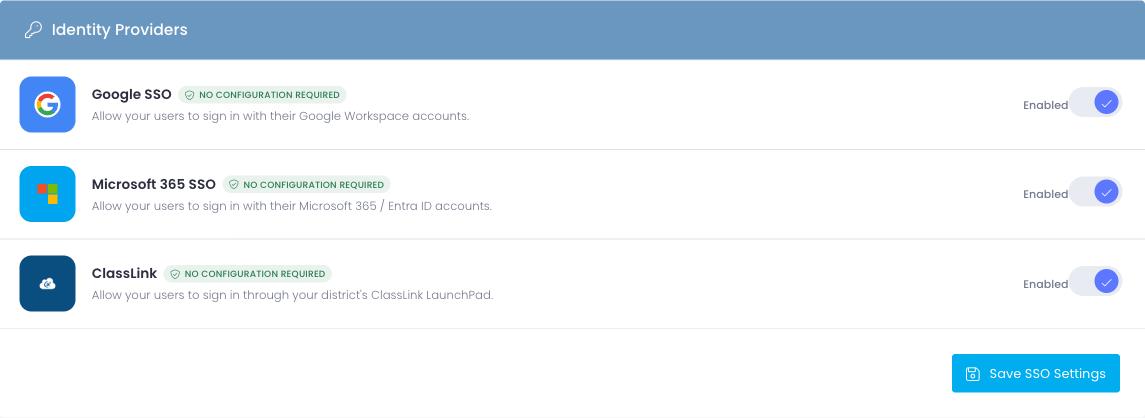
Each row tells you the provider name, a short description, and a No Configuration Required badge — confirming you don't need to paste any keys or register an app on Google or Microsoft's side.
Step 2: Turn On the Provider(s) Your District Uses
For each identity provider your district actually uses, flip its Enabled toggle on. The status label next to the toggle updates immediately from Disabled to Enabled.
Common starting points:
- Google Workspace district — turn on Google.
- Microsoft 365 district — turn on Microsoft.
- ClassLink LaunchPad district — turn on ClassLink.
- Mixed environment — turn on more than one. Each provider's button appears on the login page side-by-side and users pick whichever they have.
Click Save SSO Settings at the bottom of the page. The corresponding sign-in button appears on the admin login page and User Portal sign-in page immediately.
You can enable providers in any order, in any combination, and toggle them on or off later without affecting existing accounts.
Step 3: Test the Round-Trip With Your Own Account
Before announcing SSO to your district, sign yourself in via SSO once to confirm the round-trip works end-to-end.
- Sign out of Manage1to1 (top-right menu → Logout)
- On the admin login page, click the brand button for the provider you just enabled
- Authenticate on Google / Microsoft / ClassLink as you normally would
- You should land back at the Manage1to1 dashboard signed in as yourself
If it works, repeat the same test with a regular user account (a staff member or student in the User Portal at /clientarea/) so you've confirmed both surfaces.
If the round-trip returns you to the login screen with an error, see Troubleshooting below before continuing.
Step 4 (Optional): Switch to SSO-Only Sign-In
Once you've verified the round-trip works for at least one admin and one regular user, you can require SSO district-wide. With Force Single Sign-On enabled, the email / password form disappears from the login pages and every user must authenticate through an enabled identity provider.
If you turn on Force SSO and no admin in your district can sign in via SSO, you will lock yourself out of the admin area. Test SSO with at least one admin account before flipping this toggle.
Communicate the Change First
Send a short note to staff at least a few days before flipping Force SSO on. Include:
- The date the change will take effect
- Which Sign in with… button they should click
- A reminder that their Manage1to1 password will stop working
- Who to contact if their SSO sign-in doesn't work
Enable Force Single Sign-On
- Return to Settings → SSO Settings
- In the top Single Sign-On card, flip Force Single Sign-On to on:
- Click Save SSO Settings
The password fields disappear from both the admin login page and the User Portal sign-in page on the next refresh. Only the SSO buttons remain.
Verify After Enabling
Sign yourself out and confirm:
- The password form is gone
- The SSO button(s) are still present
- You can sign back in via SSO
If something is wrong, sign back in via SSO and toggle Force SSO off — passwords return on the next page load.
If every admin in your district somehow lost SSO access and the password form is hidden, contact Manage1to1 support. We can disable Force SSO from the back end so you can recover access. Plan ahead and you'll never need this round-trip.
Step 5: Confirm Sign-Ins Are Logged Correctly
Every successful SSO sign-in is recorded in the same login history a password sign-in is. To verify:
- Open any user's profile in the admin area
- Scroll to the Login History card
- The most recent row for a user who just signed in via SSO shows via Google SSO, via Microsoft 365 SSO, or via ClassLink SSO instead of the usual via password note
This is your audit trail — useful when a parent or admin asks "how did this account get accessed?"
Troubleshooting
"Invalid credentials" After a Successful Google / Microsoft / ClassLink Sign-In
Cause: The email address on the identity-provider account doesn't match any existing Manage1to1 admin or user record.
Fix:
- Note the exact email address the user authenticated with on Google / Microsoft / ClassLink
- In Manage1to1, search Administrators and Users for that exact email
- If no match, create the user record (or correct the email on an existing record) so it matches the identity-provider account
- Have the user try SSO again
The Sign-In Button I Just Enabled Isn't Showing Up
Cause: Browser cached the previous login page.
Fix: Hard-refresh the login page (Cmd + Shift + R / Ctrl + Shift + R) or open it in a private window.
Microsoft Sign-In Rejects Personal @outlook.com Accounts
Cause: Manage1to1's Microsoft SSO only accepts work and school accounts issued by a Microsoft 365 / Entra ID tenant. Personal Microsoft accounts (@outlook.com, @hotmail.com, Xbox / Skype accounts) are not accepted.
Fix: The user should sign in with their district-issued Microsoft 365 account, not a personal Microsoft account.
Microsoft Sign-In Shows an "Admin Consent Required" Page
Cause: Your district's Entra tenant is configured to prevent individual users from granting consent to third-party apps.
Fix: A Microsoft 365 administrator at your district clicks Accept once on the prompt to grant admin consent on behalf of the whole tenant. After that one-time acceptance, every user in the district can sign in without seeing the prompt.
ClassLink Sign-In Returns to the Login Page With No Error
Cause: The user's ClassLink account doesn't have an email address attached, or the email doesn't match any Manage1to1 record.
Fix:
- Have the user check their ClassLink profile for an email address
- Confirm that exact email exists on a Manage1to1 admin or user record
- Retry sign-in
I Turned On Force SSO and Now Nobody Can Sign In
Cause: No identity provider is actually enabled, or none of your admins have a matching account on the enabled provider(s).
Fix:
- Contact Manage1to1 support to disable Force SSO from the back end
- Once back in, enable at least one provider that your admins actually use
- Verify the round-trip with multiple admin accounts before re-enabling Force SSO
What Doesn't Happen When You Enable SSO
A few things SSO doesn't change, so you don't have to plan around them:
- Existing passwords keep working unless Force SSO is also enabled. You can run SSO alongside password sign-in for as long as you want.
- No new accounts are created. SSO only signs in users who already exist in Manage1to1.
- Permissions don't change. A user's role, permissions, and assigned schools are unchanged whether they sign in with a password or via SSO.
- MFA still applies. If an administrator has MFA enabled, SSO sign-in still prompts for the MFA code after the identity-provider step.
Common Questions
Q: Can we use Google and Microsoft at the same time? Yes. Enable both. Each provider's sign-in button appears on the login page and users click whichever one their account is on.
Q: Do we need to register Manage1to1 as an app in our Google or Microsoft tenant? No. Manage1to1 maintains a single central registration with each provider — your district doesn't paste any keys or register anything.
Q: We have ClassLink. Do we still need to set up ClassLink Rostering separately? ClassLink SSO (sign-in) and ClassLink Rostering (user provisioning via OneRoster) are independent. You can enable SSO without rostering, rostering without SSO, or both.
Q: A user changed their email in our identity provider. What now? Update their email on the matching Manage1to1 record so it again matches the identity provider. The next SSO sign-in will work.
Q: What does the user see if we turn off a provider they've been using? The button disappears from the login page. They can still sign in with their Manage1to1 password — unless Force SSO is on, in which case they need to use a different enabled provider.
Need Help?
If you run into issues turning on SSO or migrating to Force SSO, reach out to Manage1to1 support. Include:
- Which provider you're enabling
- The exact email address being rejected (if applicable)
- Whether Force SSO is enabled
- A screenshot of the error or behaviour you're seeing