Transferring Devices
Transfers move devices between buildings — from a warehouse to a school, from a school to a warehouse, or between two warehouses. Each transfer captures the source, destination, mode, optional notes, and the full device list, so you have an auditable history of every move.
When to Use Each Mode
- Single-Step (Instant Move) — the move already happened physically; you're just updating the system. Devices move to the destination as soon as you click Create Transfer. No chance to cancel mid-flight.
- Two-Step (Dispatch, Then Receive) — the move is happening over time and you want visibility while devices are in transit. The transfer goes through Pending → In Transit → Delivered, and the destination admin confirms receipt (optionally with a signature).
The default mode is set under Settings → Inventory Settings → Warehouse; you can override it per transfer.
Starting a Transfer
There are three ways to start a new transfer:
- Warehouse → View Warehouses → New Transfer (toolbar button)
- Warehouse → New Transfer (sidebar)
- Warehouse → View Warehouses → click the tablet icon on a warehouse → Transfer Selected (bulk transfer from inside the warehouse's device list)
Pick whichever fits the moment.
Filling Out the Transfer Form
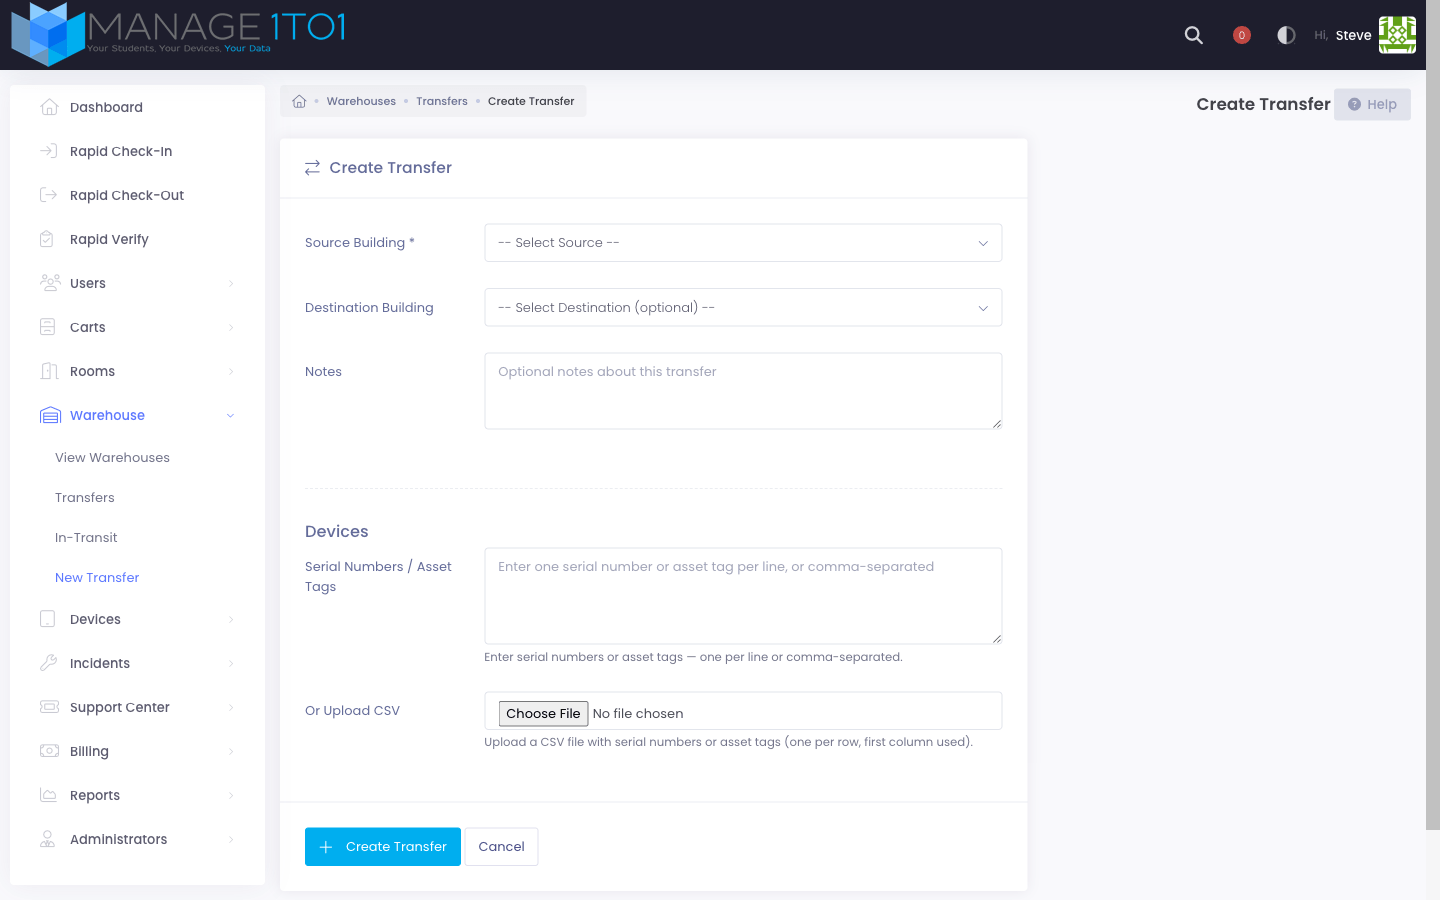
Source Building
The dropdown is searchable — start typing to filter. Schools and warehouses are grouped under separate optgroup headings so you can tell them apart at a glance:
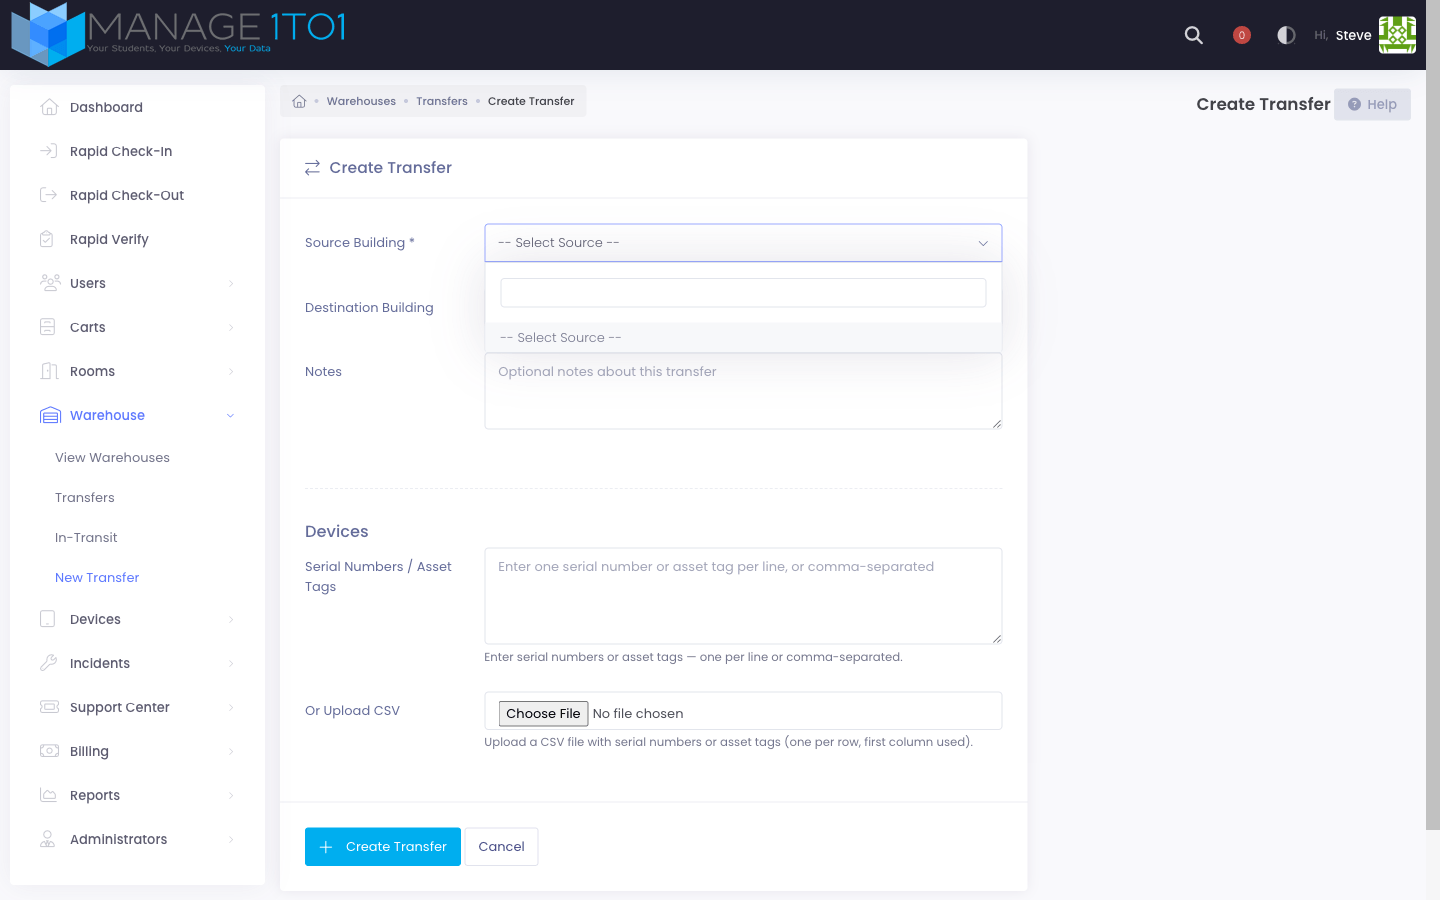
The GRADUATED placeholder building is intentionally hidden from both the source and destination pickers — it isn't a real location and can't be a transfer endpoint.
Destination Building
Same picker, same grouping. Source and destination must be different buildings (the form will reject same-source-and-destination submissions).
Notes
Optional context for the move. Examples: "Spring rollout — replacement Chromebooks for the 6th-grade pod", "Post-incident return of damaged devices for triage", "Summer staging for the new student cohort".
Devices
Two ways to attach devices:
- Paste serial numbers or asset tags into the textarea, one per line or comma-separated.
- Upload a CSV — first column is the identifier. Common headers (
Serial,Asset Tag,Serial Number,Barcode) are auto-stripped.
The form looks up each identifier and warns you about any it couldn't match. Matched devices are added; un-matched ones come back in the success toast so you can fix typos and try again.
Submit
Click Create Transfer. On success you land on the transfer detail page, where you can dispatch (two-step) or see the Delivered status (single-step).
Bulk Transfer from a Warehouse
If the devices you're moving are already in a warehouse, the fastest path is the bulk action:
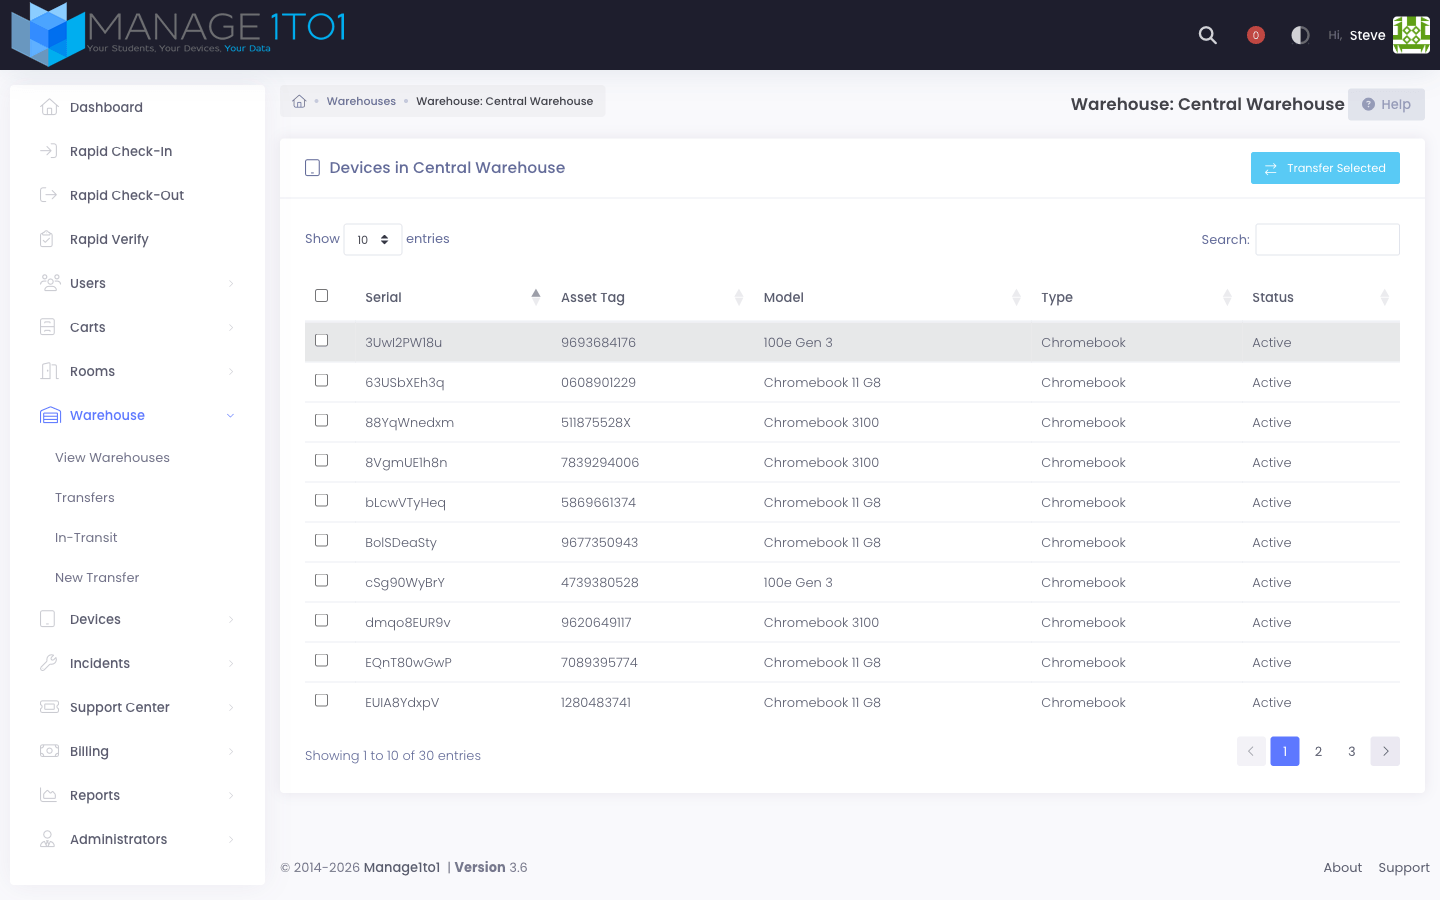
- Warehouse → View Warehouses.
- Click the tablet icon on the row for the warehouse you're shipping from.
- Tick the checkboxes for the devices you want to move.
- Click Transfer Selected in the toolbar.
- The transfer form opens pre-populated with those device identifiers and the warehouse as the source.
Single-Step (Instant Move)
Pick Single-Step when devices are physically next to you and you just need to update the system. The transfer is created and immediately marked Delivered with both Departed and Arrived timestamps set to now.
There's no in-transit state, no dispatch step, and no chance to cancel — it's a one-shot record of a move that already happened.
Two-Step (Dispatch, Then Receive)
A two-step transfer goes through three stages. Use this mode when devices are traveling overnight, when you want a chain-of-custody timestamp at each step, or when you want a signature on receipt (configurable under Settings → Inventory Settings → Warehouse → Receipt Signature).
Stage 1 — Pending
After you click Create Transfer, the transfer sits as Pending. Devices are still physically at the source. No timestamps yet.
Stage 2 — In Transit
The source-building technician clicks Dispatch Transfer on the transfer detail page (or from the in-transit list). The status flips to In Transit and the Departed timestamp is stamped.
While in transit, the transfer also shows on the Warehouse → In-Transit page, grouped by technician:

The In-Transit Reminder cron emails the assigned technician if the transfer sits in transit longer than the configured threshold (default 48 hours).
Stage 3 — Delivered
Someone at the destination clicks Receive Transfer — see the Receiving Transfers guide for the full walkthrough.
- Single-Step — the move already happened physically; you're just updating the system.
- Two-Step — the move is happening over time and you want visibility while devices are in transit.
The system reserves a placeholder building called GRADUATED for devices that left with graduating students. It's intentionally hidden from the source and destination pickers — it's not a real building you can ship to.