Canned Responses Tab
The Canned Responses tab in Help Desk Settings lets you save answers to common, known issues once and reuse them. Instead of retyping the same reply for every password reset or Wi-Fi question, your team inserts a saved response into a ticket reply or internal note in a single click.
You can access these settings from Settings > Help Desk > Canned Responses tab.
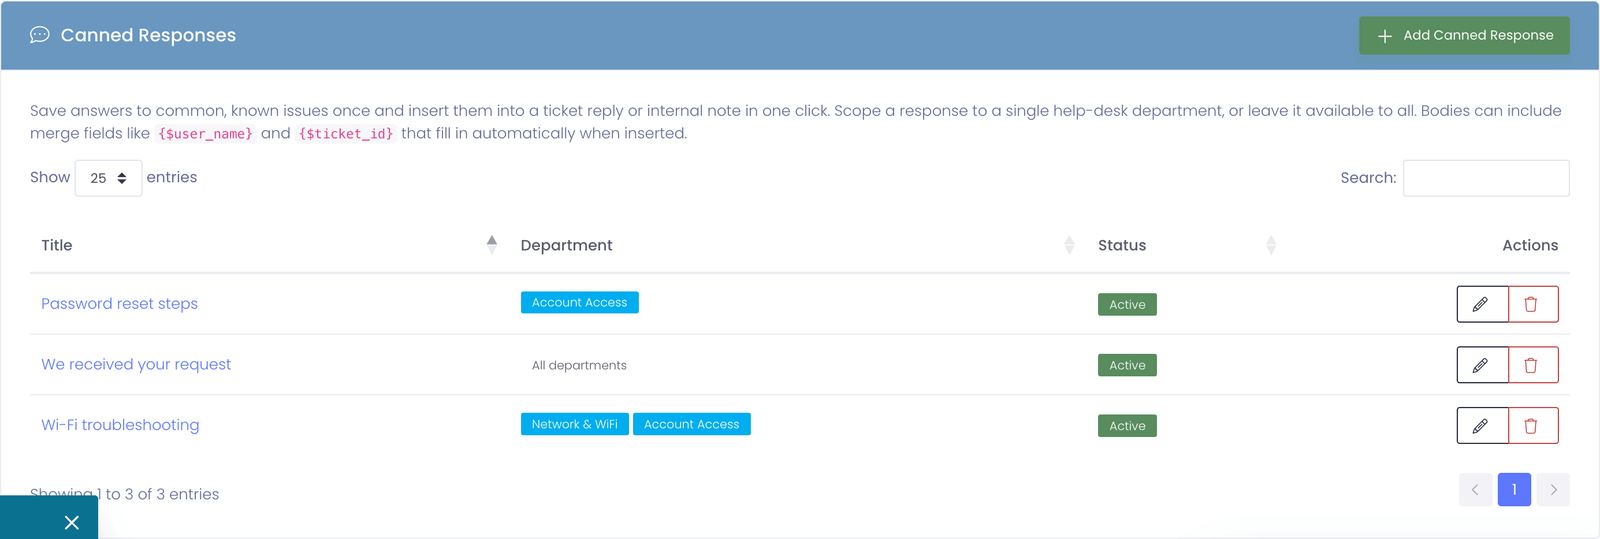
To create, edit, or delete canned responses, you need the Manage Canned Responses permission. Any team member who can work a ticket can insert a canned response, even without this permission.
What a Canned Response Includes
Each canned response has three parts:
| Field | Purpose |
|---|---|
| Title | A short, recognizable label shown in the insert picker (for example, "Password reset steps"). |
| Departments | The help desk queues where this response is offered. Leave empty to make it available everywhere. |
| Response | The reply text itself. Supports formatting and merge fields that fill in automatically. |
Creating a Canned Response
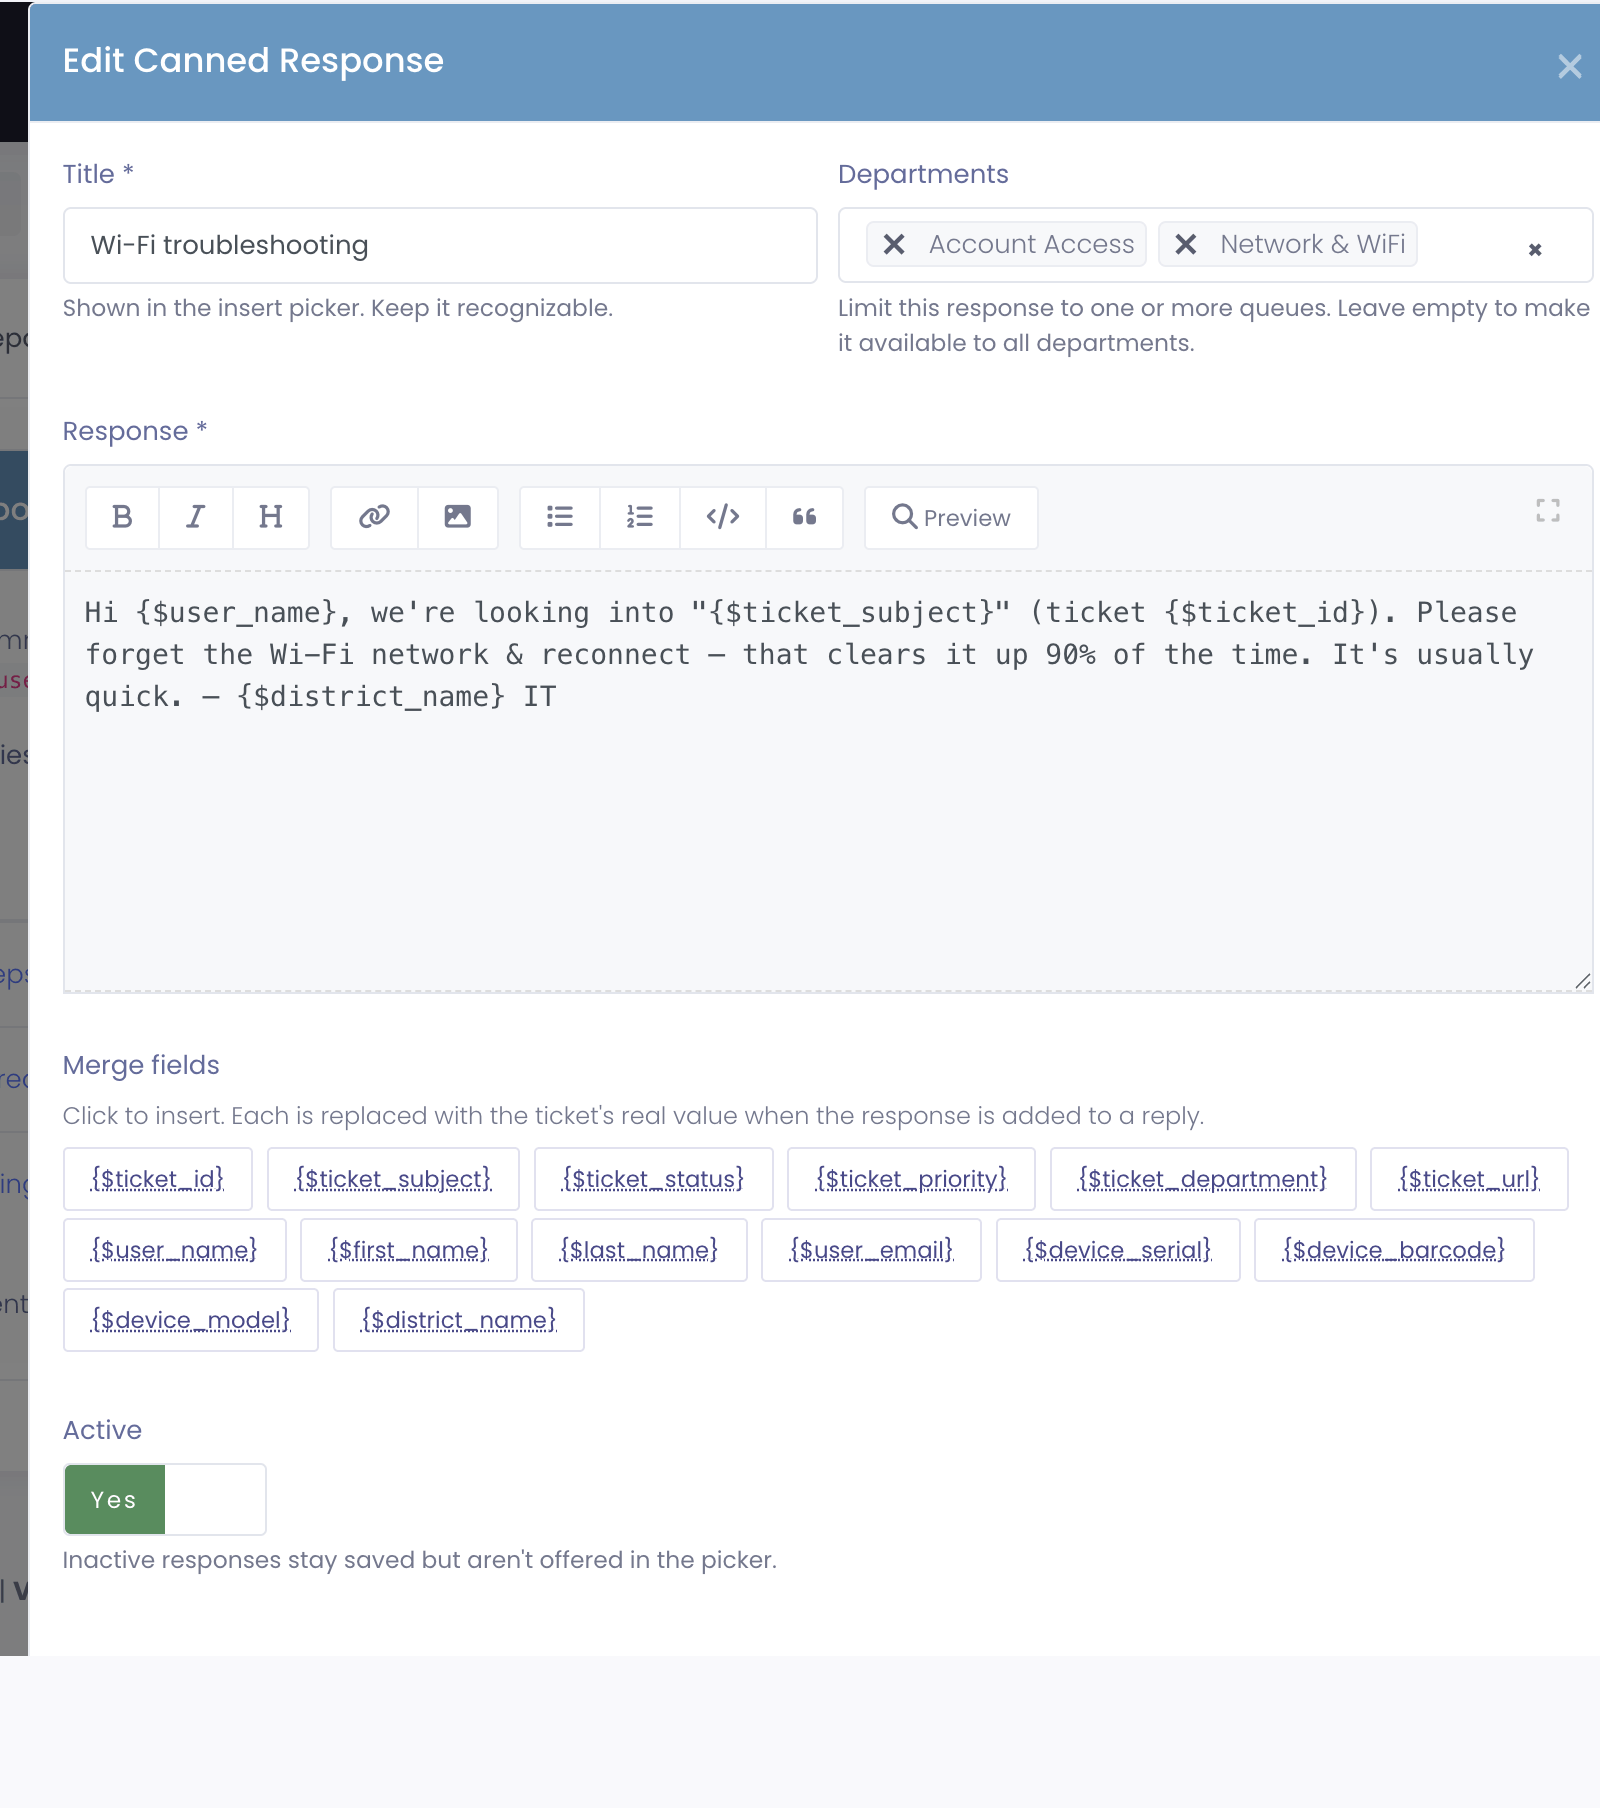
- Go to
Settings > Help Desk > Canned Responses. - Click Add Canned Response in the top-right.
- Enter a Title that your team will recognize in the picker.
- Optionally choose one or more Departments to limit where the response appears. Leave this empty to make it available in every department.
- Write the Response using the formatting toolbar. Add merge fields (see below) so each reply is personalized automatically.
- Leave Active on so the response appears in the picker.
- Click Add Canned Response to save.
Merge Fields
Merge fields are placeholders that are replaced with the ticket's real values the moment the response is inserted. For example, {$user_name} becomes the name of the person who submitted the ticket.
Click any merge field button below the response box to insert it at your cursor. The available fields are:
| Merge field | Fills in with |
|---|---|
{$ticket_id} | The ticket number |
{$ticket_subject} | The subject line of the ticket |
{$ticket_status} | The current ticket status |
{$ticket_priority} | The ticket priority |
{$ticket_department} | The help desk department the ticket is in |
{$ticket_url} | A link that opens the ticket |
{$user_name} | The full name of the person who submitted the ticket |
{$first_name} | The submitter's first name |
{$last_name} | The submitter's last name |
{$user_email} | The submitter's email address |
{$device_serial} | The serial number of the device on the ticket |
{$device_barcode} | The barcode or asset tag of the device on the ticket |
{$device_model} | The device model on the ticket |
{$district_name} | Your district or organization name |
If a merge field has no value for a particular ticket (for example, {$device_serial} on a ticket with no device attached), it is simply left blank. A misspelled field is left as-is so you can spot and correct it.
Scoping to Departments
Use the Departments selector to control where a response shows up:
- Select one or more departments to offer the response only in those queues. A "Password reset" response might be scoped to Account Access, while a "Wi-Fi reconnect" response is scoped to Network & WiFi.
- Leave it empty to make the response available on every ticket, regardless of department. This is ideal for general replies like an acknowledgement or a closing message.
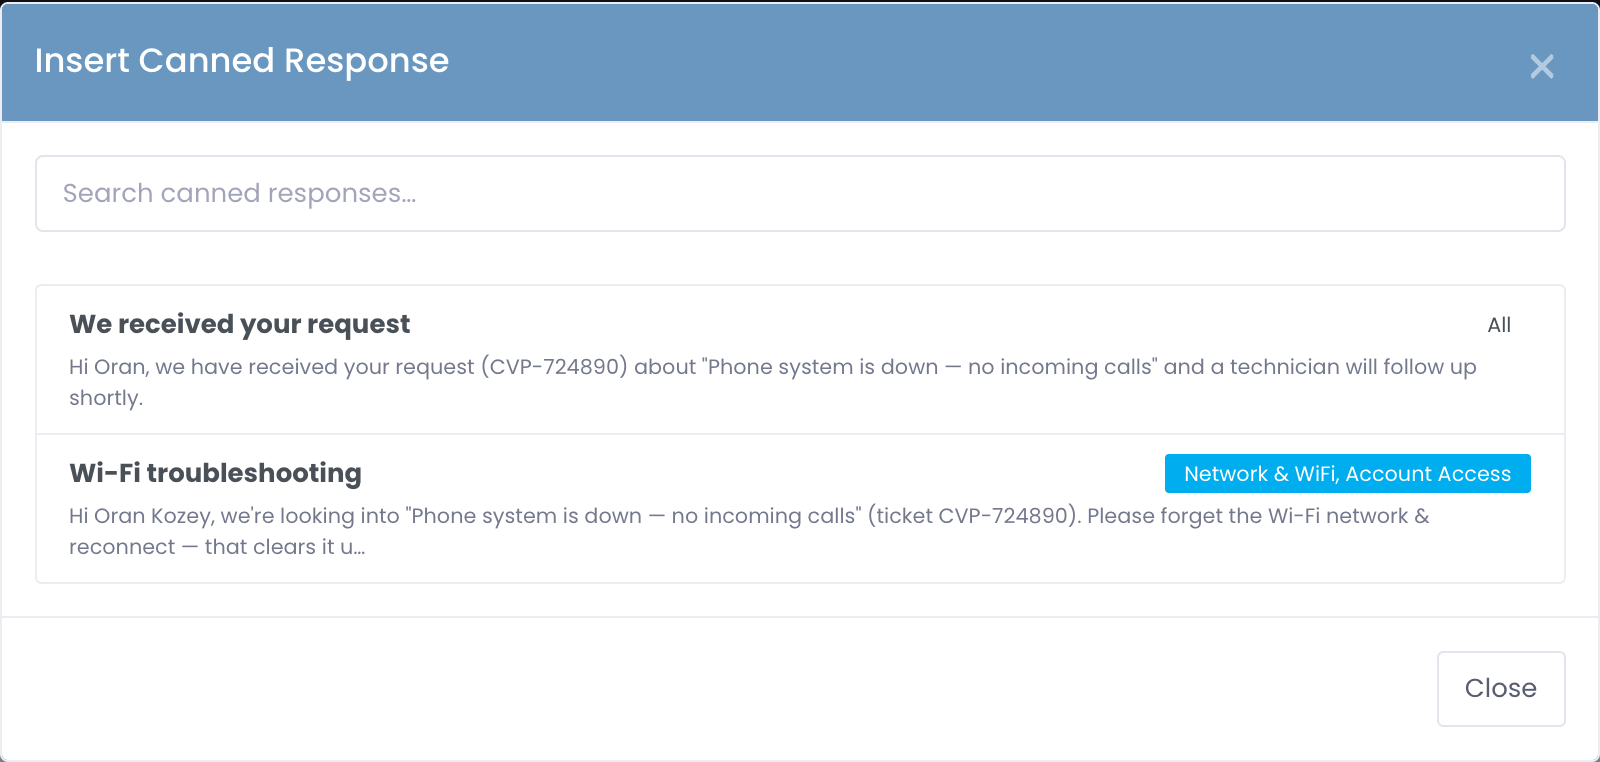
When your team opens the insert picker on a ticket, they only see responses scoped to that ticket's department plus any that are available to all departments.
Inserting a Canned Response into a Ticket
- Open a ticket and go to the Add Reply or Add Note area.
- Click Insert Canned Response above the message box.
- Search for a response by title, or pick one from the list. The preview shows exactly how it will read for this ticket, with merge fields already filled in.
- Click the response to drop it into the message at your cursor. You can keep typing or edit it before sending.
Editing and Deleting
- To edit a response, click its title (or the pencil icon) in the list, make your changes, and save.
- To turn a response off without deleting it, edit it and switch Active off. It stays saved but no longer appears in the picker.
- To delete a response, click the trash icon in its row and confirm.
Best Practices
✅ Do:
- Give responses clear, searchable titles your team will recognize
- Use merge fields so replies feel personal without extra typing
- Scope specialized responses to the department that handles them
- Keep general responses (acknowledgements, closings) available to all departments
❌ Don't:
- Duplicate the same response across every department when leaving it unscoped would do
- Rely on canned responses for issues that need a genuinely tailored answer
- Delete a response you might reuse later, turn it off with the Active switch instead