Microsoft Intune
Microsoft Intune is Microsoft's cloud MDM for Windows, Surface, and mixed fleets. The Manage1to1 integration syncs your Intune-managed device inventory into Manage1to1, so every device that exists in both systems picks up its Intune details — operating system, model, ownership, compliance state, Intune device category, storage, and last check-in — right on its device profile and in your MDM Statistics.
Connection, Device Import, and Removed-Device Handling behave the same across every MDM — Common Setup Options explains each, including how Device Import routes unknown devices into a review queue instead of adding them automatically. This page covers what's specific to Intune.
This is primarily a device inventory integration: it brings Intune's device details into Manage1to1 for a single, unified view of your fleet. By default it only reads from Intune. You can also, optionally, send remote Lock, Restart, and Retire actions to a device straight from its profile once you turn those on (see Remote Device Actions). Windows device inventory is also available through SCCM / Configuration Manager — choose Intune if your Windows and Surface devices are cloud-managed through Intune.
Before You Start
Manage1to1 connects to Intune through Microsoft Graph using an app registration in your Microsoft Entra admin center (formerly Azure Active Directory). You'll create a small application that Manage1to1 uses to read your device inventory, and grant it read-only access to managed devices.
To set it up, you'll need:
- Access to the Microsoft Entra admin center as a Global Administrator or Cloud Application Administrator (needed to grant admin consent)
- A few minutes to register an application and create a client secret
Step 1: Register an Application in Microsoft Entra
- Sign in to the Microsoft Entra admin center
- Go to Identity → Applications → App registrations and choose New registration
- Give it a recognizable name (for example, Manage1to1 Intune Sync), leave the default single-tenant option selected, and register it
- On the application's Overview page, copy the Directory (tenant) ID and the Application (client) ID — you'll paste both into Manage1to1
Step 2: Grant the Managed-Devices Permission
- On your new app, open API permissions → Add a permission
- Choose Microsoft Graph, then Application permissions
- Search for and add DeviceManagementManagedDevices.Read.All
- Back on the API permissions list, choose Grant admin consent for your organization — the permission's status must show a green check
Manage1to1 connects as an application, on its own schedule, with no signed-in user — so the permission must be added under Application permissions (not Delegated), and it needs admin consent. Without consent granted, the connection test will fail even though the tenant, client ID, and secret are all correct.
Step 3: Create a Client Secret
- Open Certificates & secrets → New client secret
- Give it a description and an expiry, then add it
- Copy the secret Value immediately — Entra only shows it once. Copy the Value, not the Secret ID.
Client secrets expire on the date you choose. When a secret expires, the sync stops until you create a new one and paste it into Manage1to1. Note the expiry date and rotate the secret before it lapses (see Rotating the client secret).
Step 4: Configure the Integration in Manage1to1
- Navigate to Settings → MDM Settings
- Find Microsoft Intune in the available modules list and click Manage (or Activate)
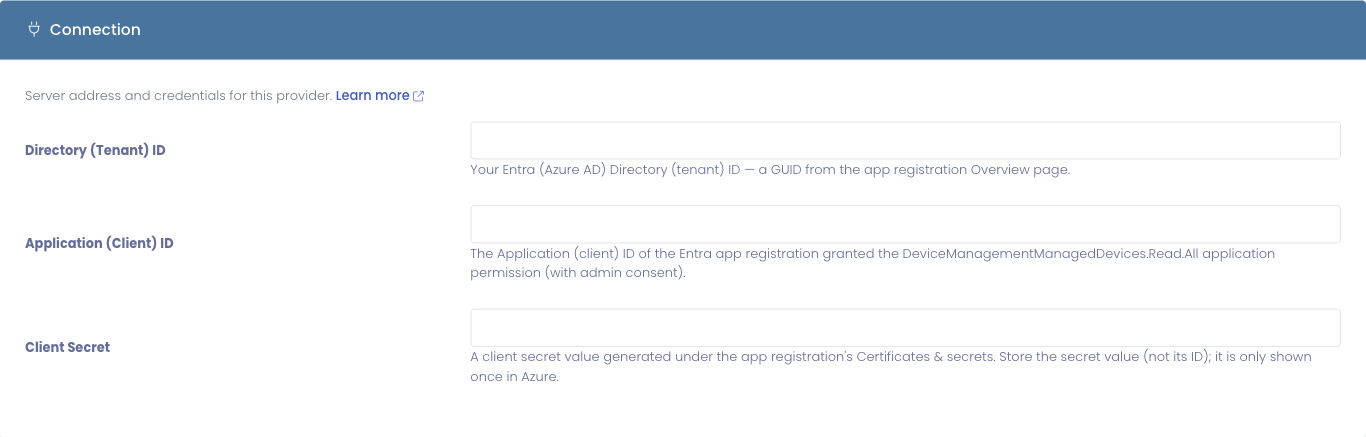
- Fill in the Connection settings:
| Setting | What to enter |
|---|---|
| Directory (Tenant) ID | The Directory (tenant) ID from your app's Overview page. |
| Application (Client) ID | The Application (client) ID from your app's Overview page. |
| Client Secret | The secret Value you copied in Step 3. |
- Optionally set your Device Import and Removed-Device Handling options — both are off by default and route changes through a review queue. See Common Setup Options.
- Click Test Connection — Manage1to1 signs in to Microsoft Graph and reads a single device to confirm both the credentials and the permission are in place.
- Click Save Settings to enable the module.
Step 5: Initial Device Sync
Once the module is enabled, Manage1to1's MDM sync pulls your Intune inventory on the next scheduled run. Devices are matched to Manage1to1 records by serial number, so any device that's both in Manage1to1 and in Intune picks up the Intune data automatically.
For each device, Manage1to1 stores:
- Device name, model, and manufacturer
- Operating system and version
- Ownership (Corporate or Personal)
- Compliance state
- Intune device category
- Assigned user
- Free and total storage
- Encryption status
- Enrollment date and last check-in
You can re-run the sync on demand from any device's profile by clicking Refresh Now on the Intune info pane.
What the Integration Does
Device Inventory Pane
Every device that exists in both Intune and Manage1to1 gets an Intune Info pane on its profile page, showing the synced fields above. The pane includes a Refresh Now button that triggers an on-demand sync for that single device.
MDM Statistics
Intune devices roll into your MDM Statistics dashboard with an OS distribution breakdown, a device ownership split (Corporate vs Personal), and a compliant-devices gauge across your Intune fleet.
Importing and Removing Devices
The sync normally only enriches devices that already exist in Manage1to1. If you'd like Intune to also pull in devices it knows about but Manage1to1 doesn't — or flag devices that disappear from Intune — turn on the Device Import and Removed-Device Handling options in the Intune settings. Both are optional, off by default, and route every change through a review step so nothing touches your inventory until you approve it. See MDM Device Review for how the review queue works.
Remote Device Actions
Beyond inventory, Manage1to1 can send three remote actions to an Intune-managed device directly from its device profile: Lock, Restart, and Retire. They are off until you enable them, and each one is queued and carried out on the next MDM sync.
Turn on device actions
- Open Settings → MDM Settings → Microsoft Intune.
- Under Device Actions, turn on Enable Remote Device Actions, then Save Settings.
- Grant your Intune app registration one more Graph permission so it is allowed to issue these commands:
- Open your app's API permissions → Add a permission → Microsoft Graph → Application permissions.
- Add DeviceManagementManagedDevices.PrivilegedOperations.All.
- Choose Grant admin consent so the permission shows a green check.
Running device actions also depends on the operator's role. Lock uses the Disable Device permission; Restart and Retire use the MDM Device Actions permission. Grant these to the roles you want to be able to act on devices.
The three actions
Once enabled, open any Intune device's profile, go to its Intune pane, and use the action buttons:
| Action | What it does |
|---|---|
| Lock | Remotely locks the device so it can't be used until it's unlocked with its existing passcode. Use it for a lost or misplaced device. |
| Restart | Reboots the device on its next check-in. |
| Retire | Removes the device from Intune management and clears company-managed data and policies from it. Personal data is left in place. Use it when a device is leaving your fleet. |
Retire takes the device out of management and strips your organization's data and policies, while leaving personal data alone. It is not a full device wipe. The device stays out of management until it is re-enrolled, so use Retire when a device is genuinely leaving your program.
Each action is queued when you confirm it and carried out on the next MDM sync, so there may be a short delay before the device reflects the change. Intune also has no remote "unlock": a locked device is cleared by entering its passcode, not from Manage1to1.
Troubleshooting
Test Connection fails
Manage1to1 couldn't authenticate with Microsoft Graph. Work through the most common causes:
- Admin consent isn't granted. On the app's API permissions page, confirm DeviceManagementManagedDevices.Read.All is listed as an Application permission with a green Granted check. This is the most common cause of a test that fails even when the IDs and secret look right.
- The secret value is wrong or expired. Confirm you copied the secret Value (not the Secret ID), and that it hasn't passed its expiry date. If in doubt, create a fresh secret and paste the new value.
- The tenant or client ID is off. Re-copy the Directory (tenant) ID and Application (client) ID from the app's Overview page — an extra character or a mixed-up pair will fail.
Fix whichever applies, then click Test Connection again — the message Microsoft returns is shown to help you pinpoint the cause.
Sync runs but no devices appear
Devices are matched by serial number. If Manage1to1 and Intune disagree on the serial for a device, the match misses.
- Verify your Manage1to1 device records have the full serial number (no trailing whitespace, no abbreviations).
- Verify the same device exists in Intune with the same serial.
- If both sides look correct, the next scheduled sync will pick the device up.
Rotating the Client Secret
Client secrets expire, so plan to rotate them before the expiry date.
- In the Entra admin center, open your app's Certificates & secrets and create a New client secret
- Copy the new secret Value
- Paste it into Settings → MDM Settings → Microsoft Intune → Client Secret
- Click Test Connection to confirm the new secret works, then Save
- Once the new secret is saved and working, delete the old secret in Entra
There's no downtime — the integration uses the saved secret on the next request, so the moment you save the new value the integration is using it.