Bulk Cart Import
The Bulk Cart Import allows you to create or update multiple carts at once using a CSV file. This is useful when initially setting up Manage1to1 or when deploying new carts across buildings. You upload the file, review a preview of exactly what will happen, then confirm.
Uploading and clicking Preview & Execute Cart Import only shows you what will happen — how many carts will be created, how many will be updated, and any rows that will be skipped. No carts are created or updated until you click Confirm & Import on the preview screen.
CSV Format
Your CSV file must include a header row. Download the CSV Import Template for the correct format.
Required Columns
| Column | Description |
|---|---|
| Name | The name of the cart (e.g., "Chromebook Cart A", "iPad Cart 1") |
| Asset Tag | A unique identifier for the cart (e.g., "CART-0001"). Used to match existing carts. |
Optional Columns
| Column | Description |
|---|---|
| Building Name | The building this cart belongs to. Must match an existing building in Manage1to1. You can also use the building's SIS code. Minor differences in capitalization, spacing, or common abbreviations (like HS for High School) are matched automatically, and a close-but-inexact name is flagged on the preview with the closest match. |
| Capacity | The maximum number of devices the cart can hold (e.g., "30"). Set to 0 or leave blank for unlimited. |
| Comments | Any additional notes about the cart |
How It Works
- Navigate to Settings → System Utilities → Inventory tab
- Locate the Bulk Cart Import section
- Upload your CSV file using the upload area
- Once uploaded, click Preview & Execute Cart Import — this opens a preview and does not create or update anything yet
- Review the preview, then click Confirm & Import to apply the changes (or Cancel to walk away with no changes)
Matching Behavior
Carts are matched by Asset Tag. When processing:
- If a cart with the same asset tag already exists, it will be updated with the values from the CSV
- If no matching cart is found, a new cart will be created
- If a building name is provided but cannot be found, that row will be skipped and logged as an error
Building Resolution
The Building Name column is flexible — Manage1to1 will try to match it in the following order:
- Building name — matches against the building display name (case-insensitive)
- SIS/Building code — if no name match is found, tries to match against the building's SIS code
This means you can use either the full building name (e.g., "Oakwood High School") or the SIS code (e.g., "10100") in your CSV.
Reviewing the Preview
The preview screen opens after you click Preview & Execute Cart Import and summarizes exactly what confirming will do.
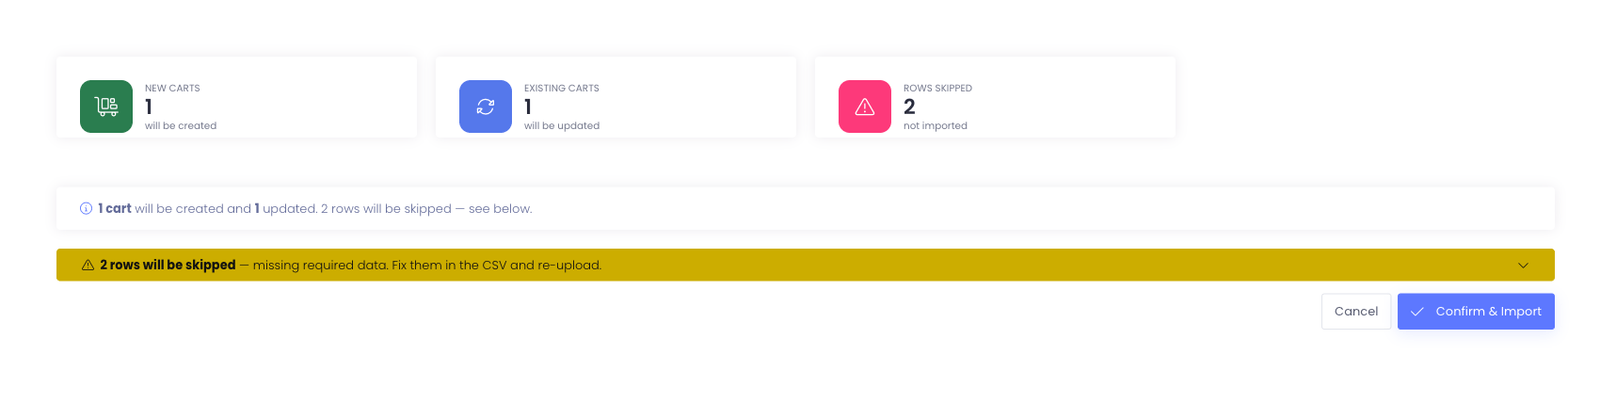
Summary cards
- New Carts — carts that will be created
- Existing Carts — carts already in Manage1to1 (matched by asset tag) that will be updated
- Rows Skipped — rows missing required data; these are left out of the import
Skipped rows
Rows missing required data are grouped into a collapsible rows will be skipped notice. Expand it to see which rows were left out, fix them in your CSV, and re-upload if you want them included.
After Import
After the import completes, you'll see a summary showing how many carts were created, updated, or failed. Any errors are logged to the Activity Log with details about which rows failed and why.
Tips
- Asset tags must be unique — each cart needs a distinct asset tag for matching to work correctly
- Download the template first to ensure your columns are in the correct order
- You can run the import multiple times safely — existing carts (matched by asset tag) will be updated, not duplicated
- Capacity is optional — leave it blank or set to 0 for carts without a device limit
- Room assignments are not part of the import — assign carts to rooms after import through the cart edit page
- The preview writes nothing — click Cancel for no changes, or Confirm & Import to apply what it shows