Bulk Room and Cart Checkout
Bulk Room Checkout and Bulk Cart Checkout let you assign many devices to rooms or carts at once using a CSV file — upload the file, review a preview of exactly what will happen, then confirm. They work just like Bulk Device Checkout, but the destination is a room or a cart instead of a user.
Use these when you deploy stationary or shared devices — a lab or classroom set assigned to a room, or a charging cart's devices assigned to that cart — without checking each one out by hand.
Uploading and clicking Preview & Process only shows you what will happen — how many devices will be assigned to how many rooms (or carts) and any rows that will be skipped. Nothing is assigned until you click Confirm & Assign on the preview screen.
To access System Utilities, you need the Manage Settings permission assigned to your role.
Where to find them
Go to Settings → System Utilities → Devices tab. Bulk Room Checkout and Bulk Cart Checkout sit alongside Bulk Device Checkout.
Rooms and carts must already exist before you assign devices to them. Create them first using Bulk Room Import / Bulk Cart Import, or from the Rooms and Carts areas.
What the CSV needs
Bulk Room Checkout — one row per device:
| Column | Required | What to put |
|---|---|---|
| Serial/Barcode/Asset Tag | Yes | Any identifier that matches the device |
| Room Name | Yes | The exact room name |
| Building Name | Optional | The building — use it to tell apart rooms with the same name in different buildings |
Bulk Cart Checkout — one row per device:
| Column | Required | What to put |
|---|---|---|
| Serial/Barcode/Asset Tag | Yes | Any identifier that matches the device |
| Cart Asset Tag | Yes | The cart's asset tag |
| Slot | Optional | The slot number to place the device in, for carts that use numbered slots |
Use the CSV Import Template button on each card to download the expected format.
Placing devices in cart slots
If your cart uses numbered slots (its Slot Assignment is set to Required), add a Slot column to the Bulk Cart Checkout file to put each device in a specific slot. This is the reliable way to load a cart in slot order: list each device with the slot number you want it in.

The Slot column also lets you fix or re-number a cart you already loaded. If a device in the file is already in that cart, its slot is simply updated, so you can re-run the file to set slots you missed, or swap and renumber devices, without checking anything in first.
A few rules keep slots tidy:
- Each slot holds one device. A slot that another device already uses is skipped.
- A slot number must fit within the cart's size.
- Leave the Slot column blank (or leave it off entirely) to load devices without slot numbers, just like before.
How to run it
- Navigate to Settings → System Utilities → Devices
- In Bulk Room Checkout (or Bulk Cart Checkout), drop your CSV onto the upload area
- Click Preview & Process to open the preview
- Review the summary — how many devices will be assigned, to how many rooms or carts, and how many rows will be skipped
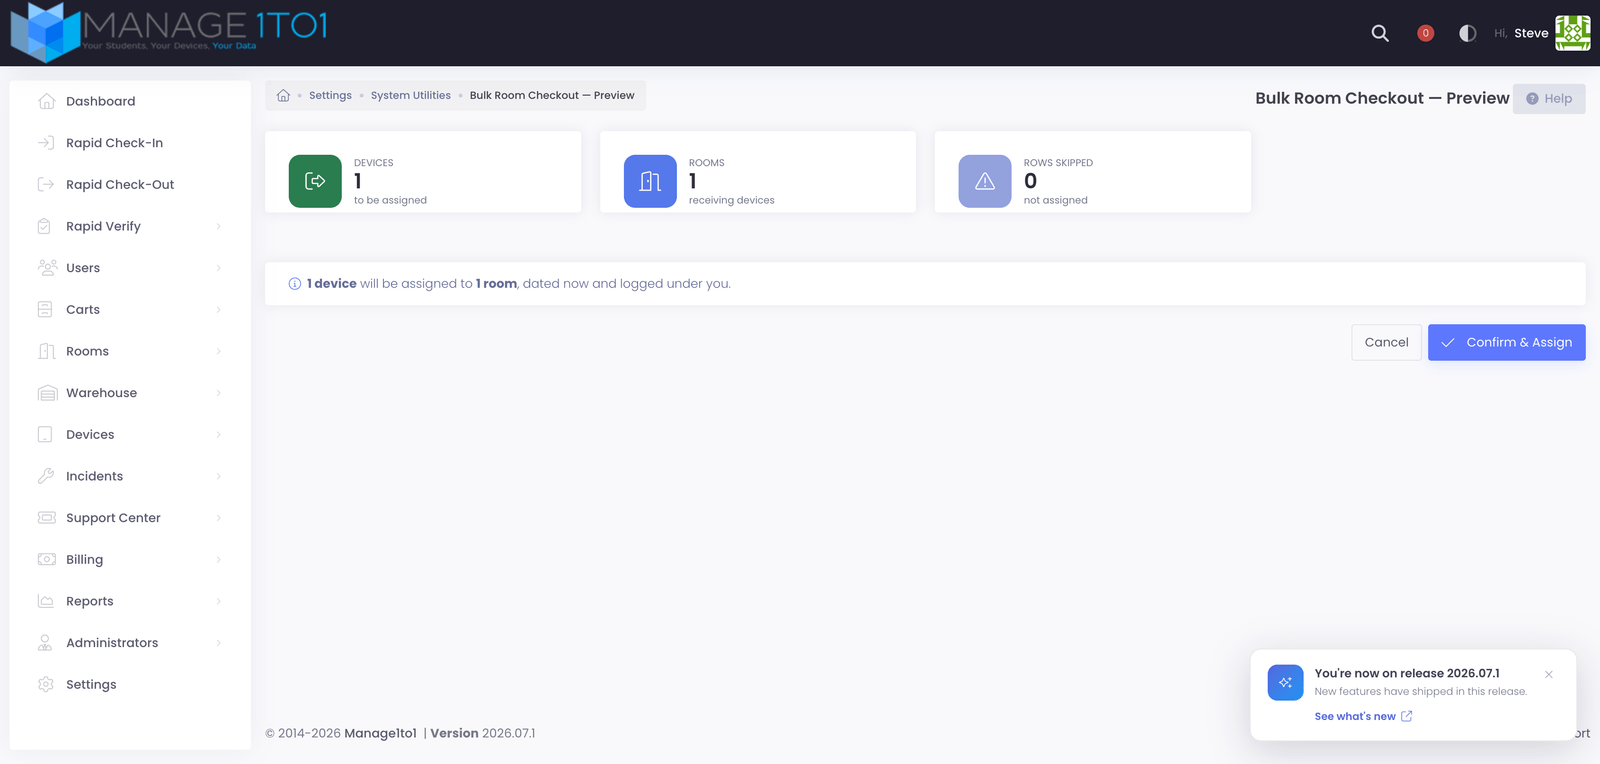
- Click Confirm & Assign to complete the assignment, or Cancel to back out
Devices are assigned with the current date and time, logged under you — exactly like a manual room or cart checkout.
What gets skipped
A row is skipped, and listed on the preview with the reason, when:
- The device identifier doesn't match a device
- The room name, or cart asset tag, doesn't match
- The device is already checked out somewhere else (to a user, a room, or a different cart). Check it in first, then re-run. A device that is already in the cart you are assigning it to is not skipped: with a Slot column, its slot is updated instead.
- The cart is full. When a cart has a device limit, any devices beyond that limit are left out, and the preview tells you the cart is full so nothing is over-filled by surprise.
- A slot problem (only when you use the Slot column): the slot is not a whole number or is larger than the cart, the same slot is listed twice, or the slot is already used by another device in the cart.
The rest of the file still processes; only the flagged rows are left out. Because the preview lists every skipped row and the reason, you can correct the file and run it again.
Common Questions
Q: Do rooms and carts need to exist first? Yes. Create them first (Bulk Room Import / Bulk Cart Import, or the Rooms and Carts areas), then assign devices to them.
Q: Can I assign a device that's already checked out to a user? No — that row is skipped so you don't accidentally move an assigned device. Check the device in first, then include it in a room or cart assignment.
Q: How is this different from Bulk Device Checkout? Bulk Device Checkout assigns devices to users. Bulk Room and Bulk Cart Checkout assign them to a room or a cart instead — for shared and stationary devices that aren't tied to one person.
Q: How do I load a cart in slot order? Add a Slot column to the Bulk Cart Checkout file (for carts that use numbered slots) and list each device with the slot number you want it in. To fix or renumber a cart you already loaded, run the file again with the slots you want. Devices already in the cart simply move to the slot you list, so you don't need to check anything in first.
Q: What happens if I list more devices than the cart holds? The devices that fit are assigned, and the extras are skipped and listed on the preview with a note that the cart is full, so a cart is never over-filled.