Warehouse Overview
Warehouses give you a place to store devices that aren't checked out to anyone — spare inventory, staging stock for a fall rollout, end-of-year collection, or RMA-bound units. Transfers move devices between buildings (warehouse-to-school, school-to-warehouse, or warehouse-to-warehouse), with optional signature on receipt and per-transfer history.
Core Concepts
- Warehouse buildings behave as inventory storage: devices in them are hidden from the main device list, can't be checked out to a user, and don't appear when you home a cart. Students and staff can't be assigned to a warehouse either — it's a location for devices, not people.
- Transfers move devices between buildings. Each transfer has a source, destination, mode (single-step or two-step), notes, and a list of devices.
- Single-Step (Instant Move) — the simplest path. The transfer is created, dispatched, and delivered in one action; device locations update immediately. Use this when devices are physically next to you and you just need to record the move.
- Two-Step (Dispatch, Then Receive) — the transfer starts as Pending, becomes In Transit when dispatched, and Delivered when a destination admin receives it. Use this when devices travel overnight or need a signature on arrival.
Managing Warehouses
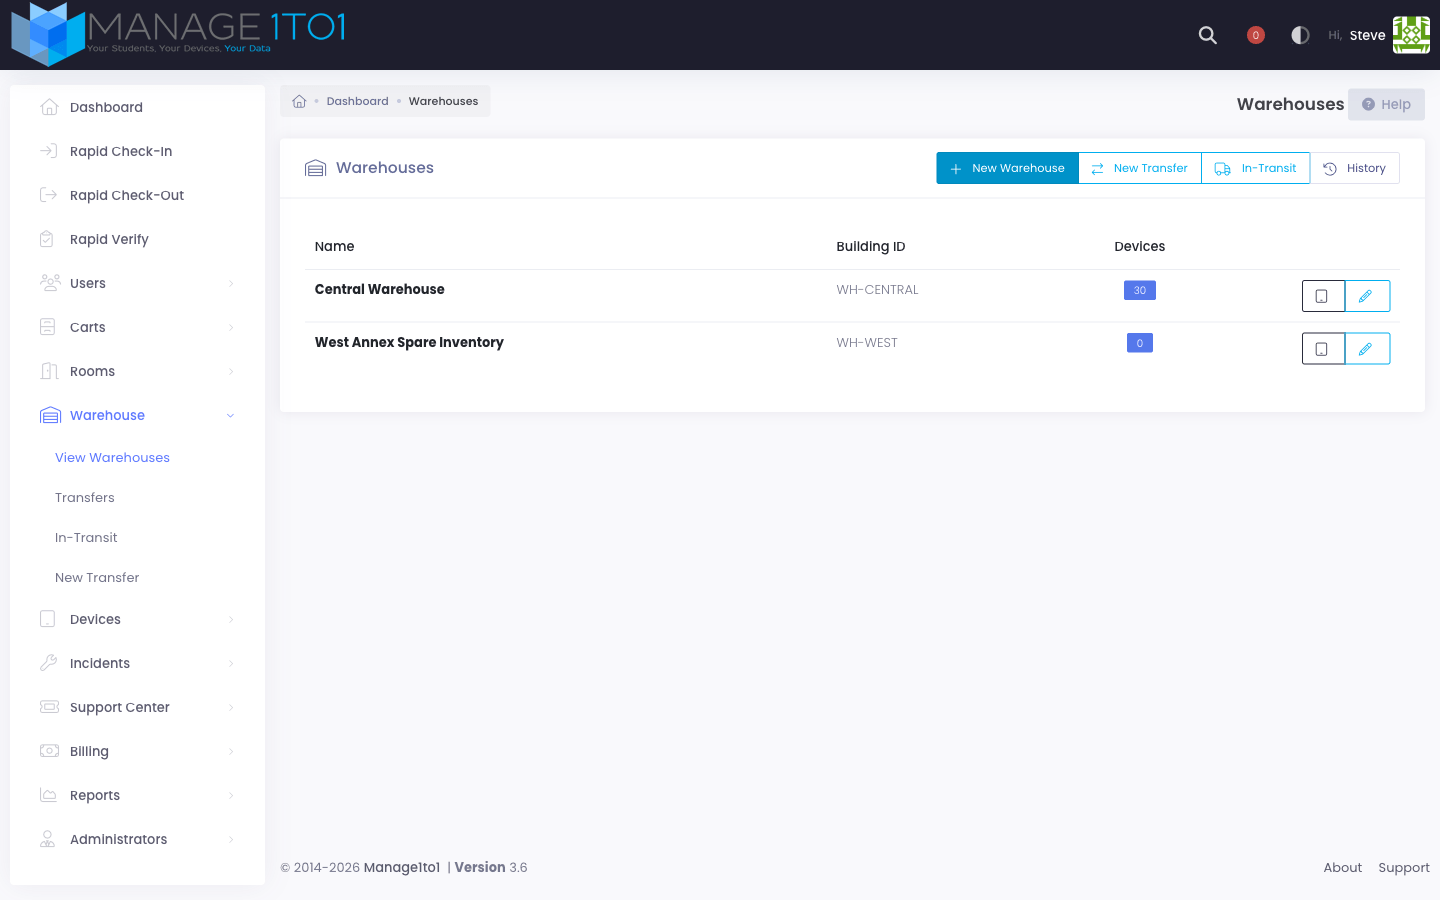
The Warehouse → View Warehouses page is the home base for everything warehouse-related. From the toolbar you can:
- + New Warehouse — open a modal to create a new warehouse (name, ID, optional address).
- New Transfer — start a building-to-building device move (see Transferring Devices).
- In-Transit — see every transfer currently between buildings, grouped by technician.
- History — search the full transfer log.
- Show Archived — reveal retired warehouses so you can restore one (see Archive a Warehouse).
Create a New Warehouse
Click + New Warehouse in the toolbar. A modal opens with the fields needed to spin up a warehouse:
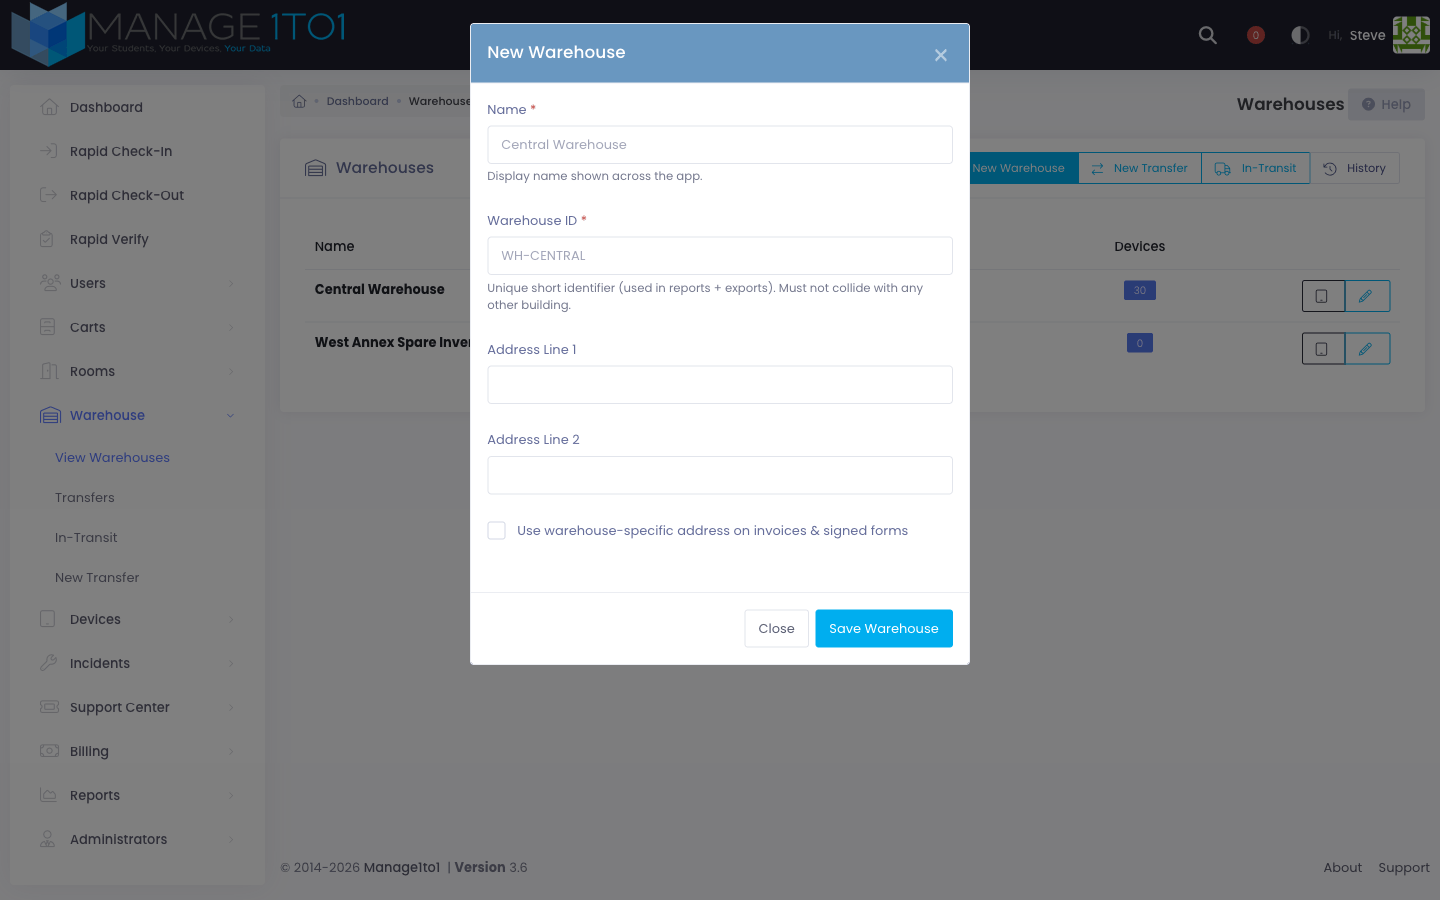
- Name — display name shown across the app (Warehouse list, transfer pickers, reports).
- Warehouse ID — short unique identifier used on reports and exports. Must not collide with any existing building ID.
- Address Line 1 / Address Line 2 — optional. Most districts leave these blank for warehouses.
- Use warehouse-specific address on invoices & signed forms — when on, this warehouse's address overrides the district default on any invoice or signed receipt scoped to it.
Save and the new warehouse appears in the list immediately, with a device count of zero. Move devices into it by creating a transfer.
Edit a Warehouse
Click the pencil icon in the Actions column on any row.
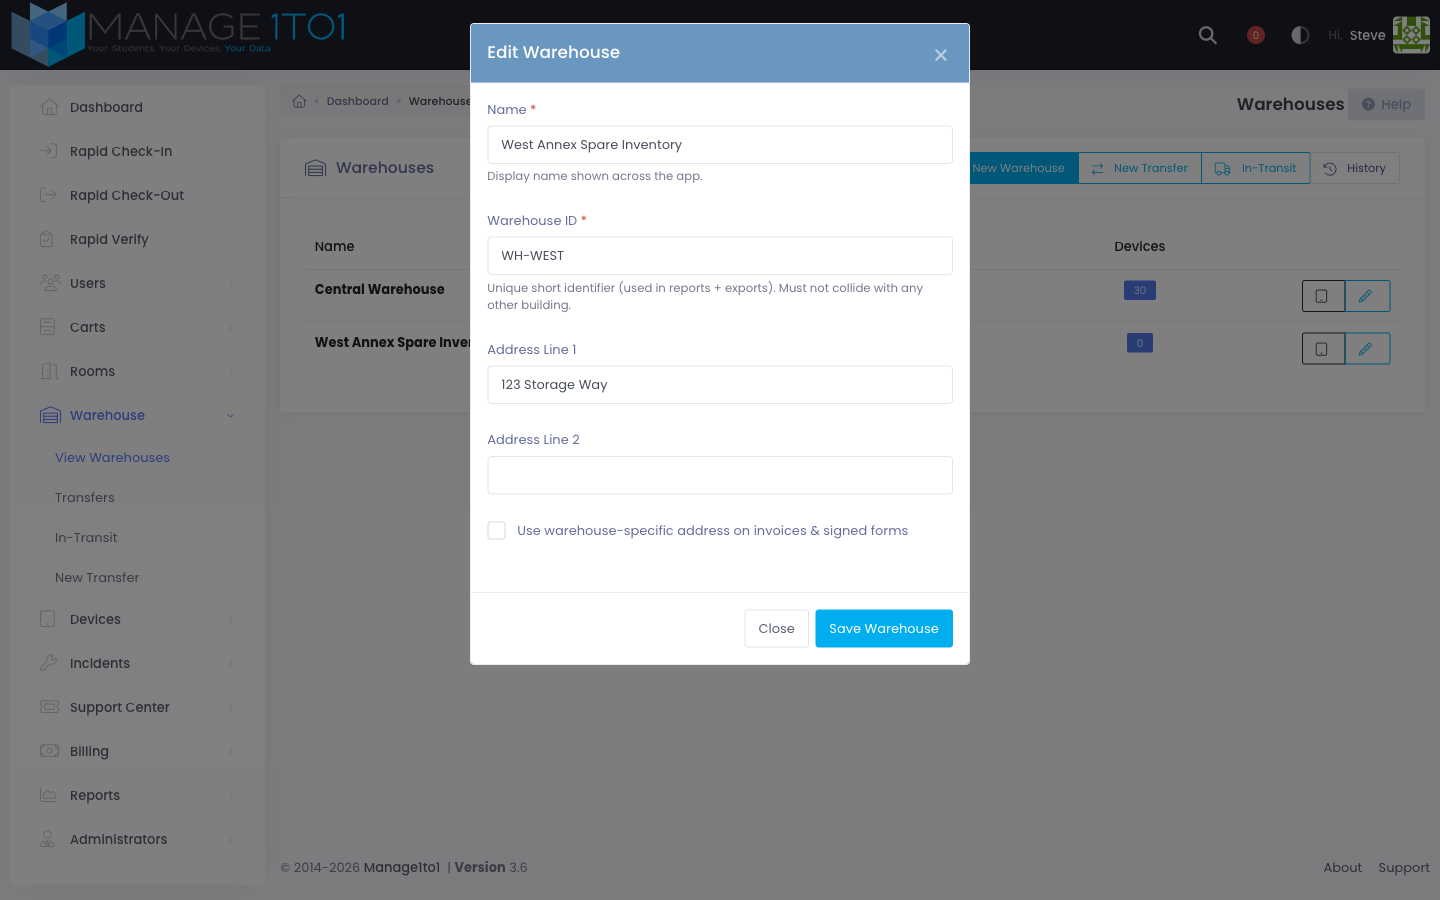
Edits log to the activity feed, so you can see who renamed which warehouse and when from the Activity Log page.
View Devices in a Warehouse
Click the tablet icon in the Actions column to drill into the device list for a specific warehouse. The page is a full DataTable with search, sort, and pagination, scoped to just the devices currently parked there.
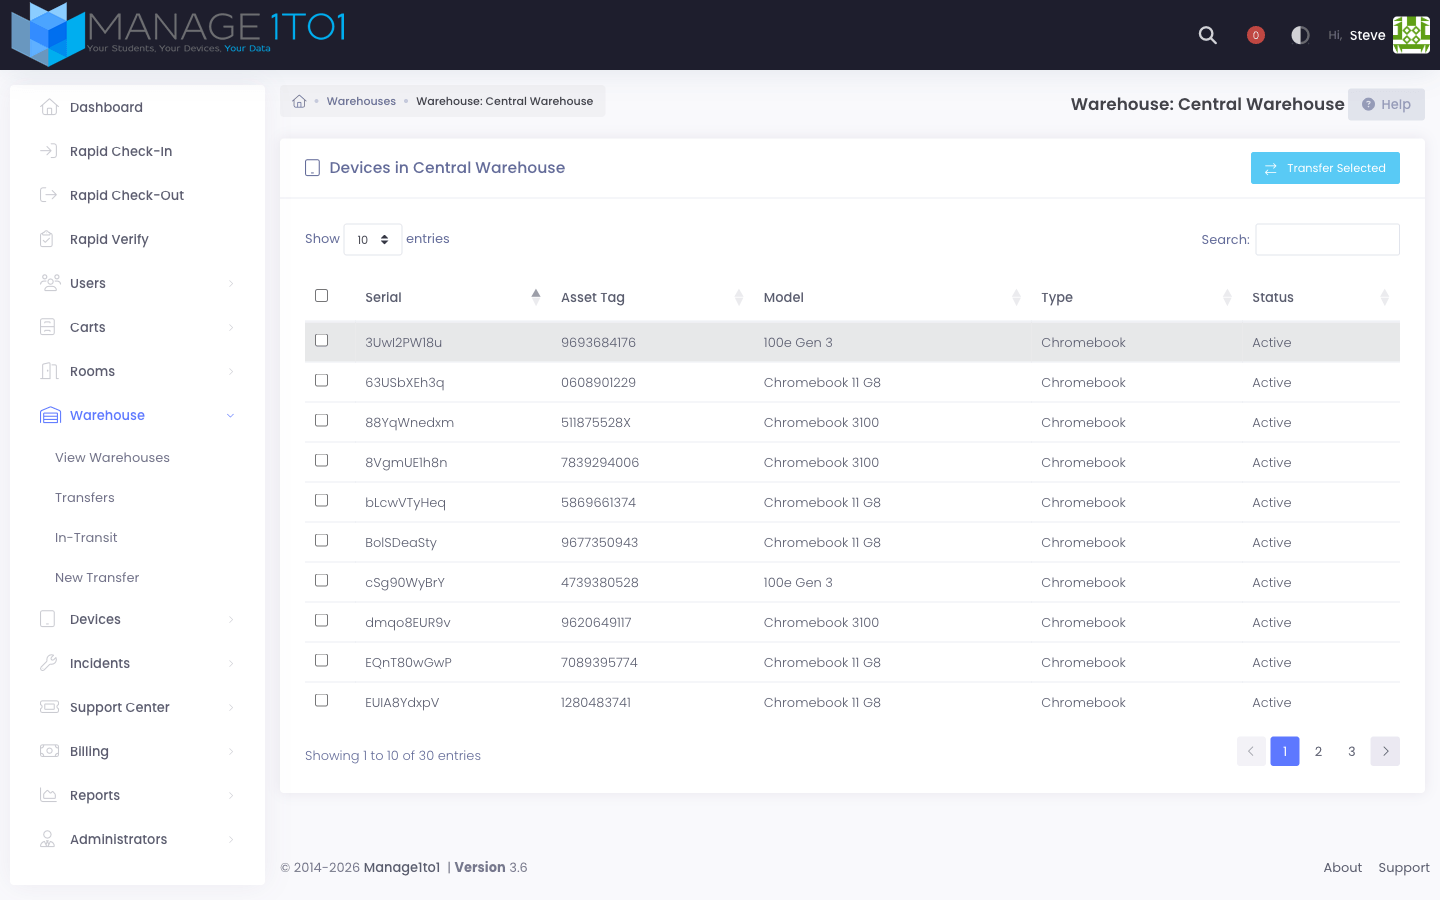
From this page you can also select devices and start a transfer straight from the toolbar. The new-transfer form opens pre-populated with those device identifiers and this warehouse as the source.
Archive a Warehouse
When a warehouse is retired — a storage room that closed, a staging location you only used for one rollout — you can archive it instead of leaving it cluttering every transfer picker. Archiving hides the warehouse from the Warehouses list and from every building dropdown (transfer source/destination, Smart Rule scope, report scope), while keeping its full transfer history intact so past moves still show the correct location name.
To archive a warehouse, click the archive (box) icon in the Actions column and confirm:

A warehouse with devices still parked in it can be archived, but those devices stay where they are — archive is about hiding the location from pickers, not moving inventory. Transfer any remaining devices out first if you want the warehouse to empty.
To see archived warehouses, click Show Archived in the toolbar. Archived rows are dimmed and carry an Archived badge:

Restore a Warehouse
Archiving is fully reversible. With Show Archived active, click the green restore icon on an archived row and confirm. The warehouse becomes active again and reappears in the list and in every building picker. Both archive and restore are recorded in the Activity Log.
Where Warehouses Don't Appear
By design, warehouses are excluded from places that wouldn't make sense:
- Cart Home Building — carts always live at a school.
- Lease check-out destination — devices are checked out to a person at a school, never at a warehouse.
- User profile building — students and staff can't be assigned to a warehouse.
- GRADUATED bucket — never selectable as a transfer endpoint.
Where warehouses do appear (transfer source/destination, Smart Rule scope, scheduled-report scope, parts location picker), they're grouped under a Warehouses optgroup so the operator can tell at a glance which entries are schools and which are warehouses.
Transferring Devices
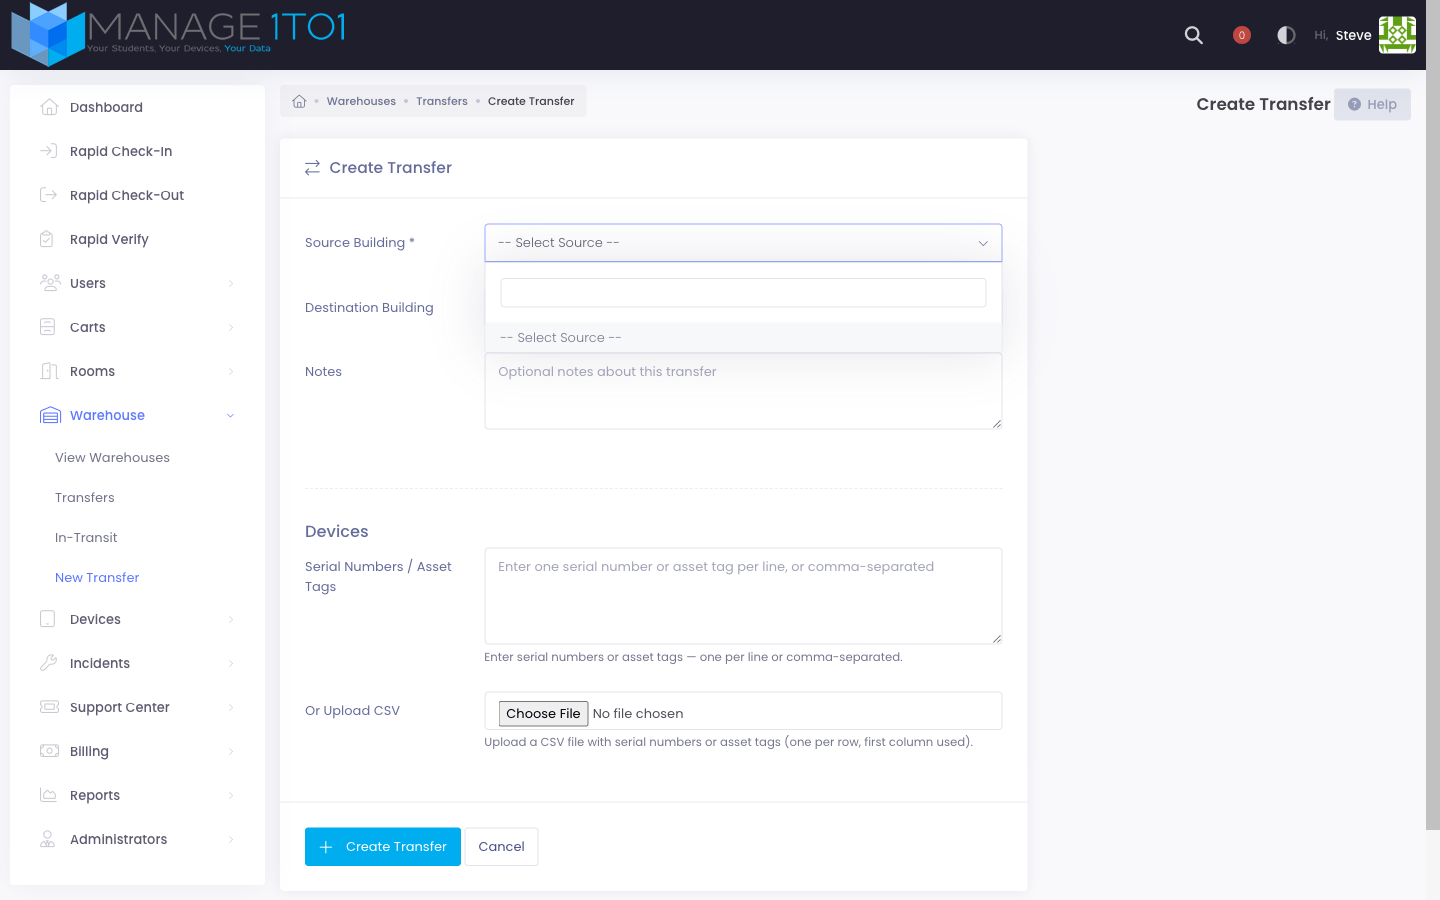
Click New Transfer from the Warehouses page or from Reports → Warehouse Transfers. The form lets you pick a source and destination building, the transfer mode, optional notes, and the device list (either pasted serials/asset tags or a CSV upload).
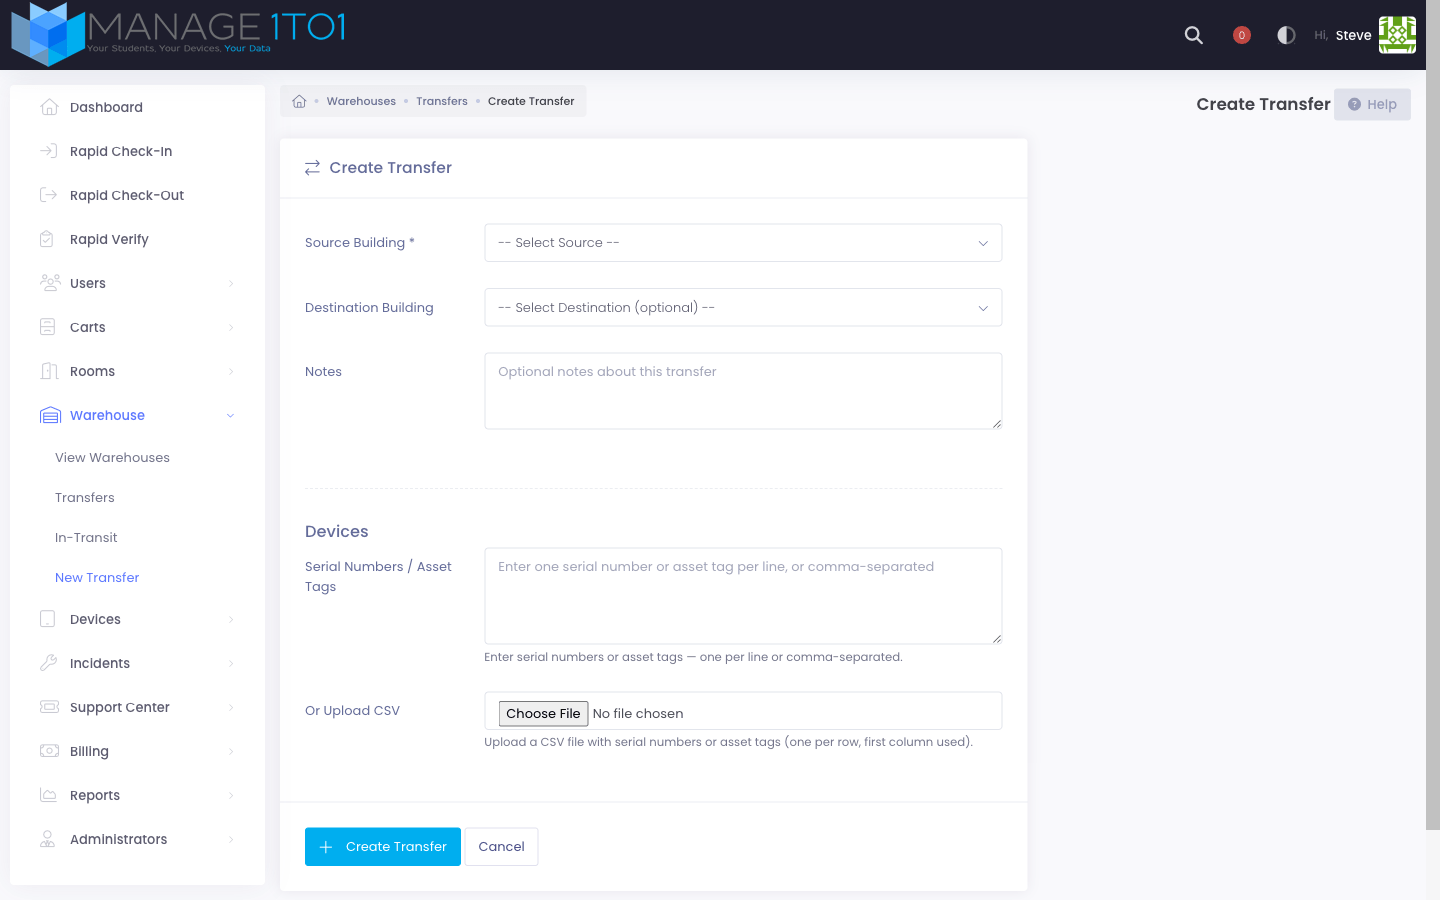
See the Transferring Devices guide for the full step-by-step walkthrough.
Receiving a Transfer
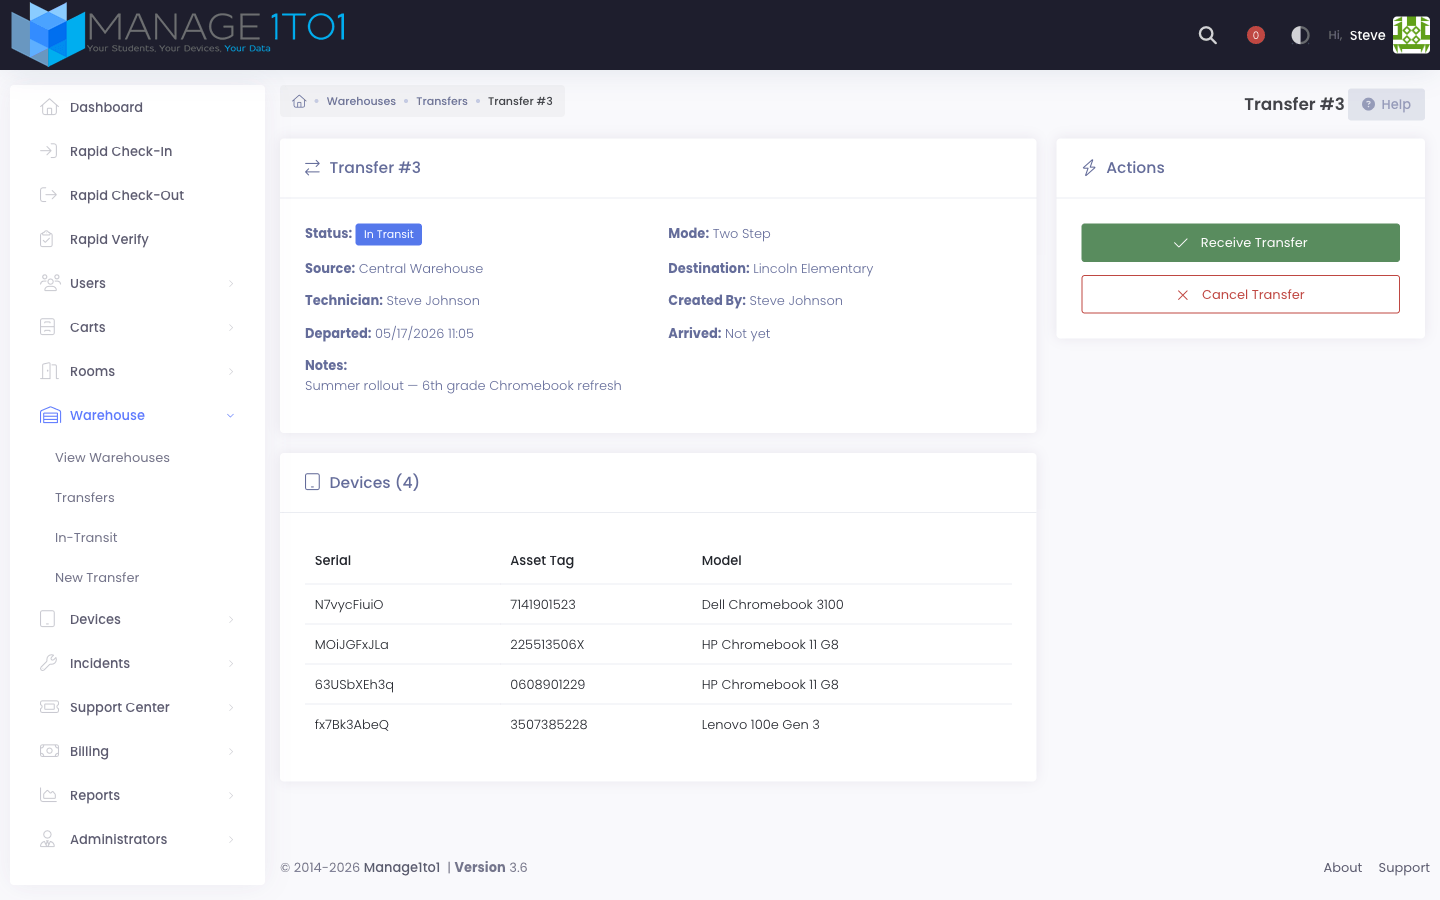
A two-step transfer needs someone on the destination side to confirm receipt. Open the transfer detail page from the In-Transit list (or the History list) and click Receive Transfer in the Actions card.
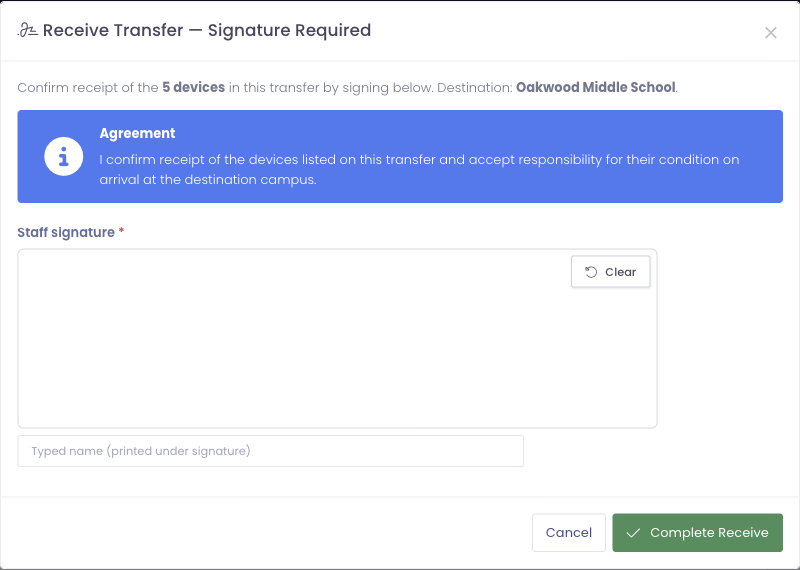
If you enabled Receipt Signature on the Warehouse settings tab, the Receive Transfer button is labeled Receive & Sign, and clicking it opens a modal with a signature pad — the receiving technician signs to confirm the devices arrived as listed, types their name under the pad, and clicks Complete Receive:
Once received (signed or not, depending on your policy), every device on the manifest is moved to the destination building and the Arrived timestamp is stamped:
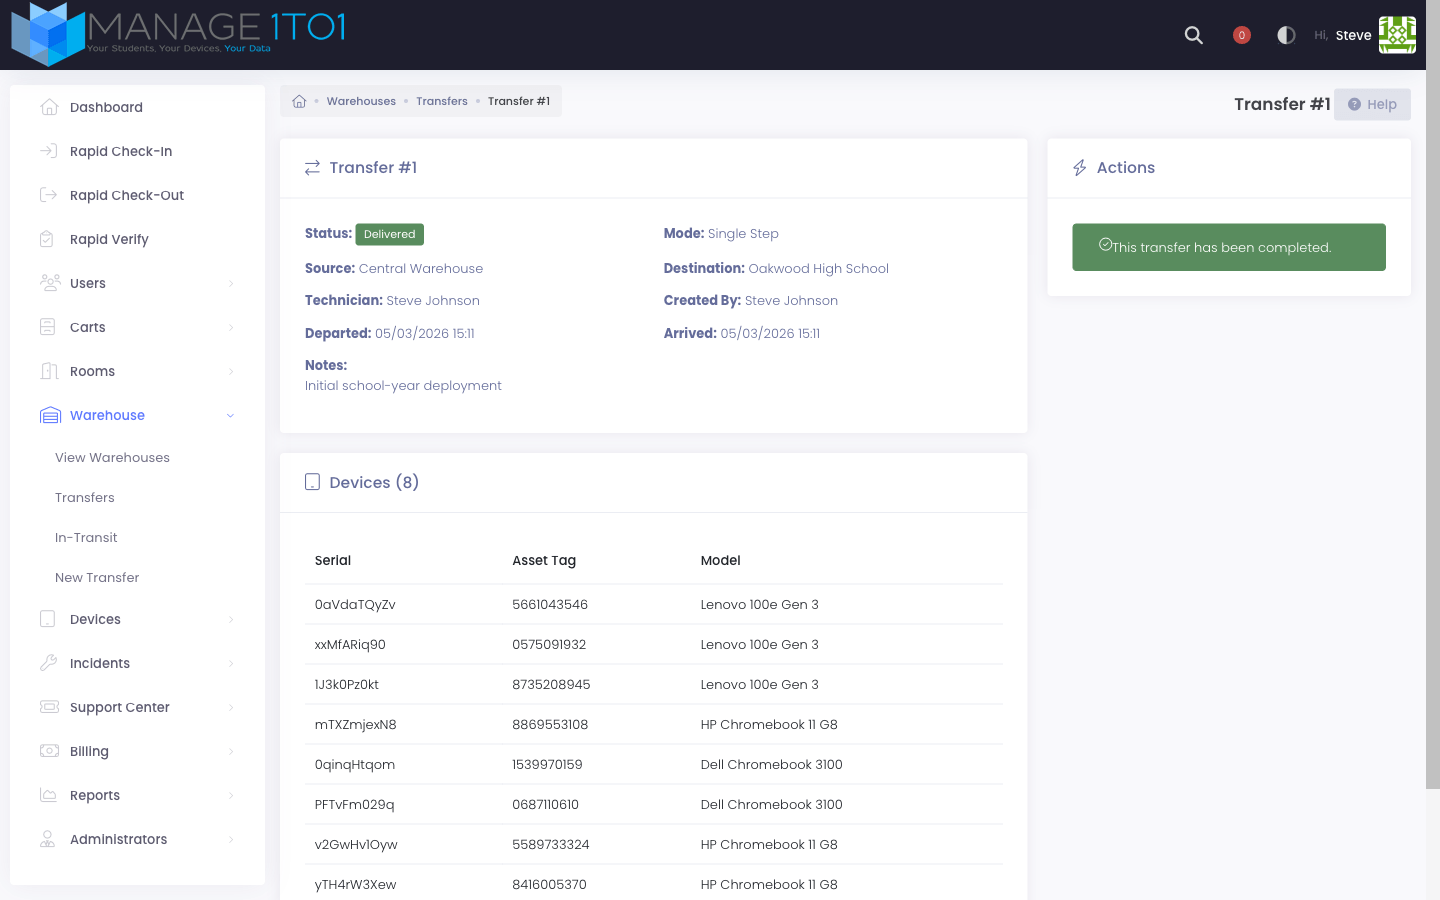
When a receipt was signed, the delivered transfer keeps the signature on file. A Signatures panel on the transfer detail lists each captured signature — the signer role, their typed name, the date and time signed, and the IP address it was signed from. Click a thumbnail to view the signature full size:

See the Receiving Transfers guide for the full walkthrough.
In-Transit Watchlist
The Warehouse → In-Transit page groups every two-step transfer currently between buildings by technician. Use this when you need to know "who's holding what right now, and where is it going?"
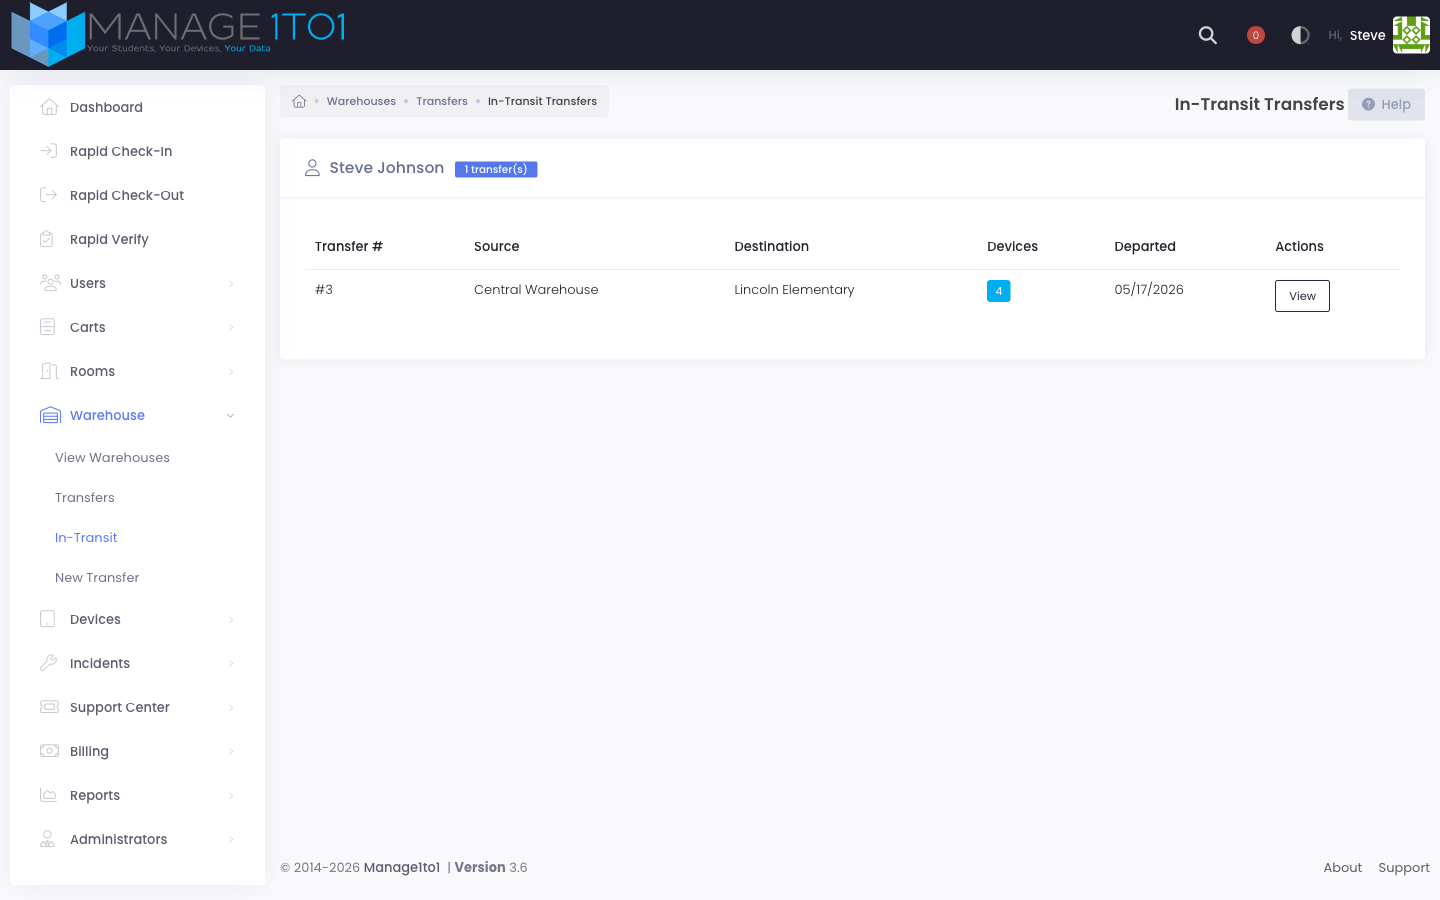
The In-Transit Reminder cron (configured under Settings → Inventory Settings → Warehouse) emails technicians who've been sitting on a transfer longer than the configured threshold. Default is 48 hours.
Transfer History
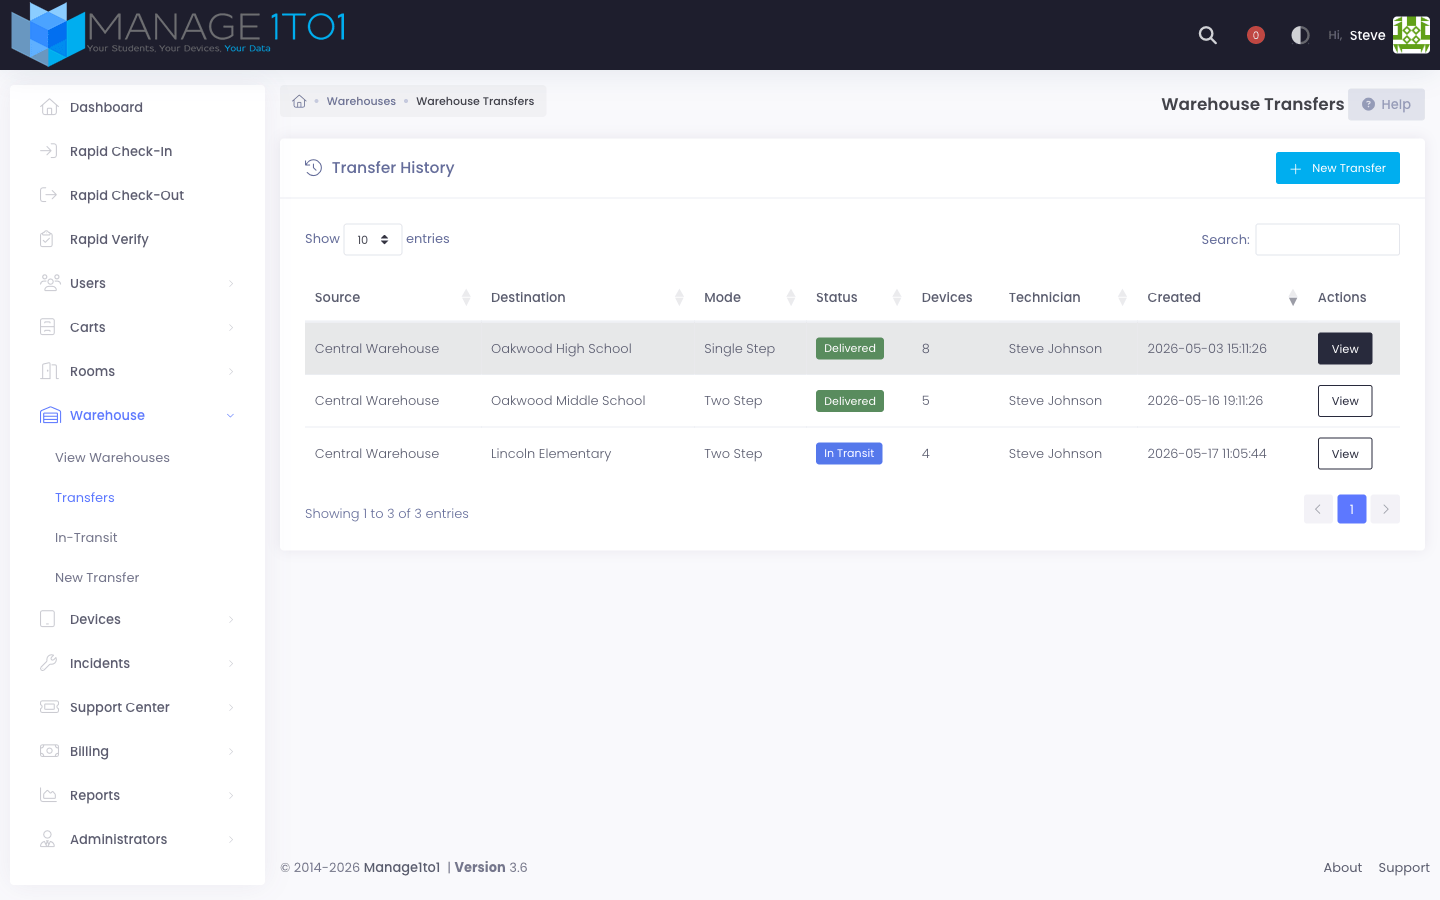
The Warehouse → Transfers page is a full DataTable of every transfer ever created — pending, in transit, delivered, or cancelled. Filter by status, search by source/destination, or jump straight to a transfer's detail page.
Smart Rules Integration
The Smart Rules engine knows about warehouse-type buildings, so you can automate any rule that watches a device's location or status.
The most common example (and the one the engine seeds out of the box) is Warehouse → In Storage: whenever a device's location changes to a warehouse building, its status flips to In Storage automatically. Build it under Settings → Smart Rules:
- Target: Devices
- Trigger: Only on update
- Conditions — All of these: Device location is Central Warehouse (Warehouse)
- Actions: Set device status → In Storage
The same pattern works for the inverse: status is Sent for Repair → Set device location → Off-Site Warehouse.
Reports
Two warehouse reports live under the global Reports menu:
- Warehouse Inventory — devices currently in each warehouse, broken down by type and status.
- Warehouse Transfers — historical transfer log with CSV export. Includes transit duration so you can spot patterns (slow shipments, frequent cancellations, etc.).
Permissions
Two permissions gate the feature:
- View Warehouse — see the warehouse pages and reports.
- Manage Warehouse — create, dispatch, receive, and cancel transfers; create and edit warehouses.
Both default to roles that already have View Device. Adjust under Administrators → Manage Roles.