Storage Locations & Cycle Counts
A warehouse is rarely one big room. Storage locations let you map your warehouse to the exact shelf, bay, or bin where a device lives, give each spot a short scannable code, store devices there, and periodically count a location to make sure what's on the shelf matches what the system thinks is there.
Storage locations live under the warehouse feature. If you don't see the options below, enable the warehouse module and feature under Settings → Modules and Settings → Inventory Settings → Warehouse.
Model Your Warehouse
Open Settings → Inventory Settings → Warehouse and find the Storage Locations panel.
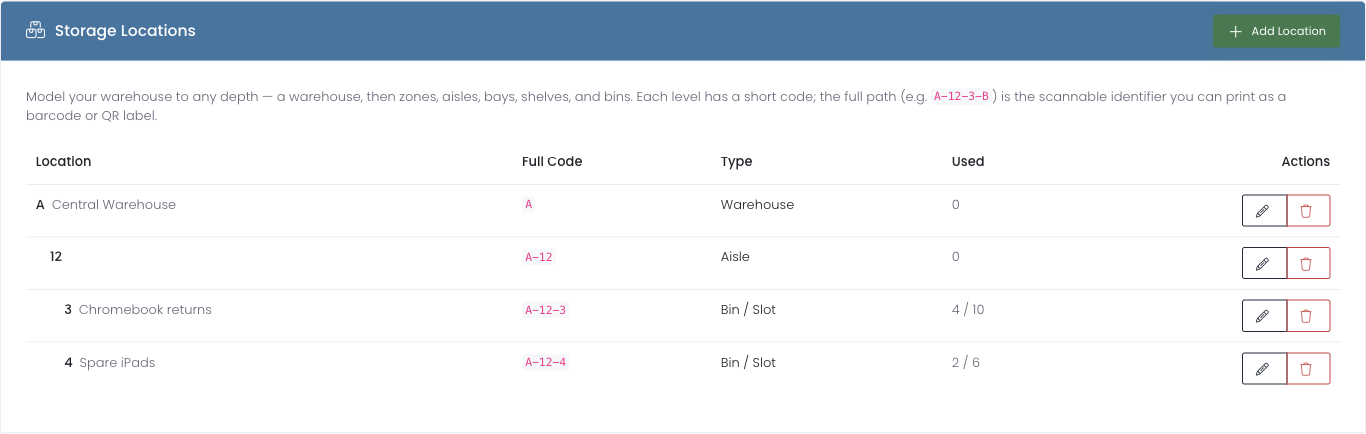
Warehouses come in all shapes and sizes, so there's no fixed set of levels. You build the structure that matches your space: a warehouse, then zones, aisles, bays, shelves, and bins, or any subset of those. Nesting is up to you.
Select Add Location to create one.
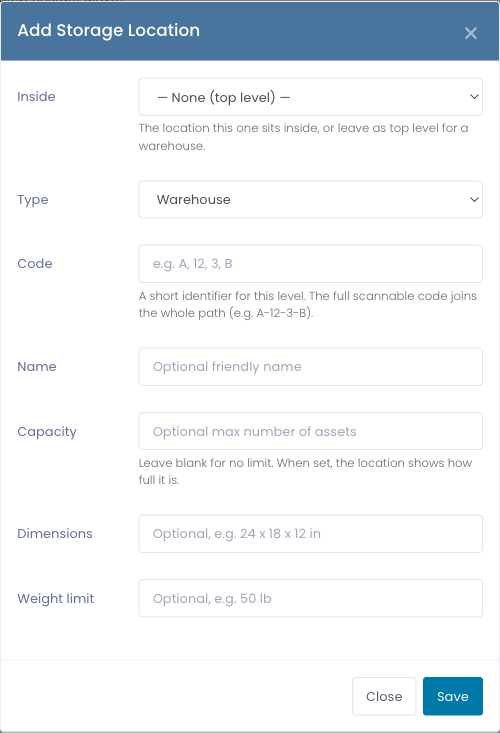
- Parent location — the spot this one sits inside. Leave it blank for a top-level location (like the warehouse itself).
- Type — a descriptive label (Zone, Aisle, Bay, Shelf, Bin, or Custom). It's just for readability; the structure comes from how you nest locations.
- Code — this level's short identifier, like
A,12, orB. Codes must be unique among locations that share the same parent. - Name — an optional friendly name.
Each location's full code is the path of codes from the top down, joined with dashes. A bin nested under aisle A, bay 12, shelf 3 becomes A-12-3-B. That full code is the scannable identifier you can print as a barcode or QR label and stick on the shelf.
Capacity (Optional)
When you add or edit a location you can set an optional capacity — the maximum number of devices that spot holds — plus free-text dimensions and a maximum weight for reference. Once a location is full, it shows a Full badge and the app stops you from storing more devices there until space frees up.
Store a Device in a Location
From any device's profile, choose Store in Location and pick the spot.

The picker shows each location's full code and, where a capacity is set, how full it is. Full locations are greyed out. Storing a device records it in that spot until it's checked out or moved elsewhere.
See What's in the Warehouse at a Glance
Add the Warehouse Storage widget to a dashboard (Add Widget → Inventory → Warehouse Storage) for a running total of everything currently stored, plus the busiest locations.

Cycle Counts
A cycle count reconciles what the system believes is stored in a location against what's physically on the shelf, so you catch devices that walked off or ended up in the wrong bin without shutting down the whole warehouse for a full audit.
Start a Count
In the Cycle Counts panel on the Warehouse tab, choose Start Cycle Count, pick the location, and decide whether to include everything nested under it (count a whole aisle in one pass instead of a single bin).
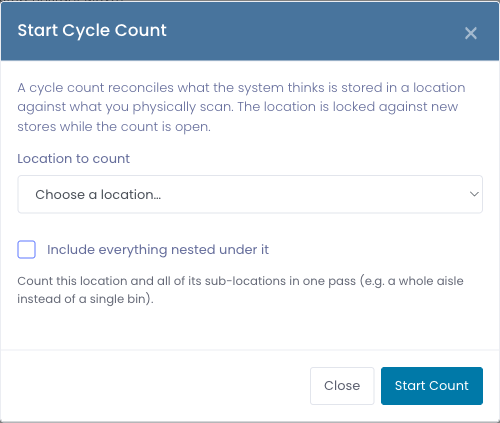
Starting a count locks that location so devices can't be stored into it mid-count. That keeps the count accurate. The lock lifts automatically when you complete or cancel the count.
Scan and Reconcile
The count opens a scanning workspace. Scan or type each device you physically find. As you go, every device falls into one of three columns:
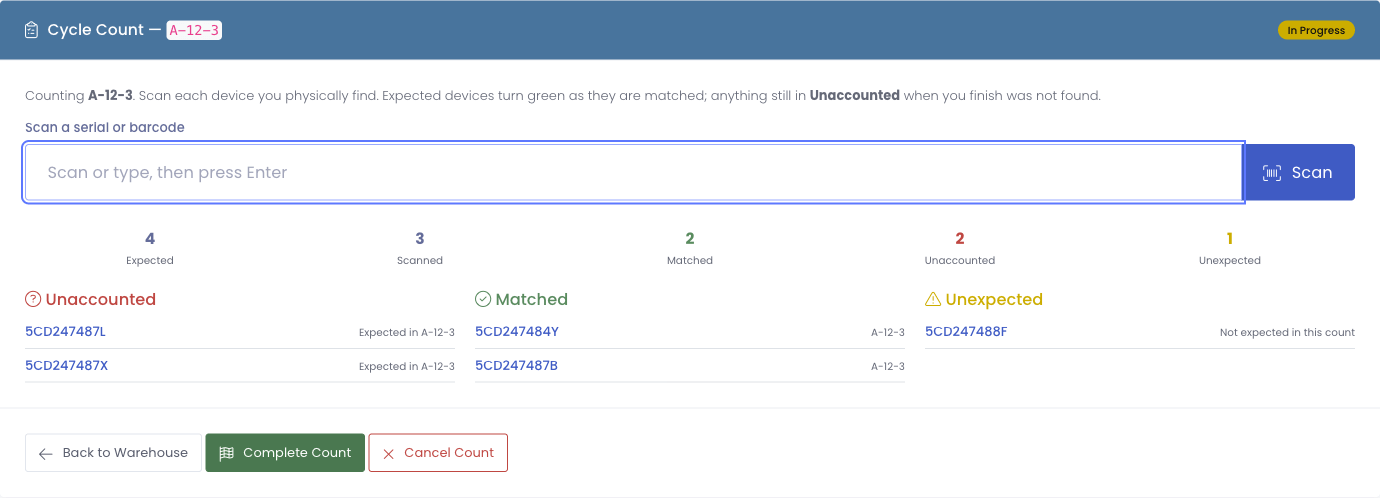
- Matched — expected here and scanned present. Everything is where it should be.
- Unaccounted — expected here but not scanned. These are the devices you couldn't find.
- Unexpected — scanned present but not expected in this location. Something ended up here that the records didn't predict.
The tally at the top updates live so you always know how many are still unaccounted for.
Finish
When you've scanned everything you can find, choose Complete Count. Anything still unaccounted for stays flagged so you can follow up, and the location unlocks. If you need to abandon the count, Cancel Count closes it without recording anything and unlocks the location.
The Storage Locations panel can print a sheet of QR labels for your locations, so scanning a shelf during a cycle count (or when storing a device) is as fast as pointing a scanner at the tag.