
Manage1to1 can connect to email accounts using different service providers such as POP3, IMAP, and Google®. When choosing Google, the connection is made through OAuth2 authentication, which adds an extra layer of security beyond a standard username and password.
Set Up Email Importing with OAuth2 and Google
To configure email importing with Google, you’ll first need to create an app in the Google Cloud Console, generate a client ID, and then connect Gmail within Manage1to1.
1. Create Your Google Application
- Open the Google Cloud console. If this is your first time, you’ll be prompted to select your country and accept Google’s Terms of Service.
- Navigate to APIs and Services >> Credentials.
- Create a new project. In the top-right corner, click Create Project, enter a project name, choose a location, and then click Create.
- Create credentials. Click Create Credentials and select OAuth client ID from the menu.
- Set up the consent screen. Click Configure Consent Screen to begin configuring the OAuth consent settings.
- Choose a user type. Select External for the User Type, then click Create. This setting allows anyone to use the generated client ID after going through Google’s verification process. However, if the client ID will only be used with Manage1to1, the verification step is not required.
- Complete the OAuth consent screen. Fill in the required details, keep the default scopes, and be sure to add your Manage1to1 domain (yourschool.manage1to1.com) to the list of Authorized domains.
- Click Save.
2. Generate the client ID
- In the Google Cloud Console left sidebar, click Credentials.
- Select Create Credentials, then choose OAuth client ID again.
- For Application Type, select Web Application.
- Enter a name for your application.
- Under Authorized redirect URIs, click Add URI.
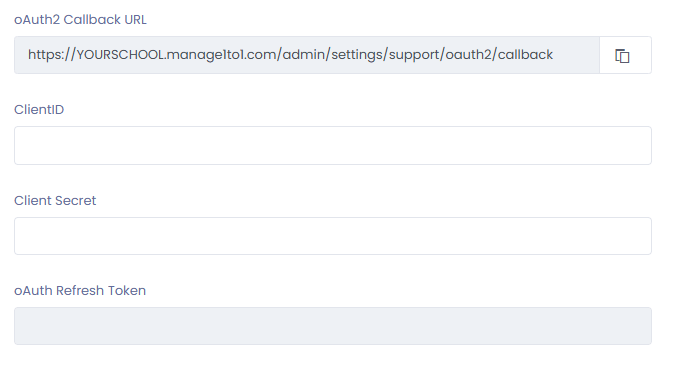
- Enter the OAuth2 Callback URL that displays in Settings >> Help Desk >> Help Desk Department
- Finish creating the client. Click Create. A confirmation screen will appear showing your Client ID and Client Secret. Keep these handy, as you’ll need them in the next steps.
3. Set up Gmail in Manage1to1
- Go to Settings >> Help Desk >> Help Desk Department
- Configure your department. Create a new department and fill out the required information in the top section. If you already have a department set up, click Edit instead.
- In the Mail Importing Configuration section, choose Google as the service provider. The system will automatically populate the hostname as pop.gmail.com.
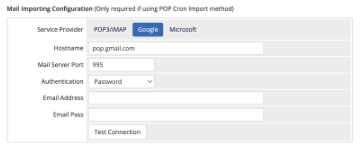
- For Authentication, select OAuth2. This will display several additional fields.
- In Email Address, enter the Gmail account you linked when creating your application.
- Copy and paste the Client ID and Client Secret from the Google Cloud Console into their respective fields. You can find these either in the confirmation message shown when the client was created or by navigating to Credentials and clicking the edit icon for the correct OAuth 2.0 Client ID.
- At the bottom of the page in Manage1to1, click Authorize. At this stage, the OAuth Refresh Token field should still be empty.
- When the Choose an account screen appears, pick the same Google account you used to create the application.
Note: If you have multiple departments with different email addresses, each address must be authorized individually. This means a separate OAuth token needs to be created under the corresponding Google account for each one. - Approve access. Follow the prompts to grant access to your Google account.
- If you see a “This app isn’t verified” warning, click Advanced, then choose Go to [your app] at the bottom of the window.
- Once access is approved, Manage1to1 will automatically generate and fill in a OAuth Refresh Token.
- Click Save Settings to finish. The system will re-test your configuration when saving, and you’ll then be ready to begin using email importing.