View Rooms
The View Rooms page is your central hub for managing all physical room locations in your school's inventory. Rooms represent classrooms, labs, offices, and other spaces where devices and carts can be assigned.
You can access this page from the main navigation under Rooms > View Rooms.
To view this page, you need the View Rooms permission assigned to your administrator role.
Understanding Rooms
Rooms represent physical locations in your schools where devices and carts are used or stored. They serve two important purposes:
- Home Location: Devices can have a room as their permanent "home" - where they belong when not checked out to a user
- Checkout Destination: Carts can be checked out to a room instead of a user, indicating they're being used in that location
This dual functionality makes rooms perfect for:
- Permanent installations - Computer labs, library stations, or classroom sets that never leave the room
- Shared spaces - Conference rooms with presentation equipment
- Rotating equipment - Carts that move between rooms on a schedule
- Location tracking - Know exactly where your devices are supposed to be
Understanding the Room List
When you open the View Rooms page, you'll see a table displaying all rooms you have permission to view. You only see rooms from buildings your administrator account can access.
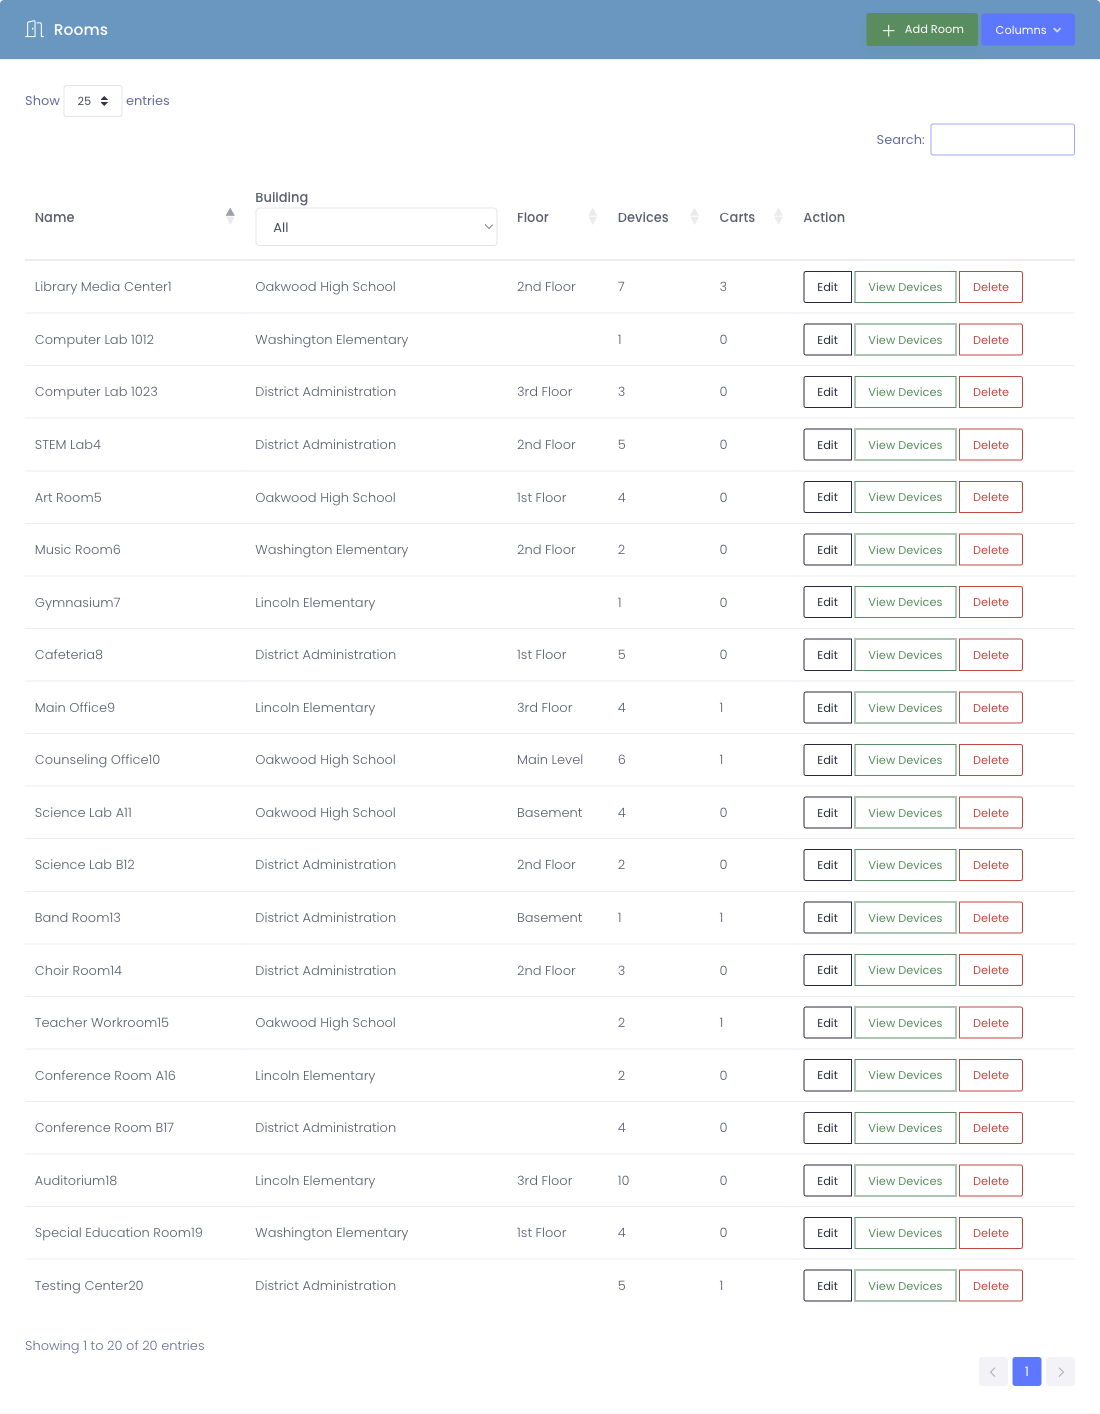
What You'll See in the Table
The room table displays these columns:
| Column | What It Shows |
|---|---|
| Name | The room's name or number (like "Room 205" or "Science Lab A") |
| Building | Which school building the room is in |
| Floor | Optional floor designation (1st Floor, 2nd Floor, etc.) |
| Devices | How many devices are currently checked out to this room |
| Carts | How many carts are assigned to this room |
| Actions | Buttons to view, edit, or delete the room |
Searching and Filtering
Quick Search
Use the search bar at the top of the table to find rooms by:
- Room name or number
- Building name
- Floor designation
As you type, the table automatically filters to show matching results.
Sorting
Click any column header to sort by that column:
- Sort by Name to find rooms alphabetically or numerically
- Sort by Building to group rooms by location
- Sort by Devices to see which rooms have the most equipment
- Sort by Carts to find rooms with cart assignments
Taking Action on Rooms
Each room row has an Actions column with buttons for managing that room.
View Room
Click the View button to open the room's detail page. This shows:
- Room information summary (name, building, floor)
- Devices currently checked out to this room
- Carts assigned to this room
- Options to check out devices or carts to the room
Edit Room
Click the Edit button to modify room details like:
- Name
- Building assignment
- Floor designation
- Comments
To edit rooms, you need the Edit Rooms permission.
Delete Room
Click the Delete button to remove a room from the system.
Before deleting a room:
- Ensure no devices are checked out to the room
- Ensure no carts are assigned to the room
- Consider whether you need the room's history for reporting
Deleting a room with active device or cart assignments is not allowed.
To delete rooms, you need the Delete Rooms permission.
Adding New Rooms
To create a new room, click the Add Room button at the top right of the page.
To add rooms, you need the Add Rooms permission.
Room Status Indicators
Device Count
The Devices column shows how many devices are currently checked out to the room:
- 0 - No devices currently assigned to this room
- 15 - 15 devices are checked out to this room
Cart Count
The Carts column shows how many carts are in this room:
- 0 - No carts assigned to this room
- 2 - 2 carts are currently in this room
Common Workflows
Scenario 1: Finding a Room with Available Equipment
A teacher needs to use a room with devices for a class:
- Open the View Rooms page
- Sort by Devices to see which rooms have equipment
- Look for rooms with device counts matching your needs
- Click View to see what devices are available
Scenario 2: Locating Equipment by Room
You need to find where certain devices are located:
- Search for the room name in the search box
- Click View to open the room details
- Review the list of devices checked out to that room
- Use this information to physically locate the equipment
Scenario 3: Room Inventory Check
During inventory, verify equipment is in the correct rooms:
- Open the View Rooms page
- For each room, click View to see assigned equipment
- Physically verify the equipment matches the system
- Update assignments if equipment has moved
Tips for Using the Room List
✅ Do:
- Use clear, consistent room naming (include building if managing multiple schools)
- Include floor information to help locate rooms quickly
- Regularly verify that device/cart counts match physical reality
- Keep room records updated when rooms are renamed or repurposed
❌ Don't:
- Delete rooms that have historical checkout data
- Create duplicate room entries for the same physical space
- Forget to update room assignments when equipment moves
Understanding Permissions
Your room access is controlled by two factors:
- Building Permissions - You only see rooms from buildings you can access
- Role Permissions - Your role determines what actions you can perform
Common permission combinations:
- View Rooms only - See room list, but can't modify anything
- View + Edit Rooms - Can modify room settings
- View + Add Rooms - Can create new rooms but not modify existing ones
- Full room access - View, Add, Edit, and Delete Rooms permissions
If you need additional room permissions, contact your system administrator.
Next Steps
Now that you know how to find and view rooms, you might want to learn about:
- Adding Rooms - Create new room records
- Managing Rooms - View room details and manage assignments
- Room Assignments - Understand how devices and carts are assigned to rooms
Rooms help you track where your equipment belongs and where it's currently located. Start exploring your room inventory!