View Carts
The View Carts page is your central hub for managing all device carts in your school's inventory. Carts are collections of devices - like mobile laptop carts, iPad charging stations, or classroom device sets - that move together as a unit.
You can access this page from the main navigation under Carts > View Carts.
To view this page, you need the View Carts permission assigned to your administrator role.
Understanding Carts
Think of a cart as a container for multiple devices. Instead of checking out individual devices to each student, you check out an entire cart to a teacher or staff member. This is perfect for:
- Mobile computer labs - A cart of 30 laptops that rotates between classrooms
- Charging stations - iPad carts that students use during class periods
- Shared device sets - Chromebooks assigned to a specific teacher or department
- Loaner pools - Extra devices that substitute teachers can use
Carts help you manage groups of devices together, track which classroom has which set, and ensure devices are returned to their proper location.
Understanding the Cart List
When you open the View Carts page, you'll see a table displaying all carts you have permission to view. Like devices, you only see carts from buildings your administrator account can access.
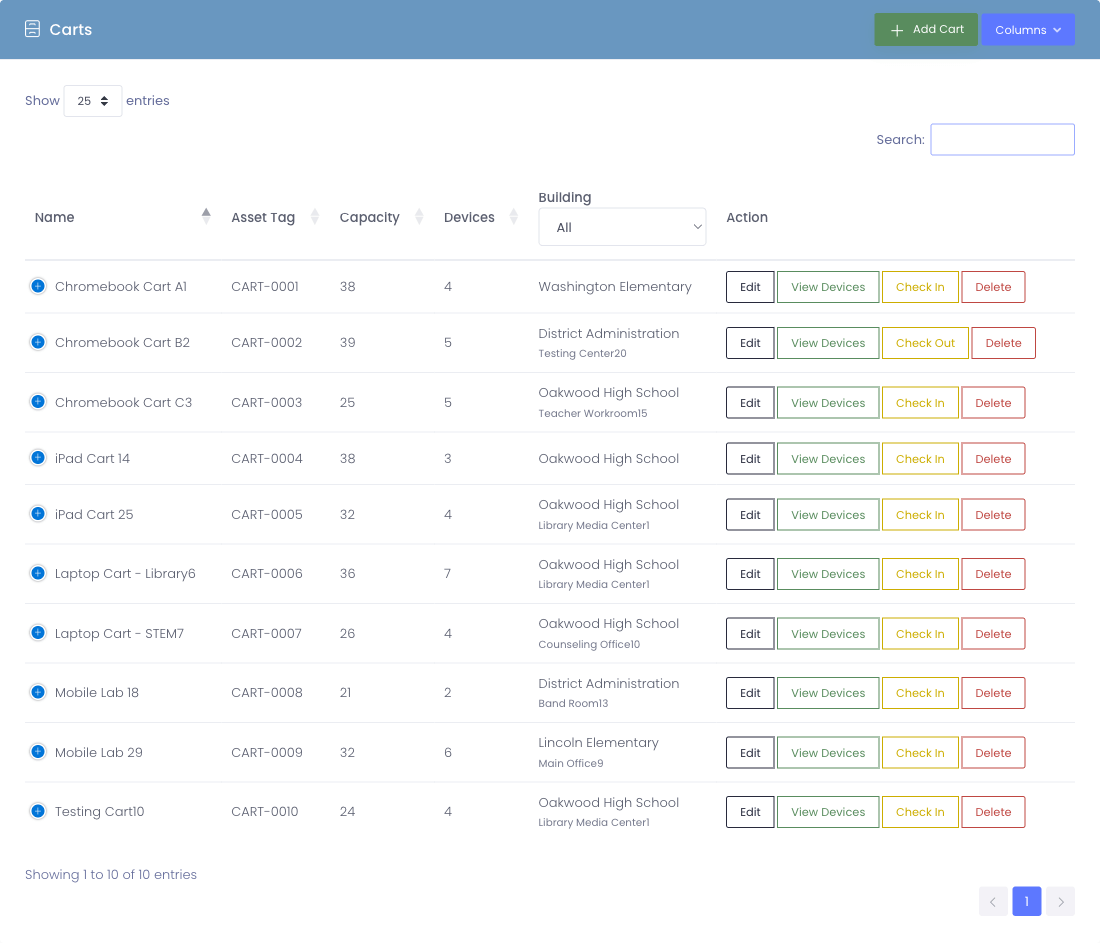
What You'll See in the Table
The cart table displays these columns by default:
| Column | What It Shows |
|---|---|
| Name | The cart's name (like "English Lab Cart A" or "Room 205 iPads") |
| Asset Tag | Optional tracking number for the physical cart itself |
| Capacity | How many devices the cart can hold (or "unlimited") |
| Devices | How many devices are currently in the cart |
| Building | Which school building the cart belongs to |
| Checked Out | Who or where currently has the cart (user, room, or "None") |
| Action | Buttons to view, edit, or delete the cart |
Cart Capacity
The Capacity column tells you the cart's maximum size, and the Devices column shows how full it currently is.
Examples:
Capacity: 30, Devices: 28- Cart can hold 30 devices, currently has 28Capacity: 0, Devices: 15- Unlimited capacity cart with 15 devicesCapacity: 20, Devices: 20- Cart is full (no more devices can be added)
When a cart reaches capacity, the system prevents adding more devices until you remove one or increase the capacity limit.
Checkout Status
The Checked Out column shows who or where currently has the cart:
- None - Cart is available, not checked out
- Smith, John - Checked out to a specific user (teacher or staff member)
- Room 205 - Checked out to a specific room location
When a cart is checked out, all devices in it are considered assigned to that person or location.
Searching and Filtering
Quick Search
Use the search bar at the top of the table to find carts by:
- Cart name
- Asset tag
- Building name
- Who it's checked out to
As you type, the table automatically filters to show matching results.
Sorting
Click any column header to sort by that column:
- Sort by Name to find carts alphabetically
- Sort by Devices to see which carts are fullest
- Sort by Building to group carts by location
- Sort by Checked Out to see available vs. assigned carts
Customizing Columns
Just like the device list, you can show or hide columns:
- Click the Columns button above the table
- Check or uncheck column names to show or hide them
- The table updates immediately
The system remembers your column preferences between visits.
Taking Action on Carts
Each cart row has an Action column with buttons for managing that cart.
View Devices
Click the View or Devices button to open the cart's device management page. This shows:
- All devices currently in the cart
- Cart summary and checkout status
- Options to add or remove devices
- Ability to check out the entire cart
Learn more about managing cart devices →
Edit Cart
Click the Edit button to modify cart details like:
- Name
- Asset tag
- Capacity settings
- Building assignment
- Slot tracking options
To edit carts, you need the Edit Carts permission.
Delete Cart
Click the Delete button to remove a cart from the system.
Deleting a cart is permanent and irreversible. Before deleting:
- Remove all devices from the cart first
- Make sure the cart isn't checked out to anyone
- Only delete carts that were created by mistake
If a cart is no longer in use, it's better to remove its devices and leave the cart record rather than delete it.
To delete carts, you need the Delete Carts permission.
Adding New Carts
To create a new cart, click the Add Cart button at the top right of the page.
To add carts, you need the Add Carts permission.
Common Workflows
Scenario 1: Finding an Available Cart
A teacher needs a cart of laptops for tomorrow:
- Open the View Carts page
- Sort by Checked Out to group available carts together
- Look for carts showing "None" in the Checked Out column
- Check the Devices column to see if it has enough devices
- Click View to see the cart details and check it out
Scenario 2: Locating a Missing Cart
You can't find a physical cart and need to know who has it:
- Search for the cart name in the search box
- Check the Checked Out column to see who currently has it
- Contact that person to locate the physical cart
- If it shows "None" but you know someone has it, they forgot to check it out
Scenario 3: Inventory Check
During end-of-year inventory, verify all carts are accounted for:
- Open the View Carts page
- Review each cart's Devices count
- Physically verify the carts match the system count
- Check in any carts showing as checked out but physically returned
- Update device counts if mismatches are found
Scenario 4: Managing Multiple Buildings
If you manage carts across several schools:
- Use the search box to filter by building name
- Or sort by Building column to group carts by location
- Review checkout status for each building's carts
- Ensure carts aren't incorrectly assigned to the wrong building
Tips for Using the Cart List
✅ Do:
- Regularly check that cart device counts match physical inventory
- Review checkout status to ensure carts aren't "ghost checked out"
- Use clear, descriptive cart names (include room number or department)
- Keep capacity settings accurate for cart management
❌ Don't:
- Delete carts that have historical checkout data - you'll lose that history
- Forget to check in carts at end of day/year - it affects availability
- Leave old, unused carts with outdated device counts
- Mix up cart names - be specific and consistent
Understanding Permissions
Your cart access is controlled by two factors:
- Building Permissions - You only see carts from buildings you can access
- Role Permissions - Your role determines what actions you can perform
Common permission combinations:
- View Carts only - See cart list, but can't modify anything
- View + Edit Carts - Can modify cart settings and manage devices
- View + Add Carts - Can create new carts but not modify existing ones
- Full cart access - View, Add, Edit, and Delete Carts permissions
If you need additional cart permissions, contact your system administrator.
Next Steps
Now that you know how to find and view carts, you might want to learn about:
- Adding Carts - Create new cart records
- Managing Cart Devices - Add/remove devices from carts
- Checking Out Carts - Assign carts to users or rooms
- Room Assignments - Learn about checking out carts to rooms
Carts make managing shared device collections much easier than tracking individual device assignments. Start exploring your cart inventory!