Managing Parts
The Parts Catalog is the foundation of your inventory system. This is where you create and maintain records for every replacement part you stock - from screens and batteries to keyboards and charging cables.
You can access the parts catalog from Incidents > Parts Inventory.
To add, edit, or delete parts, you need the Manage Parts permission assigned to your administrator role.
Understanding the Parts List
When you open Incidents > Parts Inventory, you'll see a table displaying all parts in your catalog. This is your master list of everything you track.
What You'll See in the Table
| Column | What It Shows |
|---|---|
| Name | Descriptive name of the part (clickable to view details) |
| SKU | Part number or manufacturer SKU |
| Cost | Your internal cost to acquire this part |
| Sale Price | Price charged to customers (from linked Invoice Item) |
| Quantity | Total inventory across all locations |
| Reorder Level | Threshold that triggers low stock alerts |
| Status | Active or Inactive |
| Action | Buttons to edit or delete the part |
Searching and Filtering
Use the search box at the top of the table to find parts by:
- Part name
- SKU/part number
- Any visible column data
As you type, the table automatically filters to show matching results.
Adding a New Part
To add a part to your catalog:
- Go to
Incidents > Parts Inventory - Click the Add Part button in the header
- Fill out the part details (see fields below)
- Click Save
After saving, you'll be taken to the part's detail page where you can add inventory.
Part Fields Explained
Name *
The descriptive name for this part.
What to include:
- Device compatibility (iPad, Chromebook, MacBook, etc.)
- Part type (screen, battery, keyboard, etc.)
- Any distinguishing characteristics (size, color, model year)
Good examples:
- "iPad 7th Gen LCD Screen Assembly"
- "Chromebook 11 G8 Keyboard - US Layout"
- "MacBook Air 13" Battery (2020)"
- "USB-C Charging Cable 6ft"
Avoid vague names:
- ❌ "Screen"
- ❌ "Battery"
- ❌ "Part"
Why this matters: Clear names help technicians quickly find the right part when working on repairs.
SKU
Optional part number or SKU for reference.
Common uses:
- Manufacturer part numbers
- Vendor catalog numbers
- Internal part codes
- UPC/barcode numbers
Examples:
- "AP-LCD-IPD7-001"
- "661-13676"
- "HP-KB-CB11G8"
Benefits:
- Easier reordering from vendors
- Cross-reference with purchase orders
- Barcode scanning support (if configured)
Description
Optional extended description of the part.
What to include:
- Compatibility notes ("Compatible with iPad 7th, 8th, 9th generation")
- Technical specifications
- Installation notes
- Vendor information
- Links to product pages
This field is for your reference - it doesn't appear on invoices or reports.
Cost *
Your internal cost to acquire this part.
What to enter:
- The price you pay to purchase or acquire this part
- Include shipping/handling if you allocate it per part
- Use decimal format (e.g., "45.99")
Why this matters:
- Tracks your actual expenses
- Calculates repair costs for reporting
- Helps determine markup for billing
- Supports cost analysis and budgeting
Important: Cost is for internal tracking only. It's not shown to customers or on invoices.
Invoice Item
Optional link to a billing Invoice Item for invoicing.
How it works:
- Create a Invoice Item in
Settings > Invoice Settings > Itemswith your desired sale price - When adding/editing a part, select that Invoice Item from the dropdown
- The part inherits the Invoice Item's price for invoicing purposes
Why link to Invoice Items:
- Enables invoicing for parts used on incidents
- Centralizes pricing (change price in one place)
- Supports different pricing tiers (if you have multiple Invoice Items)
- Connects to your billing workflow
Parts without a Invoice Item:
- Can still be tracked in inventory
- Can still be used on incidents
- Cannot be included in invoices
- Show "-" for Sale Price in the parts list
Create Invoice Items before adding parts if you plan to bill for them. This makes setup faster since you can link them immediately.
Reorder Level
The minimum quantity threshold for low stock alerts.
How it works:
- Set a number (e.g., "5")
- When total inventory drops below this number, alerts are triggered
- Set to "0" to disable alerts for this part
How to determine your reorder level:
Consider these factors:
- Lead time - How long to receive new stock?
- Usage rate - How many do you typically use per week/month?
- Buffer - Extra cushion for unexpected demand
Example calculation:
- You use 3 screens per week
- It takes 2 weeks to receive new stock
- Minimum needed: 3 × 2 = 6 screens
- With buffer: Set reorder level to 8-10
Alert types:
- Immediate - Email sent when stock drops below threshold
- Daily digest - Summary of all low stock parts sent daily
Learn more about Low Stock Alerts →
Active Status
Whether the part is currently active in your catalog.
Active parts:
- Appear in part selection dropdowns
- Can be used on incidents
- Included in inventory reports
- Trigger low stock alerts
Inactive parts:
- Hidden from selection dropdowns
- Cannot be used on new incidents
- Retain historical data
- Don't trigger alerts
When to deactivate (vs. delete):
- Part is discontinued but has usage history
- Temporarily out of stock with no reorder plans
- Replaced by a newer version
- Seasonal items not currently stocked
Visibility
Controls which administrator roles can see and use this part.
By default, every part is visible to administrators in all roles. If you want to limit a part to certain roles, turn on Restrict to specific roles and choose the roles that should have access.
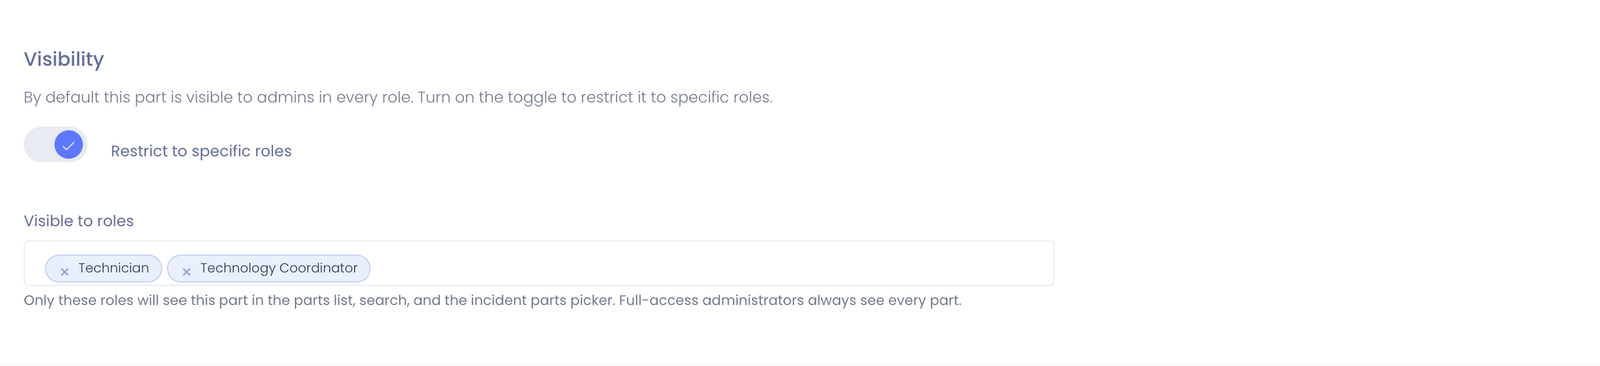
How it works:
- Restrict to specific roles off (default) - the part is visible to everyone.
- Restrict to specific roles on - only the roles you select can see the part. Administrators in other roles won't see it in the parts list, in part search, or in the parts picker when adding parts to an incident.
Where the restriction applies:
- The parts catalog list under
Incidents > Parts Inventory - Part search and the parts picker on an incident
- Opening a part's detail page directly
Good uses:
- Reserve high-value or sensitive parts (for example, storage drives or memory) for senior technicians
- Keep building-specific parts off the list for staff who never handle them
- Reduce clutter so each team sees only the parts relevant to their work
Full-access administrators (such as Technology Directors) always see every part, regardless of the restriction. The restriction only affects roles that don't already have full access.
The current visibility is shown on the part's detail page - either All roles or a badge for each role that can see it.
Viewing Part Details
Click on any part name to view its detail page.
What You'll See
Part Information:
- All fields from the part record
- Current sale price (from linked Invoice Item)
- Total quantity across all locations
- Low stock indicator (if below reorder level)
Inventory by Location:
- Breakdown of quantities at each location
- Quick view of where stock is available
- Status badges (In Stock, Low Stock, Out of Stock)
Activity History: A comprehensive log of all activity for this part, including:
- Manual inventory adjustments (with reasons)
- Parts used on incidents
- Parts returned from incidents
- Transfers between locations
The Activity History table supports:
- Pagination - Navigate through large histories
- Search - Find specific activities
- Sorting - Order by date, type, or administrator
| Column | Description |
|---|---|
| Date | When the activity occurred |
| Activity | Description of what happened |
| Location | Which storage location was affected |
| Change | Quantity change (+/-) shown in color |
| By | Administrator who performed the action |
Actions Available
From the part detail page, you can:
- Edit - Modify part information
- Adjust Inventory - Add or remove stock at a location
- Transfer - Move parts between locations
- Delete - Remove the part (if no usage history)
Editing a Part
To modify an existing part:
- Go to
Incidents > Parts Inventory - Click on the part name to view details
- Click Edit
- Update the desired fields
- Click Save
What you can change:
- Name, SKU, Description
- Cost
- Invoice Item link
- Reorder Level
- Active status
Changing a part's cost doesn't affect historical records. Past incident usage retains the cost recorded at the time of use. This preserves accurate historical reporting.
Deleting a Part
To remove a part from your catalog:
- Go to
Incidents > Parts Inventory - Find the part in the list
- Click the Delete button in the Action column
- Confirm the deletion
You cannot delete a part if:
- It has been used on any incidents
- It has inventory adjustment history
This protection prevents accidental data loss. If you need to remove a part with history, mark it as Inactive instead.
Common Workflows
Scenario 1: Setting Up a New Part Type
Your district purchases new Chromebook batteries to stock:
- Go to
Incidents > Parts Inventory - Click Add Part
- Fill out:
- Name: "Chromebook 11 G8 Replacement Battery"
- SKU: "HP-BAT-CB11G8"
- Description: "Compatible with HP Chromebook 11 G8 EE. 3-cell 47.36Wh."
- Cost: "42.00"
- Invoice Item: Select "Chromebook Battery Replacement" (if billing)
- Reorder Level: "5"
- Click Save
- Click Adjust Inventory to add initial stock
- Select location, enter quantity, reason: "Initial stock from PO#12345"
Scenario 2: Discontinuing an Old Part
You no longer stock iPad 5th generation screens:
- Find "iPad 5th Gen Screen Assembly" in parts list
- Click to view details
- Click Edit
- Uncheck Active
- Click Save
The part remains in historical records but won't appear in selection dropdowns.
Scenario 3: Updating Pricing
Your vendor increased prices on screen assemblies:
- Go to
Settings > Invoice Settings > Items - Find the "Screen Replacement" invoice item
- Update the price from $89.00 to $99.00
- Save
All parts linked to this Invoice Item automatically use the new price for future invoices. (Historical invoices retain the original price.)
Tips for Managing Parts
✅ Do:
- Use descriptive, searchable names
- Include device compatibility in names
- Set realistic reorder levels based on usage
- Link to Invoice Items if you plan to bill
- Keep SKUs consistent with your vendors
- Deactivate rather than delete parts with history
- Review parts list periodically for accuracy
❌ Don't:
- Use vague names like "Screen" or "Part"
- Set reorder levels too low (risk running out)
- Set reorder levels too high (unnecessary alerts)
- Delete parts with usage history
- Forget to update costs when vendor prices change
- Create duplicate parts for the same component
Common Questions
Q: Can I have multiple parts for the same component? Yes. You might have "iPad Screen - OEM" and "iPad Screen - Third Party" as separate parts with different costs. This is useful for tracking quality tiers or vendor options.
Q: What happens to incidents if I delete a part? You cannot delete parts that have been used on incidents. The system prevents this to maintain data integrity.
Q: Can I change a part's name after it's been used on incidents? Yes. The new name will appear everywhere, including historical incident records. Only the name changes - the record linkage remains intact.
Q: Do I need a Invoice Item for every part? No. Only link Invoice Items to parts you want to invoice. Internal parts (screws, thermal paste, etc.) can exist without Invoice Items.
Q: How do I handle parts with multiple compatible devices? Option 1: Create one part with compatibility notes in the description. Option 2: Create separate parts for each device type. Choose based on whether you need separate inventory tracking.
Next Steps
- Parts Locations - Set up where parts are stored
- Inventory Adjustments - Add stock to your parts
- Using Parts on Incidents - Track parts in repairs
- Low Stock Alerts - Configure reorder notifications
- Parts Inventory Reports - Export inventory data for analysis and audits
A well-organized parts catalog makes inventory management and repair tracking significantly easier!