User Information Tab
The User Information tab is the operational home for an individual user. Think of it as the dashboard for the person - showing who they are, what they currently have, and any active issues requiring attention - all in one place.
This is the tab you'll use most often for day-to-day operations like checking out devices, verifying AUP status, reviewing current incidents, or confirming guardian information.
To view the User Information tab, you need the View Users permission assigned to your role. Additional actions (like checking out devices) may require specific permissions (e.g., Checkout Device).
Understanding the User Information Tab
Think of this tab as the front page of a person's technology file - the current snapshot that shows what's happening right now with this user.
What this tab shows:
- User's basic information (name, ID, grade, building)
- Quick action buttons (checkout device, edit user, print snapshot)
- Current device checkouts (what they have right now)
- Current incidents (active issues not yet resolved)
- Guardian/parent contact information
- AUP and fee compliance status
- Year-to-date metrics
What this tab doesn't show:
- Historical checkouts (see Checkout History tab)
- Closed incidents (see Incident History tab)
- Payment history (see Billing History tab)
- Past support tickets (see Ticket History tab)
Why this tab is important:
- Single source of current state - Everything you need for most interactions
- Quick actions - Common tasks available without navigating elsewhere
- Informed decisions - See compliance status and issues before taking action
- Efficient service - Help users at the counter without switching screens
Tab Layout and Sections
The User Information tab is organized into distinct sections, each serving a specific purpose:
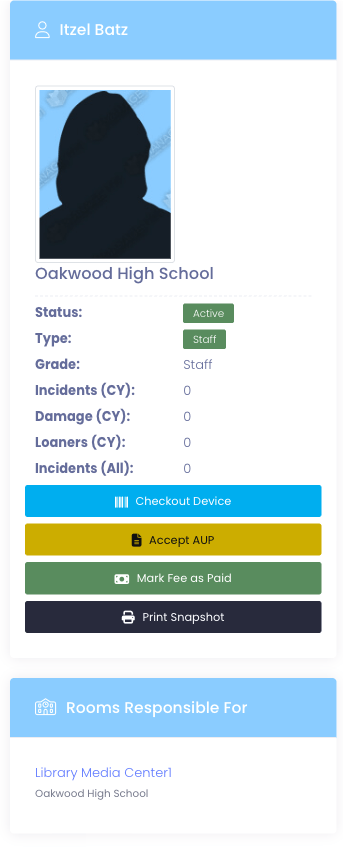
1. User Summary Panel (Left Side)
This panel shows the user's identity, status, and quick metrics.
What's included:
- Profile photo (if uploaded)
- Name - Full name displayed
- User Type - Student or Staff
- Status - Active or Inactive
- Building - School/location assignment
- Grade - Grade level (for students)
- Local ID Number - Student/staff ID from SIS
- AUP Signed - Whether Acceptable Use Policy is signed
- Fee Paid - Whether technology fee has been paid
- YTD Incidents - Number of incidents this school year
- YTD Checkouts - Number of device checkouts this school year
Quick Action Buttons:
- Checkout Device - Assign a device to this user
- Add Incident - Create a new incident report
- Edit User - Modify user information
- Print Snapshot - Generate printable summary
- View Full History - Links to other profile tabs
Rooms Responsible For (Staff Only)
If the user is staff and is currently responsible for one or more rooms, a Rooms Responsible For card appears just below the User Summary Panel. It lists the rooms this person manages right now — each room links to its detail page, with the building shown underneath.
This card is hidden for students and for staff who don't currently have any room assignments, so it never adds visual noise to profiles where it isn't relevant.
The card only shows current responsibility. To see the full history (past rooms, when responsibility started and ended, who recorded each assignment), open the Checkout History Tab — the timeline appears in the Room Responsibility History section there.
2. User Information Details Panel (Right Side - Top)
This panel contains the complete account details and identification information.
Basic Information:
- First Name, Middle Name, Last Name
- Preferred Name (if different from legal name)
- Email Address
- Username (for portal login)
- User Type (Student/Staff)
- Status (Active/Inactive)
Identification:
- Local ID Number (district student/staff ID)
- State ID Number (if applicable)
- Custom ID fields (if configured)
Academic/Organizational:
- Building (school/location)
- Grade Level
- Homeroom (if applicable)
- Department (for staff)
- Custom fields (district-specific)
Technology & Compliance:
- AUP Signed Date
- Device Fee Paid Status
- Restricted Plan (if enabled and configured)
Contact Information:
- Phone Number
- Address fields (street, city, state, ZIP)
Actions Available:
- Edit button to modify any of these fields (requires Edit Users permission)
3. Current Checkouts Section
Shows all devices currently assigned to this user.
What's displayed:
| Column | What It Shows |
|---|---|
| Device Type | Type of device (Chromebook, iPad, Laptop, etc.) |
| Serial Number | Device serial number |
| Asset Tag | District asset tag number |
| Checkout Date | When the device was checked out |
| Is Loaner | Whether this is a temporary loaner device |
| Actions | Check In, View Device Profile, Add Incident |
Key features:
- Empty state - If no devices checked out, displays "No current checkouts"
- Loaner indicator - Loaners are clearly marked
- Quick actions - Check in or report incidents without leaving the page
- Device links - Click device to open its profile
What this section is for:
- Verify what device(s) a user currently has
- Check in devices when returned
- Create incidents for checked-out devices
- Identify loaner vs. assigned devices
4. Current Incidents Section
Shows all active (unresolved) incidents for this user.
What's displayed:
| Column | What It Shows |
|---|---|
| Incident # | Unique incident identifier |
| Type | Damage, Loss, Theft, etc. |
| Device | Which device the incident involves |
| Date Reported | When the incident was created |
| Status | Current incident state (Open, Under Review, etc.) |
| Actions | View Incident, Update Status, Add Note |
Key features:
- Empty state - If no active incidents, displays "No current incidents"
- Status indicators - Visual cues for incident state
- Quick access - Click incident number to open full incident profile
- Action buttons - Update or add notes inline
What this section is for:
- See active issues before checking out new devices
- Follow up on unresolved damage or loss
- Track incident status without leaving user profile
- Identify users with patterns of incidents
5. Guardians Section (Students Only)
Shows parent/guardian contact information for student users.
What's displayed:
- Guardian Name
- Relationship (Parent, Guardian, etc.)
- Email Address
- Phone Number
- Address (if different from student)
Key features:
- Multiple guardians - Can display primary and secondary contacts
- Empty state - If no guardians configured, displays "No guardian information"
- Contact links - Email addresses are clickable (mailto links)
What this section is for:
- Contact parents about incidents or billing
- Verify guardian email before sending invoices
- Confirm who to communicate with about device issues
- Identify missing contact information
Common Use Cases
Scenario 1: Checking Out a Device to a Student
A 7th grader arrives at the front desk to receive their assigned Chromebook:
- Search for student (Intelligent Search or View Users)
- Open their user profile (automatically shows User Information tab)
- Review User Summary panel:
- Verify AUP Signed: ✓ Yes
- Verify Fee Paid: ✓ Yes
- Check YTD Incidents: 0 (clean record)
- Check Current Checkouts section:
- Empty (no device currently assigned)
- Click Checkout Device button
- Scan Chromebook barcode or select from inventory
- Confirm checkout details
- Complete checkout
- Current Checkouts section now shows:
- Chromebook, Serial ABC123, Asset Tag CR-7890, Checked out today
Result: Student receives device, all compliance verified, checkout visible on profile.
Scenario 2: Student Reports Broken Screen
A student comes to the office saying their screen is cracked:
- Open student's user profile
- Review Current Checkouts section:
- Chromebook, Serial DEF456, checked out 2 months ago
- Click Add Incident button next to the device
- Create incident:
- Type: Damage
- Description: Cracked screen
- Upload photo of damage
- Set status: Under Review
- Save incident
- Current Incidents section now shows:
- New incident #1234, Type: Damage, Status: Under Review
- User Summary panel updates:
- YTD Incidents: 1
Result: Incident documented, visible on profile, ready for review and billing.
Scenario 3: Parent Questions Compliance Status
A parent calls asking why their child can't check out a device:
- Open student's user profile
- Review User Summary panel:
- AUP Signed: ✗ No
- Fee Paid: ✓ Yes
- Explain to parent: "The Acceptable Use Policy hasn't been signed yet. We need that before we can issue a device."
- Check Guardians section for parent email
- Resend AUP form to guardian email
- Once signed, student becomes eligible for checkout
Result: Quick identification of compliance issue, clear explanation to parent.
Scenario 4: Checking In Multiple Devices
A graduating senior returns all their devices at year-end:
- Open student's user profile
- Review Current Checkouts section:
- Laptop: Serial GHI789, Asset LT-4567
- Charger: Serial JKL012, Asset CH-8901
- Case: Serial MNO345, Asset CS-2345
- For each device:
- Click Check In button
- Verify device condition
- Confirm check-in
- Current Checkouts section updates:
- All devices removed (now empty)
- User Summary panel updates:
- No active checkouts displayed
Result: All devices returned and documented, student's record is clear.
Scenario 5: Reviewing Repeat Offender
A student has multiple incidents and staff want to review before issuing another device:
- Open student's user profile
- Review User Summary panel:
- YTD Incidents: 4
- YTD Checkouts: 3
- Review Current Incidents section:
- Incident #2001: Damage (cracked screen), Status: Resolved, billed
- Incident #2103: Loss, Status: Under Review
- Review Current Checkouts section:
- Empty (no current device due to loss investigation)
- Decision: Don't issue new device until loss incident is resolved
- Add note documenting decision
- Contact guardian via Guardians section email
Result: Informed decision based on incident pattern, documented reasoning.
Understanding Quick Actions
The User Information tab provides several action buttons for common workflows:
Checkout Device
What it does: Opens the device checkout workflow to assign a device to this user.
Requirements:
- User must be Active
- User typically needs AUP signed and fees paid (depending on district policy)
- You need Checkout Device permission
When to use:
- Issuing a device to a user for the first time
- Providing a replacement device
- Assigning a loaner during repairs
Workflow:
- Click Checkout Device
- Scan device barcode or search for device
- Confirm device details
- Mark as loaner if temporary
- Complete checkout
- Device appears in Current Checkouts section
Add Incident
What it does: Creates a new incident report associated with this user.
Requirements:
- You need Create Incidents permission
When to use:
- User reports damage to their device
- Device is lost or stolen
- Device needs repair
Workflow:
- Click Add Incident
- Select incident type (Damage, Loss, Theft, etc.)
- Select which device (if they have multiple checked out)
- Add description and photos
- Set status
- Save incident
- Incident appears in Current Incidents section
Edit User
What it does: Opens the Edit User form to modify user information.
Requirements:
- You need Edit Users permission
When to use:
- Correcting misspelled names
- Updating grade or building
- Changing contact information
- Marking user inactive
- Updating custom fields
Workflow:
- Click Edit User
- Modify fields as needed
- Save changes
- User Information tab updates with new data
- Changes logged in Activity Log tab
Print Snapshot
What it does: Generates a printable PDF summary of the user's current status.
What's included:
- User information
- Current checkouts
- Current incidents
- Compliance status
When to use:
- Creating paper records
- Providing parent with status summary
- Documenting student records
- Building-level reporting
AUP and Fee Compliance
The User Summary panel displays two critical compliance indicators:
AUP Signed (Acceptable Use Policy)
What it means:
- Whether the user (or their guardian) has signed the district's Acceptable Use Policy
- Typically required before devices can be checked out
Status indicators:
- ✓ Yes (with date) - AUP signed, eligible for device checkout
- ✗ No - AUP not signed, may be ineligible for device checkout
How it's updated:
- User/guardian signs through student portal
- Administrator manually marks as signed
- Bulk import from SIS (if tracked there)
Why it matters:
- Legal/policy requirement before issuing devices
- Ensures users understand acceptable device usage
- Required for liability protection
Fee Paid (Technology Fee)
What it means:
- Whether the user has paid any required technology fees
- May include annual device fees, insurance premiums, etc.
Status indicators:
- ✓ Yes - Fees paid, eligible for device checkout
- ✗ No - Fees unpaid, may be ineligible for device checkout
How it's updated:
- Payment recorded in billing system
- Administrator manually marks as paid
- Bulk import from financial system
Why it matters:
- Financial accountability
- May determine device eligibility
- Tracks fee collection status
Most districts configure device checkout workflows to require both AUP signed AND fee paid before allowing device assignment. Check with your administrator for your district's specific policies.
Year-to-Date Metrics
The User Summary panel shows two key metrics for the current school year:
YTD Incidents
- Count of all incidents (damage, loss, theft, etc.) created this school year
- Includes both current (active) and historical (resolved) incidents
- Useful for identifying patterns or repeat issues
- Helps determine if additional training or intervention is needed
YTD Checkouts
- Count of all device checkouts this school year
- Includes both current checkouts and historical returned devices
- High numbers may indicate multiple device replacements
- Useful for understanding device turnover patterns
Use cases:
- Student with 5 YTD Incidents → May need device handling training
- Student with 7 YTD Checkouts → May indicate repeated damage/replacement cycle
- Staff with 0 YTD Checkouts but requesting device → Verify if this is their first
Restricted Plans (If Enabled)
Some districts use "Restricted Plans" to limit user capabilities due to policy violations, billing status, or other administrative reasons.
What restricted plans do:
- Limit device checkout privileges
- Restrict access to certain device types
- Block portal access
- Enforce payment plans before device issuance
If displayed on this tab:
- Plan Name - Shows which restricted plan applies
- Reason - Why the restriction was applied
- Expiration - When restriction lifts (if applicable)
- Modify button - Update or remove restriction (requires the View/Edit User Restricted permission — see Manage Roles)
Common uses:
- Student has unpaid damage invoice → Restricted until payment
- Repeated policy violations → Restricted to basic device only
- Payment plan → Restricted until installments complete
Where the warning appears:
When a user has an active Restricted Plan, the red Technology Restriction banner surfaces in every flow where an admin is about to issue or has just returned a device for that user, so the warning is hard to miss:
- The user's profile (this page)
- Rapid Check-Out (during the checkout step, alongside the user information panel)
- Rapid Check-In (after a successful check-in, as awareness for the next interaction)
- Device Profile → Check-Out to User (above the checkout form once a user is selected)
The banner is informational — it does not block actions — but ensures staff acknowledge the restriction before issuing devices. Whether checkouts should actually be refused for restricted users is a district policy decision; the warning gives staff the context to enforce it.
What admins see depends on permission:
- Admins with the View/Edit User Restricted permission see the full banner, including the plan content (the reason, instructions, or notes the restriction was created with), and can expand or collapse the banner to read the details.
- Admins without the permission still see the warning header so they know the user is restricted, along with which admin originally applied the restriction and who last updated it — but the plan content itself is hidden.
This way, front-desk and check-out staff can be informed about restrictions without needing access to the underlying plan details, which often contain sensitive disciplinary or financial information.
Restricted Plans are an optional feature that must be enabled and configured by your system administrator. If you don't see this section, the feature is not enabled for your district.
Tips for Using the User Information Tab
✅ Do:
- Review AUP/fee status BEFORE checking out devices
- Check Current Checkouts section before issuing additional devices (avoid duplicates)
- Review Current Incidents section for patterns (repeated damage may need intervention)
- Use Quick Actions for common tasks (faster than navigating elsewhere)
- Verify guardian email before sending invoices or communications
- Add notes when making decisions based on incident history
- Print snapshots for documentation when needed
❌ Don't:
- Skip compliance checks (AUP/fee) before device checkout
- Assume Current Checkouts is empty (always verify visually)
- Ignore high YTD Incidents numbers (may indicate need for training or support)
- Forget to check in devices in Current Checkouts section when returned
- Make changes without Edit Users permission
- Share printed snapshots inappropriately (contain sensitive student data)
- Overlook Current Incidents when issuing replacement devices
Common Questions
Q: What's the difference between "Current Checkouts" here and the Checkout History tab?
- Current Checkouts (this tab) - Devices checked out RIGHT NOW that haven't been returned
- Checkout History tab - Complete history of ALL checkouts, including returned devices
Think of this tab as "what they have today" and the history tab as "what they've ever had."
Q: Why don't I see any action buttons? Action button visibility depends on your permissions:
- Checkout Device - Requires Checkout Device permission
- Add Incident - Requires Create Incidents permission
- Edit User - Requires Edit Users permission
If you don't see a button, you don't have the corresponding permission.
Q: Can I check out a device if AUP is not signed? This depends on your district's configuration. Most districts require AUP signed before allowing checkouts, but some may allow it with a warning. Check with your system administrator for your specific policy.
Q: What does "Is Loaner" mean in Current Checkouts? A loaner is a temporary device issued while a user's assigned device is being repaired or replaced. Loaners are expected to be returned when the assigned device is ready. Non-loaners are typically permanent assignments for the school year.
Q: Why is the Current Incidents section empty when I know they had incidents? This section only shows active (unresolved) incidents. Once an incident is marked as Resolved or Closed, it moves to the Incident History tab. This keeps the User Information tab focused on current, actionable issues.
Q: Can I check in a device directly from this tab? Yes! In the Current Checkouts section, click the Check In button next to the device. You don't need to navigate to the device profile or a separate check-in page.
Q: What if a user has multiple guardians? The Guardians section can display multiple guardian contacts. Typically there's a primary guardian and optionally secondary guardians. All configured guardians will be listed with their contact information.
Q: Why don't I see the Guardians section? The Guardians section only appears for Student user types. Staff users won't have a Guardians section since they're not typically associated with parent/guardian contacts.
Q: How do I update guardian information? Click the Edit User button, then update the guardian fields in the Edit User form. Alternatively, guardian information may sync automatically from your SIS if automated sync is configured.
Q: What happens if I click "Print Snapshot"? A PDF is generated containing the current state of the user:
- User information
- Current checkouts
- Current incidents
- Compliance status (AUP/fees)
This is useful for paper documentation, parent conferences, or record-keeping.
Q: Can I add an incident for a device the user doesn't have checked out? Generally no - the Add Incident button next to devices in Current Checkouts only allows creating incidents for those specific checked-out devices. However, if you use the main Add Incident button (in Quick Actions), you may be able to report incidents for devices previously returned or for general incidents not tied to a specific device checkout.
Q: What does YTD mean and when does it reset? YTD = "Year to Date" - metrics for the current school year. These typically reset at the start of each school year (whenever your district defines that start date, often July or August).
Q: Why does a user show as "Active" but I can't check out a device to them? Active status means they're currently enrolled/employed, but device checkout may be blocked by:
- AUP not signed
- Technology fee not paid
- Restricted plan applied
- Building access (you may not have permission to check out devices to their building)
- Checkout limits reached
Check the User Summary panel for compliance indicators and any restricted plan notices.
The User Information tab is your operational hub for individual user interactions. Most day-to-day tasks - verifying compliance, checking out devices, reviewing current issues, and accessing guardian information - happen right here without needing to navigate to other tabs.